Recipe Overview
Why you’ll love it: Whether you serve the chicken breasts for dinner tonight or cut them up to use later, knowing how to make roasted bone in chicken breasts is an essential tool in your cooking tool box.
How long it takes: just over an hour
Equipment you’ll need: shallow baking pan
Servings: 4
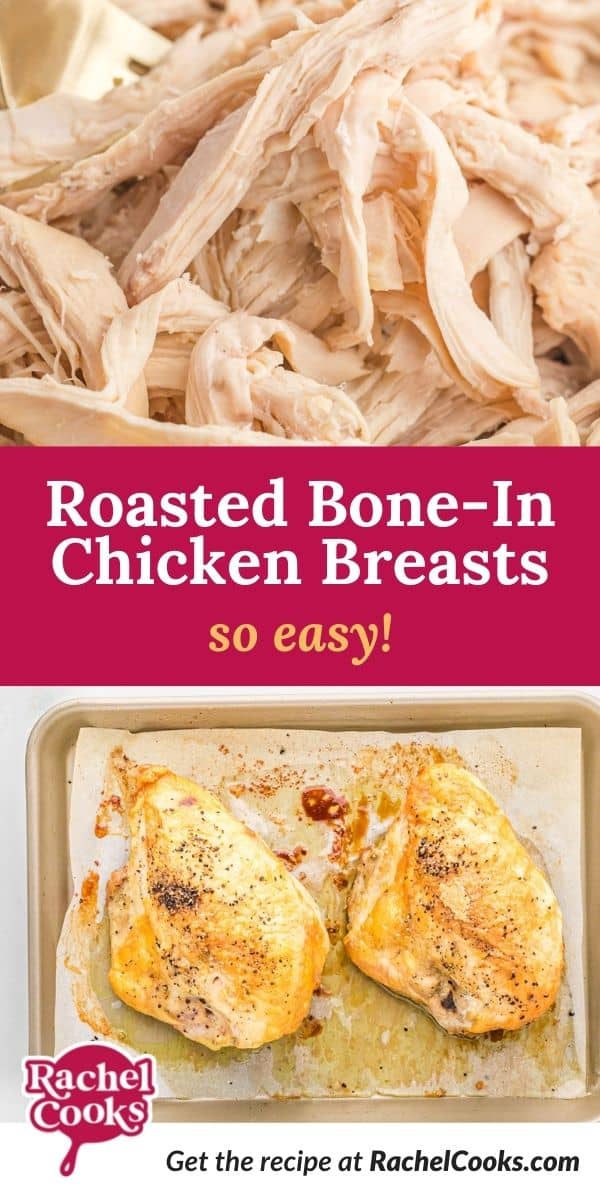
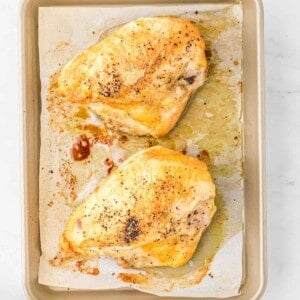
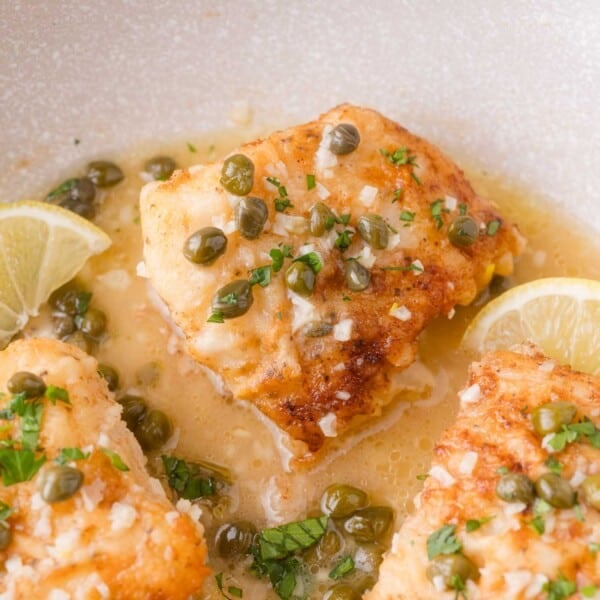
With crispy skin and tender juicy meat, roasted bone in chicken breasts are really delicious. It’s an easy dinner when you serve the chicken with baked potatoes (bake them at the same time as the chicken!) and a simple green salad with homemade vinaigrette.
I love making a whole roasted chicken in my oven or a whole chicken in the crockpot from time to time. It smells so good and it’s such comfort food BUT it takes awhile. Those recipes are a little bit of a project, something I generally save for the weekends. Baked chicken breasts are juicy and delicious, and way, way faster. (Poaching chicken is a great method too!)
Roast Chicken Breasts
Flavorful. When you roast the chicken on the bone with the skin on, the meat is more flavorful and juicy. It’s much tastier than boneless skinless chicken breasts (although my baked chicken breast recipe turns out really well if you happen to have boneless chicken in the fridge).
Budget-friendly. Bone-in chicken breasts (AKA split chicken breasts) are often cheaper than boneless skinless chicken breasts, especially if you buy a family pack.
Meal prep. Go ahead and buy that big ol’ family pack. You can bake them all at the same time and then you’ll be so happy you did. The delicious roasted chicken can be called upon to provide fast, healthy, economical, and scrumptious dinners (keep reading for lots of recipes that use already cooked chicken).
I came across your recipe and decided to use it instead of buying a rotisserie chicken for pot pies. I used 3 large breasts and they turned out perfectly done and juicy.
Ingredient Notes
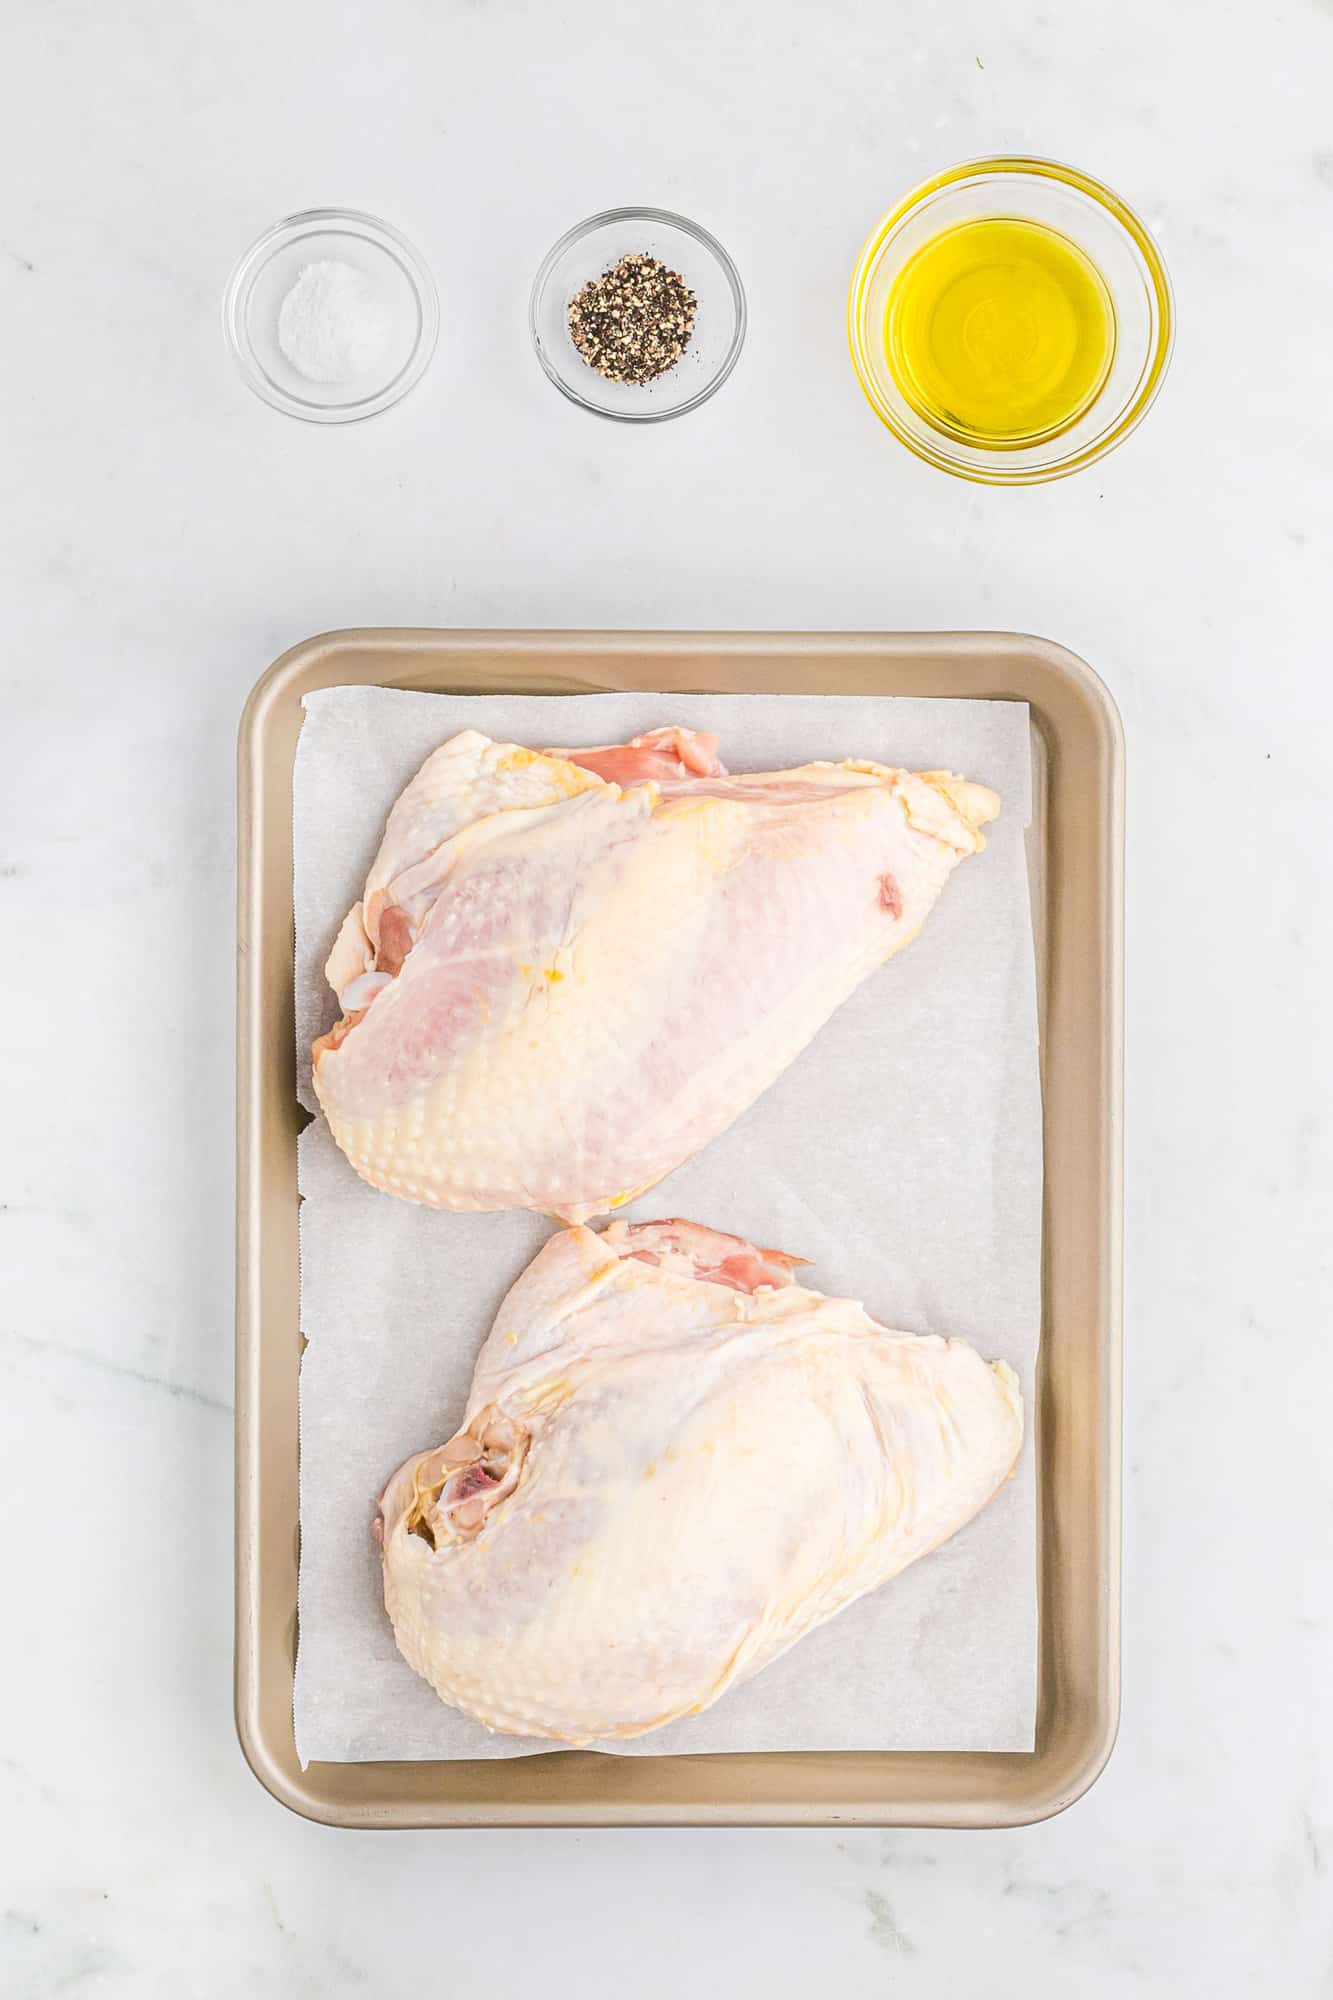
- Split Chicken Breasts: Look for chicken breasts that are “split”, that is, cut along the breastbone to make two halves. They are usually sold bone-in and skin-on. It’s best if each of them are approximately the same size so they get done at the same time. (If you prefer to roast a whole chicken, try my spatchcock chicken.)
- Olive Oil: You’ll just need a smidge to rub over the breasts. It will help the skin to crisp up but not get dry.
- Salt & Pepper: Simple seasonings make these chicken breasts really versatile so you can use them in all sorts of recipes, from Italian to Mexican. If you want to eat them as is for a main course, feel free to add more seasoning. Try my all-purpose seasoning blend. It’s very versatile and will add a punch of flavor. A teaspoon of herbes de Provence really glamorizes the chicken, too.
How To Roast Chicken Breasts
Here are the EASY steps to roasting chicken breasts. Scroll down for the complete recipe.
Prep chicken. Remove any excess fat. Some is fine but if there are huge chunks of it, use a sharp kitchen shears to trim it off. If the chicken is wet, pat dry with paper towels.
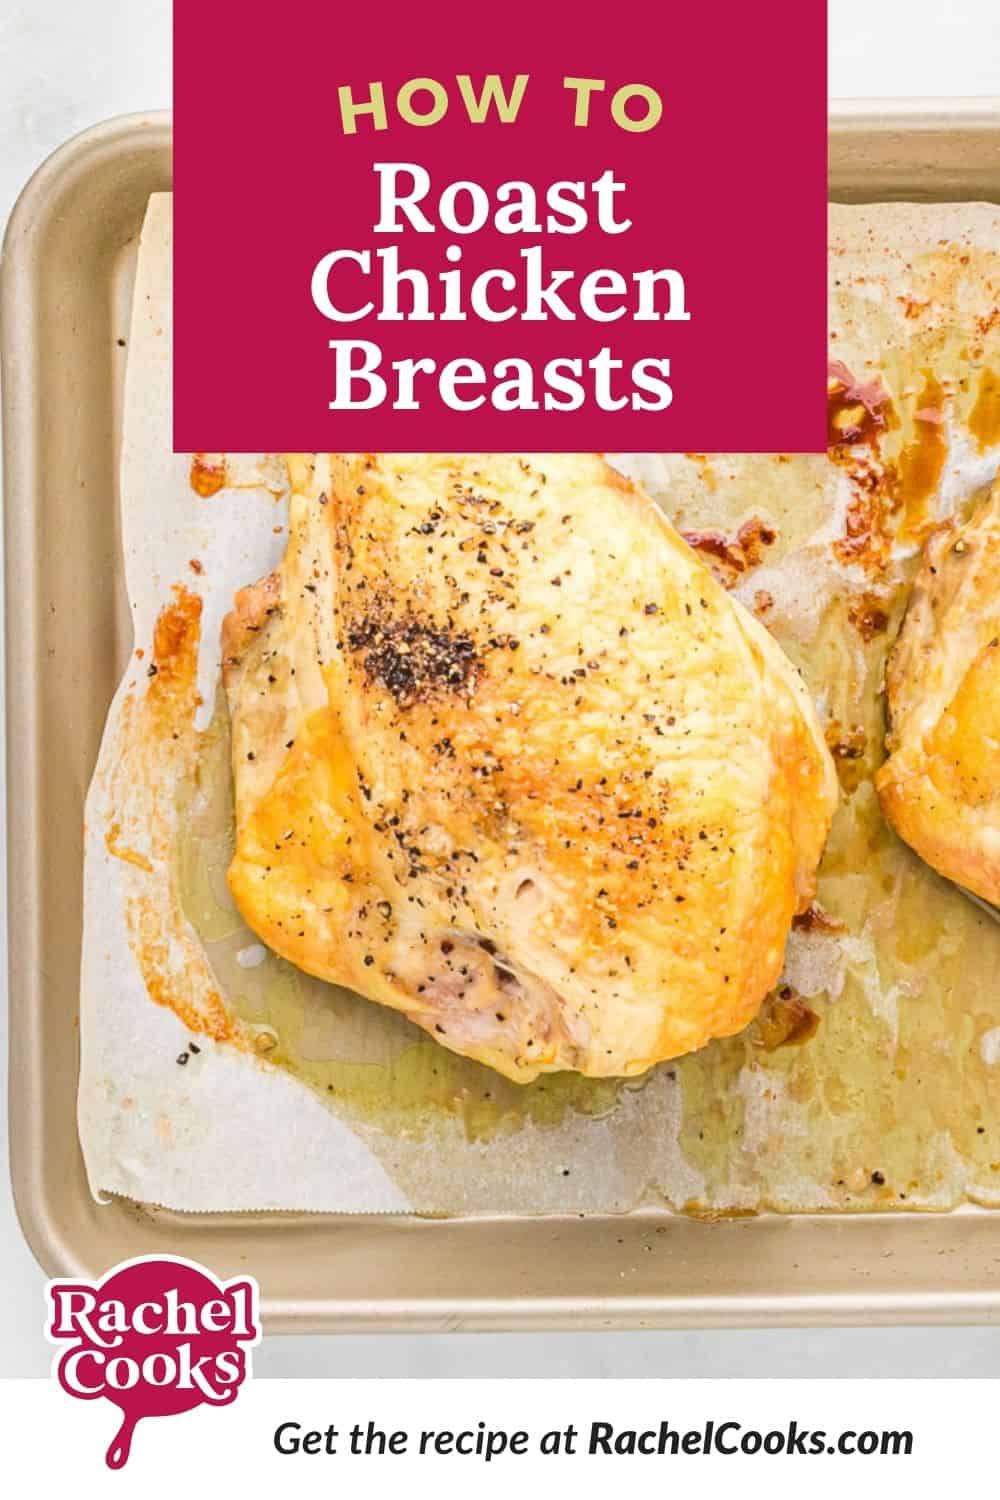
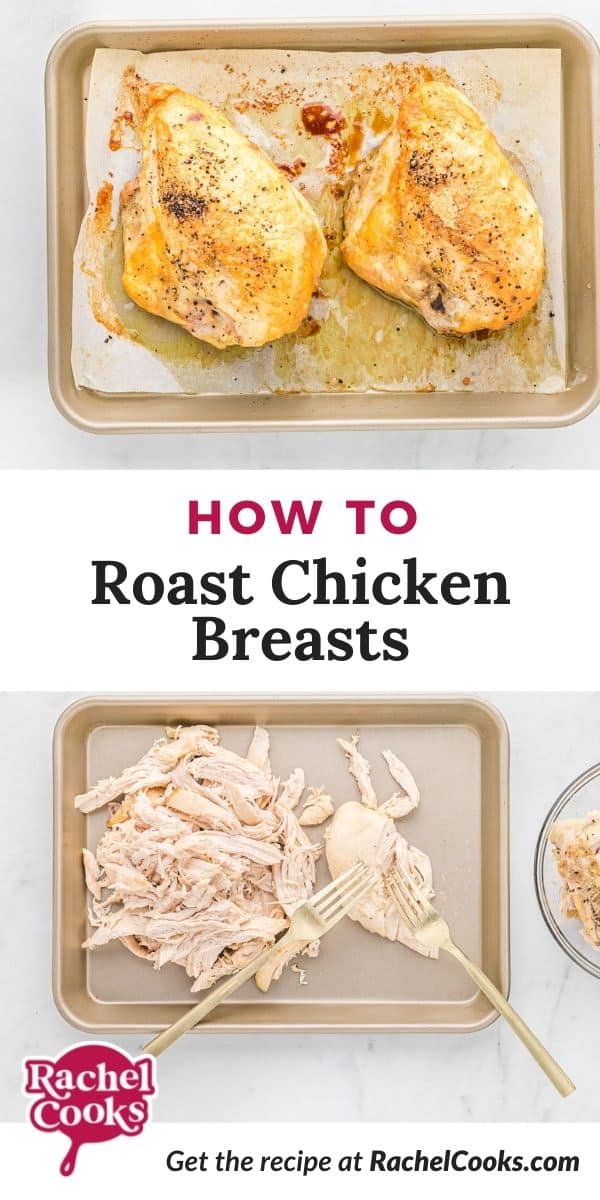
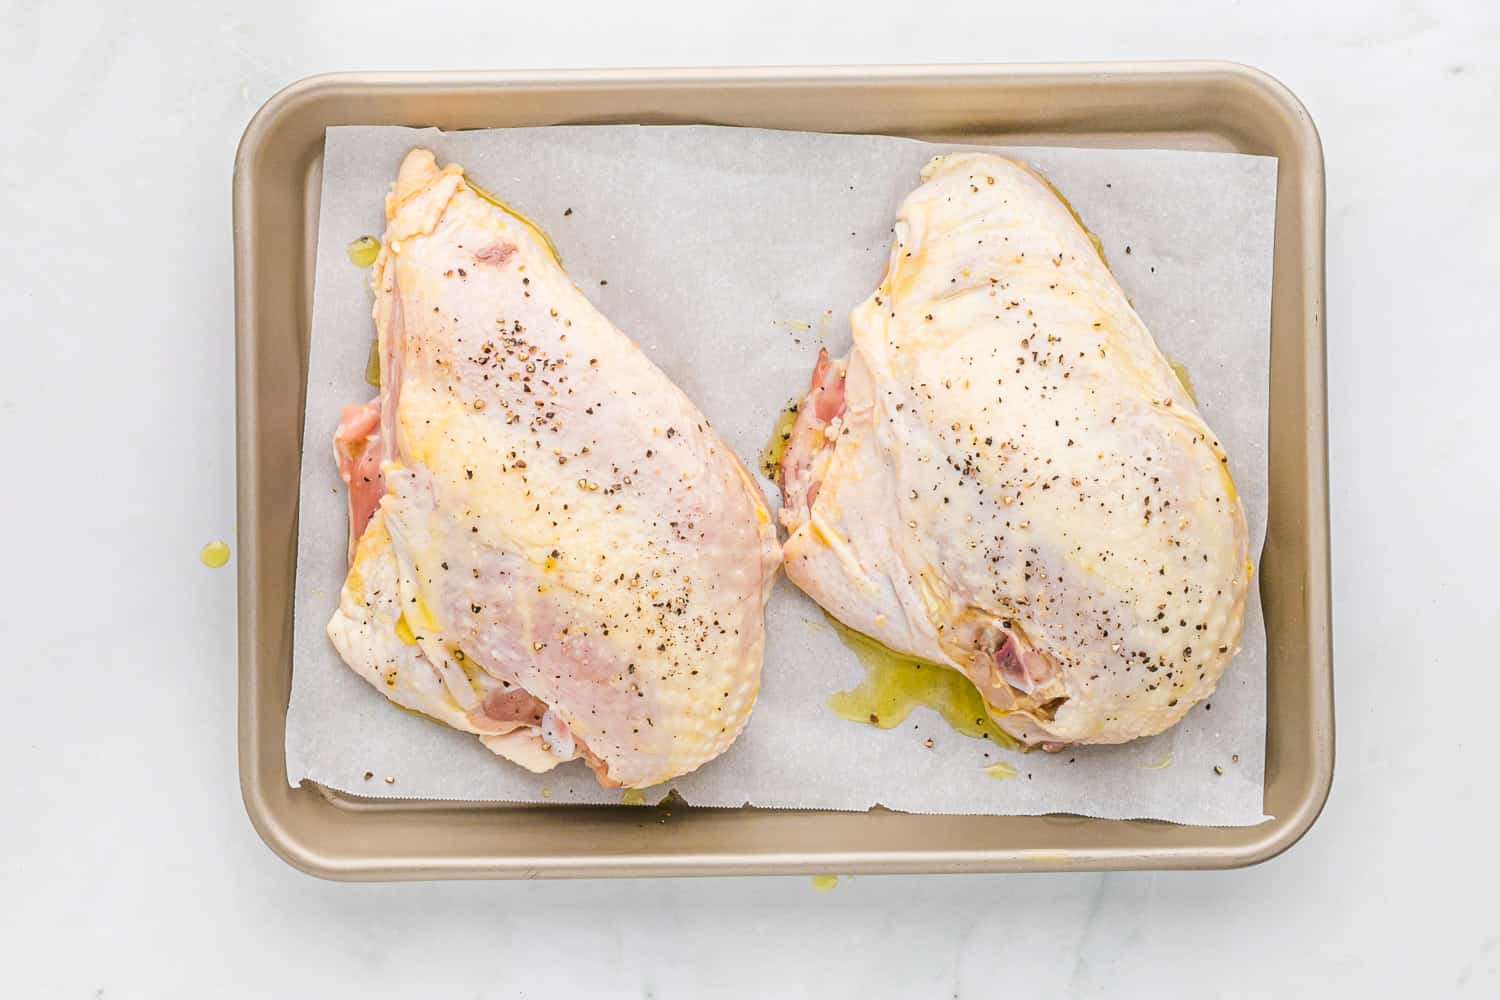
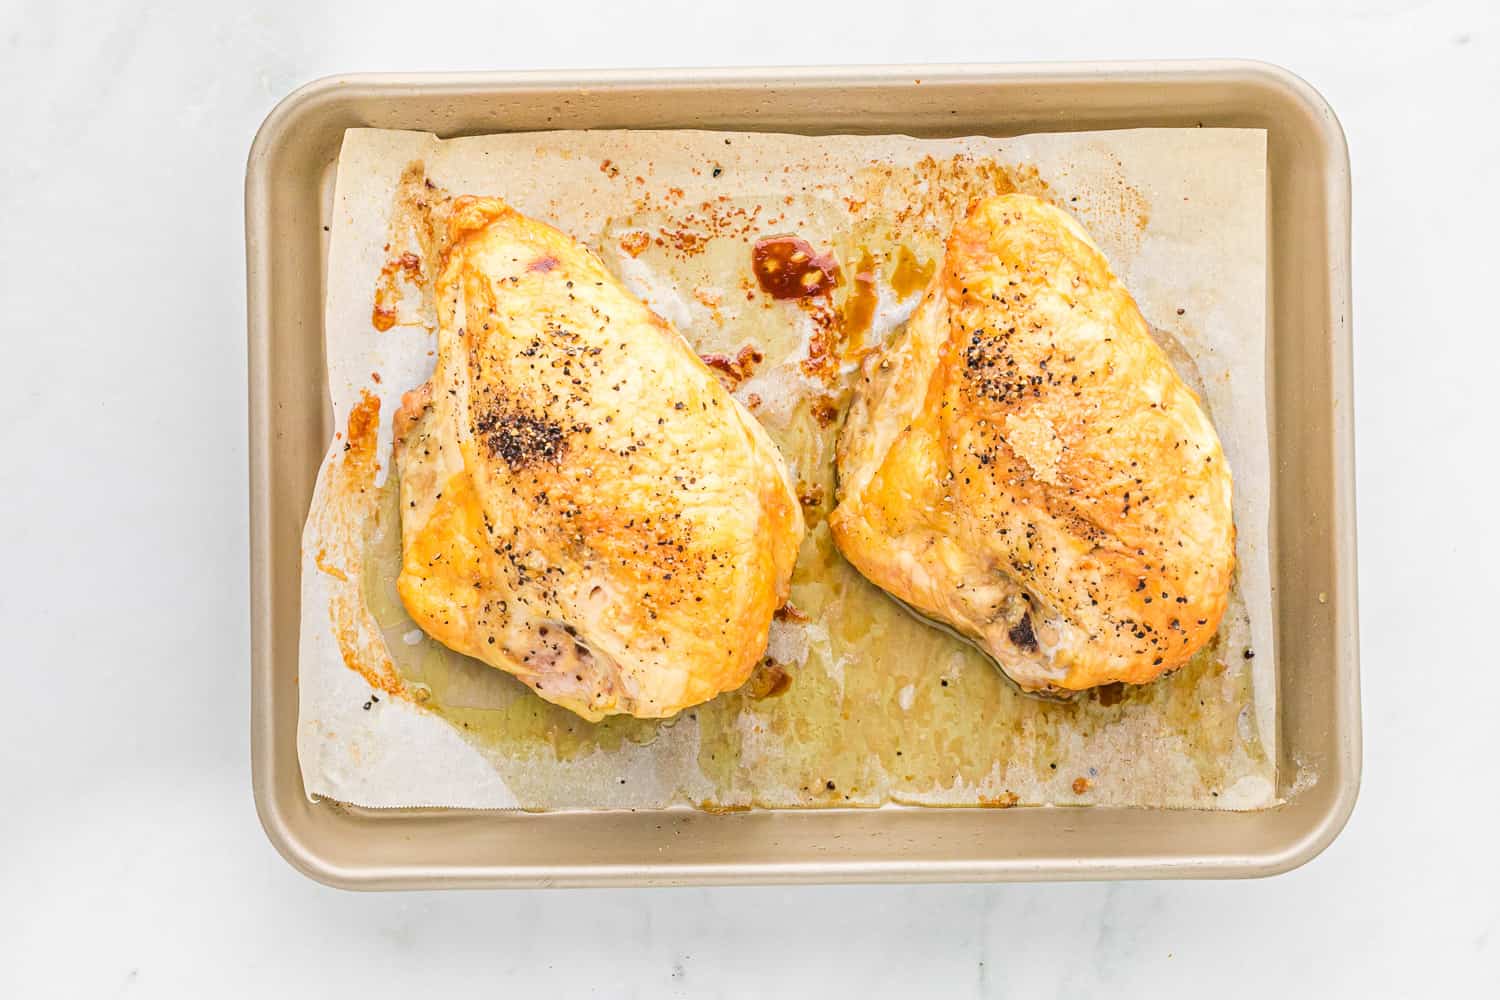
Line a baking pan with foil or parchment paper. That’s not essential but it does make clean up a lot easier. Put the chicken breasts on the prepared pan and drizzle with olive oil. Rub the oil evenly onto the chicken breast.
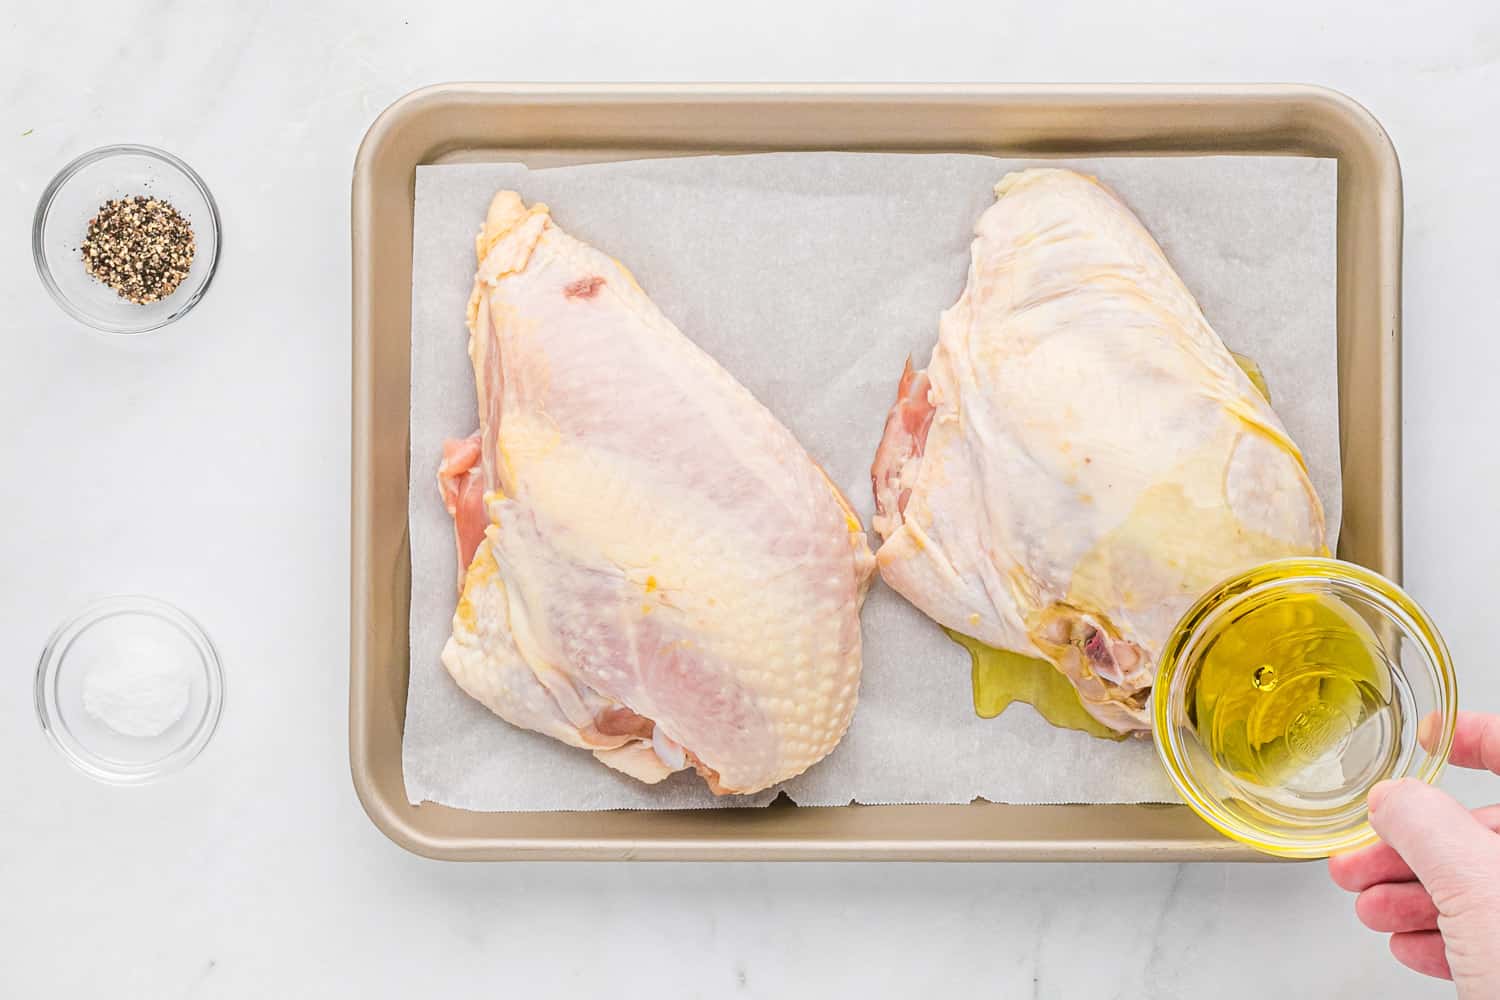
Sprinkle with freshly ground pepper and salt.
Bake. Roast the chicken until it’s cooked through. I always use my instant read thermometer to check.Keep in mind that bone-in chicken takes a bit longer to cook than boneless chicken.
Cooking Tip
Worried that your roasted chicken breasts will turn out too dry? When roasted correctly, chicken breast with the bone in will be juicier and more flavorful than boneless, especially if it’s skin-on.
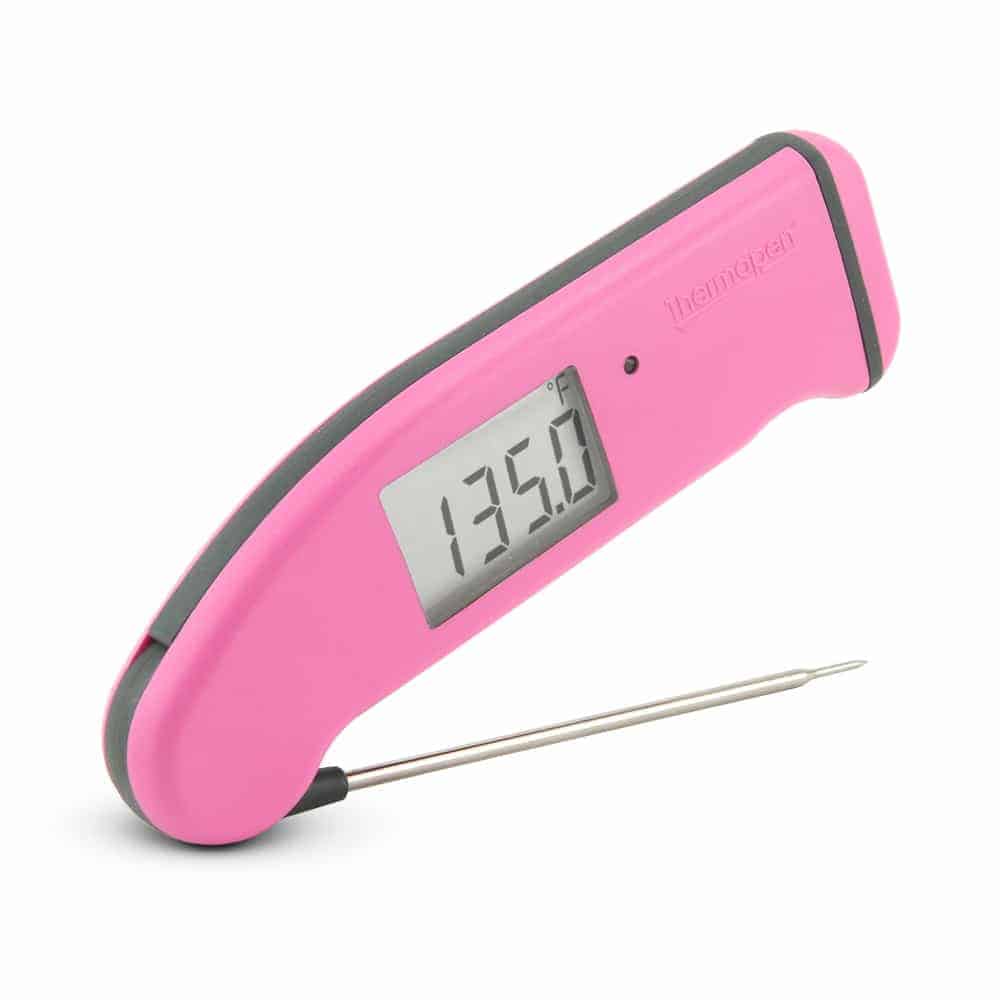
Relying on the appearance of the chicken can be misleading. To keep chicken breasts from drying out, pay attention to the internal temperature. An instant read thermometer will tell you when the inside of the chicken is perfectly done. Look for an internal temperature of 165ºF.
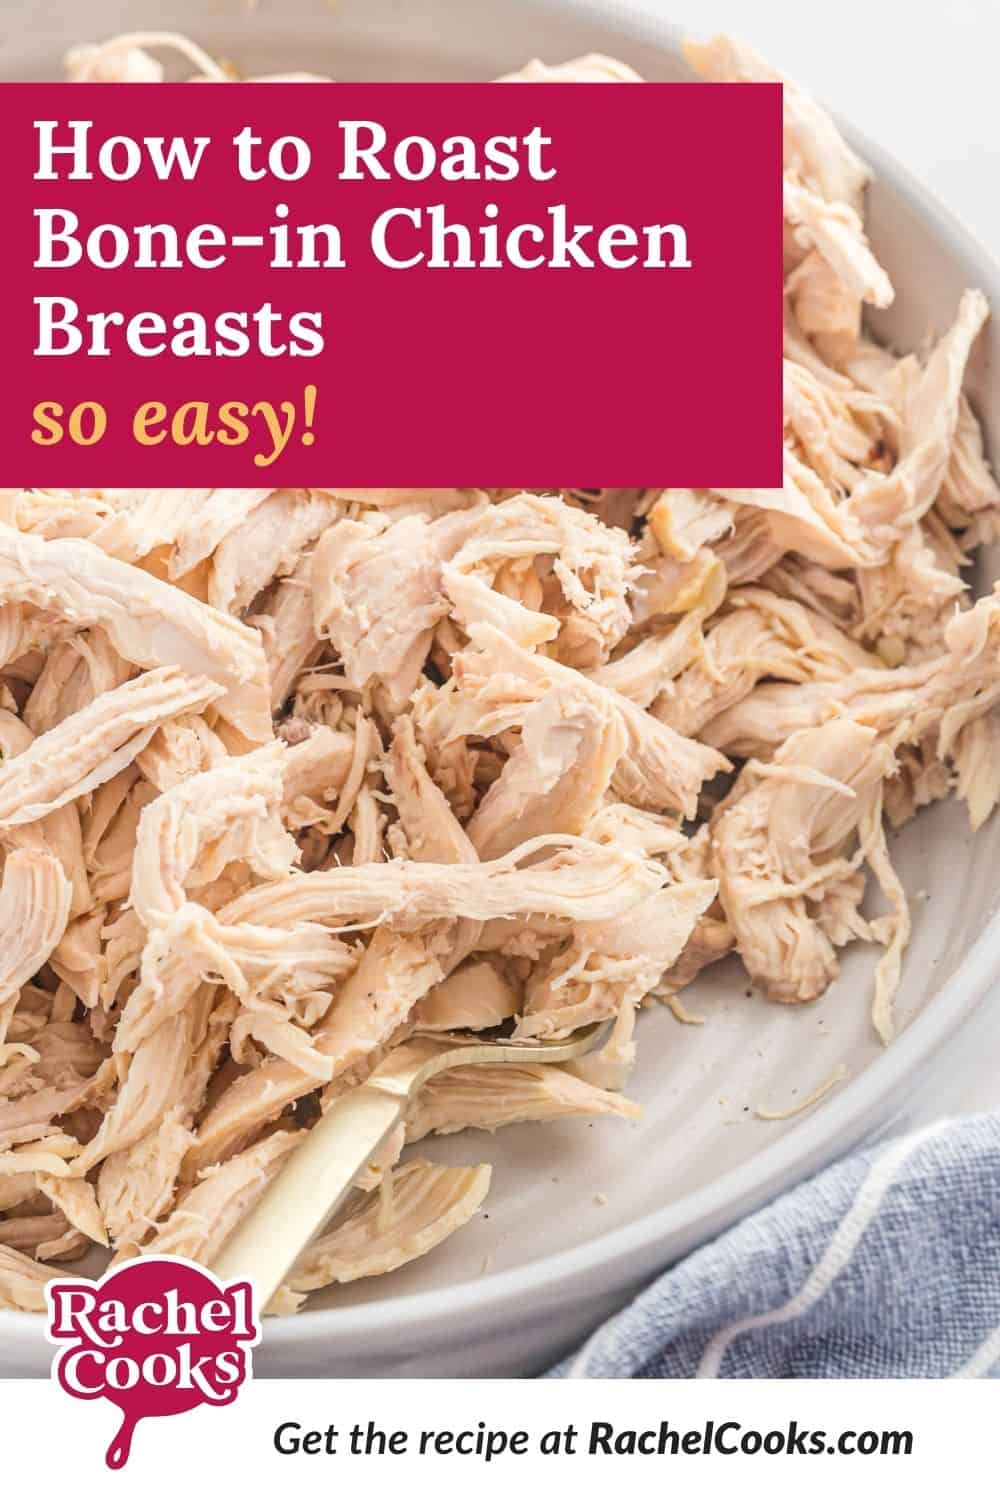
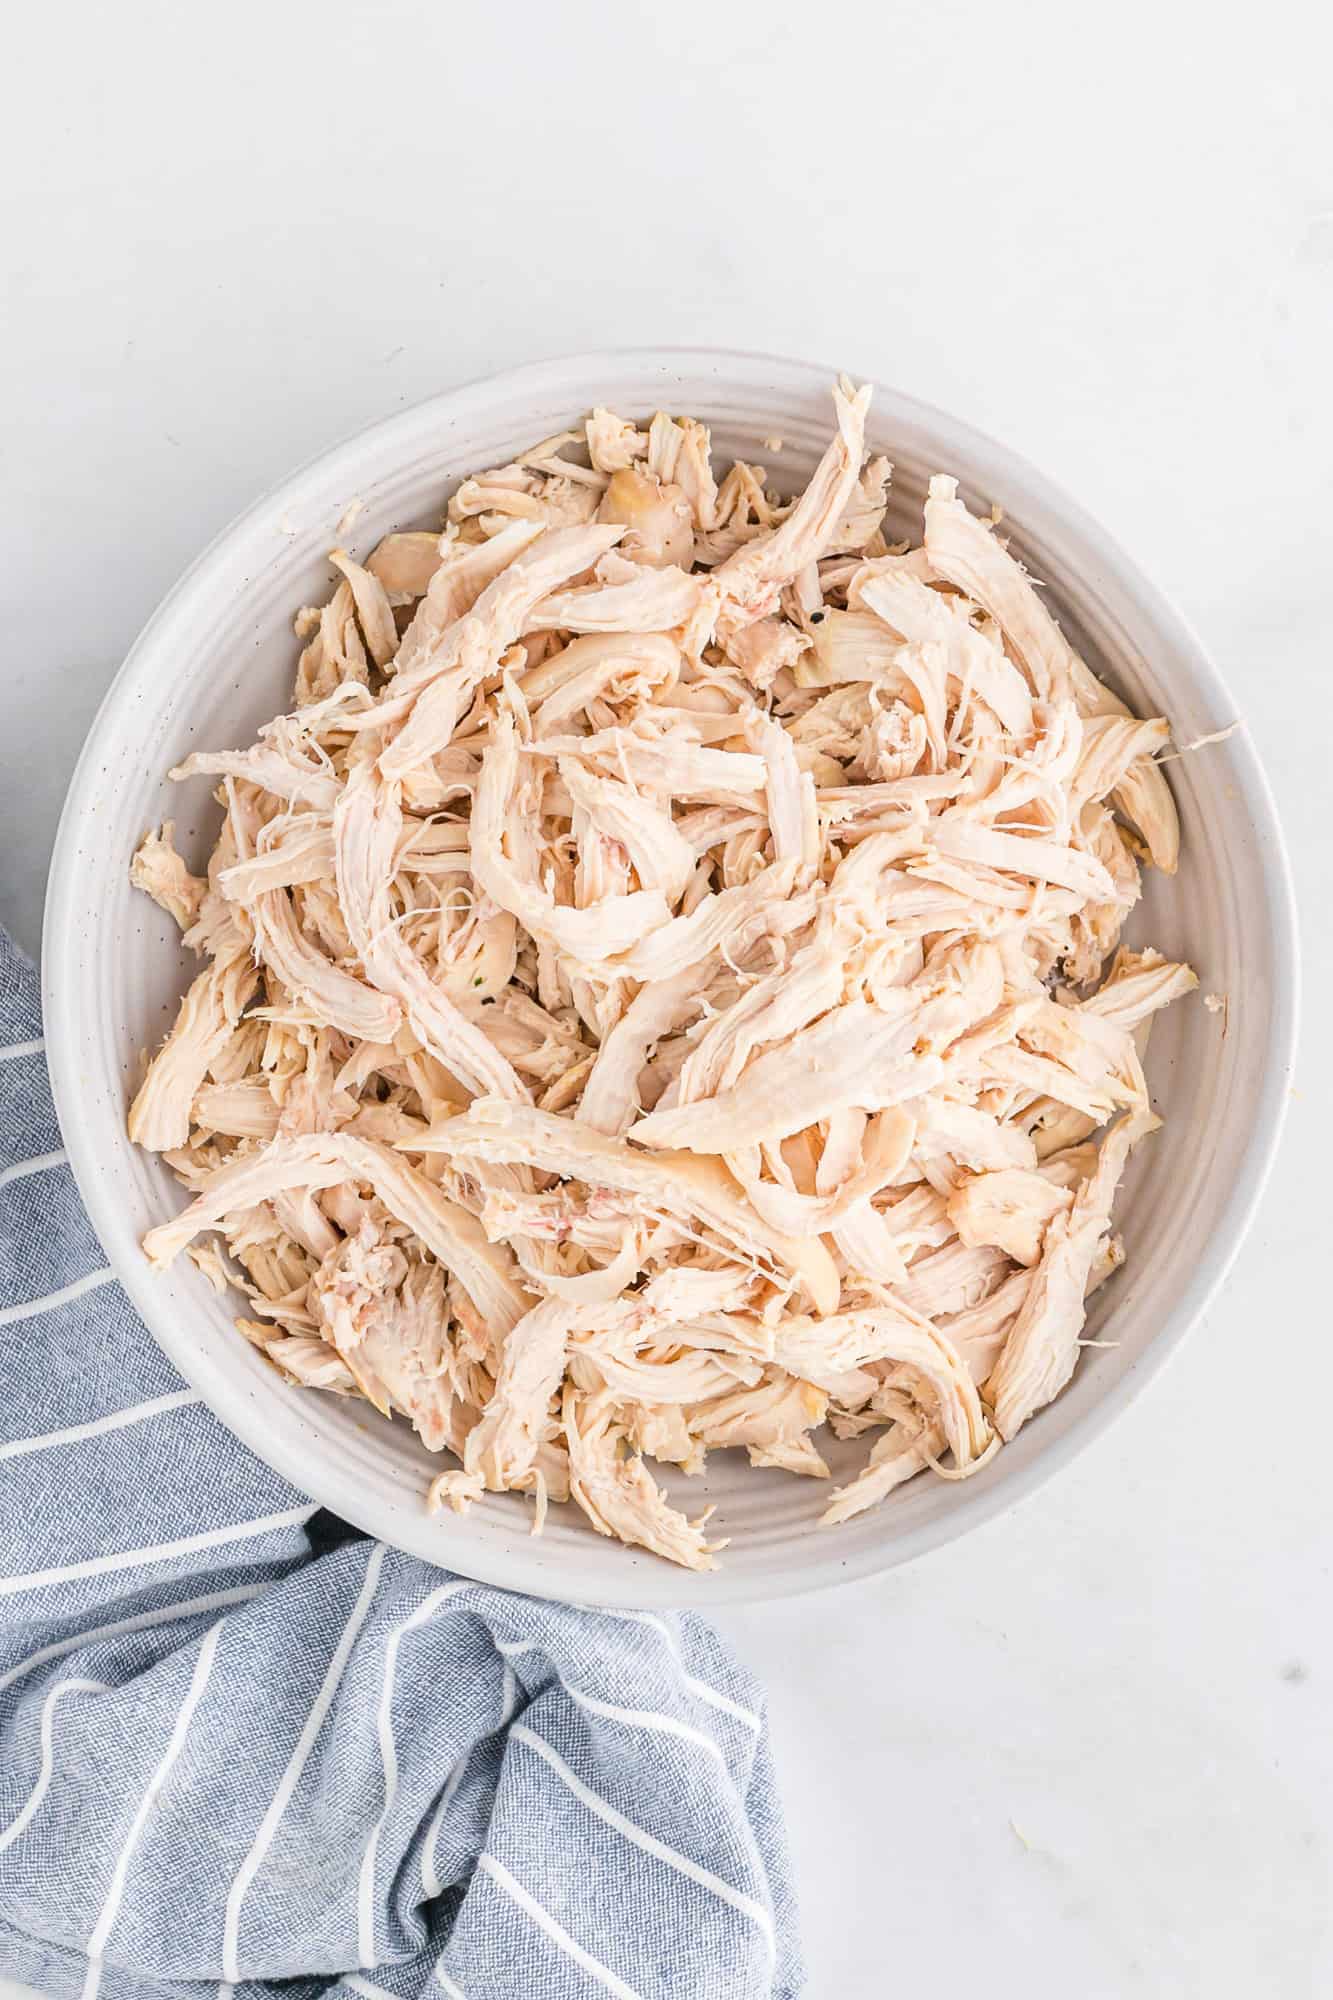
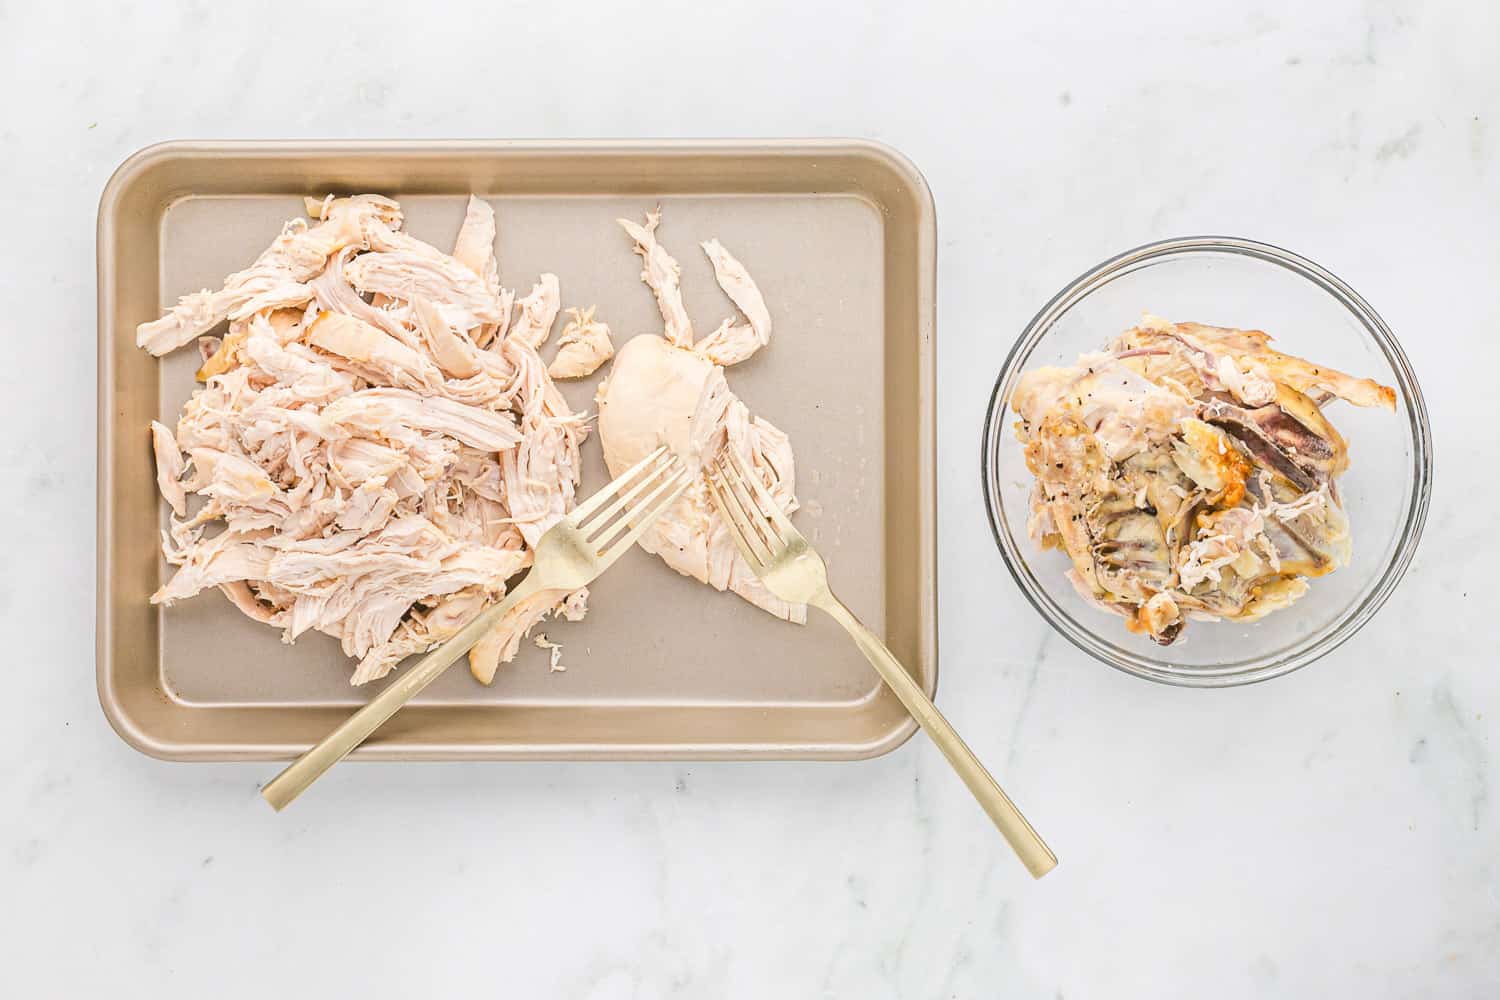
Serve. You can serve roasted chicken immediately, or cool it and shred the meat for later use.
Instant-Read Meat Thermometers
I use my Thermapen to check the chicken’s internal temperature. It has saved us from eating many dried up chicken breasts. If you don’t have a good thermometer, invest in one. I use mine nearly every day!
Recipe Variations
- Season the chicken. I purposely made this recipe very basic so it could be used for a variety of meals. However, if you want, add seasoning of your choice to the oil before rubbing it into the raw chicken. Try Cajun seasoning or southwest spice blend.
- Bake the chicken at a different temperature. Don’t worry if you’re baking something in the oven with the chicken that may be a little fussier with temperature. The ideal temperature to roast bone-in chicken breasts is 400ºF. However, you can bake chicken in an oven that’s anywhere from 350ºF to 425ºF. Obviously, cooking time is affected. You’ll have to add time if you’re roasting it at 350ºF and subtract time at 425ºF. Again, an instant read thermometer is your friend.
- Like dark meat better? Try herb roasted chicken drumsticks & potatoes. They turn out great every time and are really easy to make. If you prefer turkey, try herb roasted turkey breast.
- Make chicken in your air fryer. Try boneless skinless air fryer chicken breasts which are tender and juicy, or if you prefer dark meat, air fryer chicken drumsticks or air fryer chicken thighs.
- Make chicken in your Instant Pot. Instant Pot shredded chicken is one of my go-to recipes. It can be shredded or diced, ready to use in so many ways. If you prefer dark meat, try Instant Pot chicken thighs (bone-in, skin-on or boneless skinless).
How To Use Roasted Chicken Breasts
- Chicken à la King
- Avocado Chicken Salad – creamy and healthy!
- Southwestern BBQ Chicken Salad (best chopped salad!)
- Healthy Curried Chicken Salad – so easy to make!
- Healthy Chicken Salad with walnuts and grapes
- Southwest Chicken Salad
- Creamy Chicken Rice Soup
- Chicken Fajita Stuffed Spaghetti Squash
- Cauliflower Nachos
- BBQ Chicken Pizza
- For a super easy meal, add cooked chicken to a can of vegetable soup or a box of mac and cheese (of course you could always add them to homemade vegetable soup or homemade mac and cheese, too). It doesn’t get much easier than that.
Try this method for cooking chicken breasts and I guarantee this will become a meal prep staple. Let the chicken cool down enough so you can handle it. Remove the skin, and debone the chicken. The meat can be left in large pieces, cut into small chunks, or shredded. Store it in the refrigerator or freezer in labeled freezer-safe containers.
Refrigerate/Freeze: Cooked chicken will keep for up to four days in the refrigerator or up to four months in the freezer. If frozen, thaw overnight in the refrigerator before using.
Reheat: Gently warm individual portions in the microwave or use in one of the recipes above.

Free Meal Plans
Interested in a weekly meal plan that includes this recipe? Take a look at my Meal Plan #8 or Meal Plan #37. You’ll find a wholesome recipe for each weekday plus a categorized grocery list. Let me do the planning for you this week!
More Chicken Recipes


Roasted Bone In Chicken Breasts
Ingredients
- 2 large split chicken breasts, bone-in and skin-on, about 1 pound each
- 2 teaspoons extra virgin oil
- ½ teaspoon kosher salt
- ¼ teaspoon coarse ground black pepper
Instructions
- Preheat oven to 400℉ (see note).
- If desired, line a baking sheet with foil for easy clean up. Rub chicken breasts with olive oil and sprinkle salt and pepper evenly over them.2 large split chicken breasts, bone-in and skin-on, about 1 pound each, 2 teaspoons extra virgin oil, ½ teaspoon kosher salt, ¼ teaspoon coarse ground black pepper
- Bake for 45 to 55 minutes or until internal temperature is 165℉ and juices run clear. Roasting time will depend on the size of the chicken breasts.
- Let chicken rest 15 minutes before serving.
- For meal prep: If desired, remove skin, and debone chicken before shredding or dicing. Refrigerate or freeze for later use.
Notes
- Have something else in the oven? Chicken can be roasted at varying temperatures. It’s fine to roast the chicken at anywhere between 350℉ and 425℉. Adjust cooking time accordingly.
- Storage: Cooked chicken will keep for four days in the refrigerator or up to four months in the freezer. If frozen, thaw overnight in the refrigerator before using.
- Make extra. If desired, the recipe can easily be doubled or tripled. Just give each chicken breast a little rub of oil and a sprinkle of salt and pepper. If they are crowded in the pan, baking time may increase.
Video
Nutrition
Nutrition information is automatically calculated, so should only be used as an approximation.


there is button on top “skip to recipe” for people who dont want or need to do all the arm chair reading/endless scrolling.
Some of the details included in the narrative can be helpful or provide options.
Thank you for your support!
Hi Rachel, I came across your recipe and decided to use it instead of buying a rotisserie chicken for pot pies. I used 3 large breasts and they turned out perfectly done and juicy. I loved adding the juices back to the shredded meat.
Thank you for a great recipe.
P.S. I used my new Thermoworks Chefalarm which worked great!
So glad to hear it! Aren’t Thermoworks products the best?!
This is just about what my mom did for our family, with a few minor changes. She’d melt a mix of butter and olive oil in the bottom of a pan, season the tops of the chicken breasts with garlic salt and paprika, place them face-down in the pan, season the bottom, and bake for about 1/2 hour. Then she’d turn them before finishing the cooking (about 15-20 minutes). Delicious!
Sounds fantastic!
easy recipe but meat is tough, what can l do next time?
Hi JJ, Try checking it earlier to make sure it doesn’t overcook. Different size pieces of meat cook at different speeds so it could be yours overcooked slightly. Did you leave the skin on?
Stupid recipe with no actual directions
Hi, Me.
The directions are in the recipe card, were you unable to find them? I copied them below since you seem to be having difficulties….hope this helps! ;)
1. Preheat oven to 350 degrees Fahrenheit.
2. Line a baking sheet with foil for easy clean up. Rub chicken breasts with olive oil and sprinkle salt and pepper evenly over them.
Bake at 350 degrees for 55-65 minutes or until internal temperature is 165 degrees and juices run clear.
3. Let cool at least 15 minutes (or until you can handle them) before removing from bone and shredding or dicing.
You’re rude. It’s called common sense.
That’s a very rude word, stupid, and not fitting in this situation. I had a hard time finding the recipe as well but it was thanks to the annoying pop-ups which are NOT the fault of the author. I’m assuming at this point after reading your statement that you are 10 years old and probably should not be cooking.
Thanks for your support.