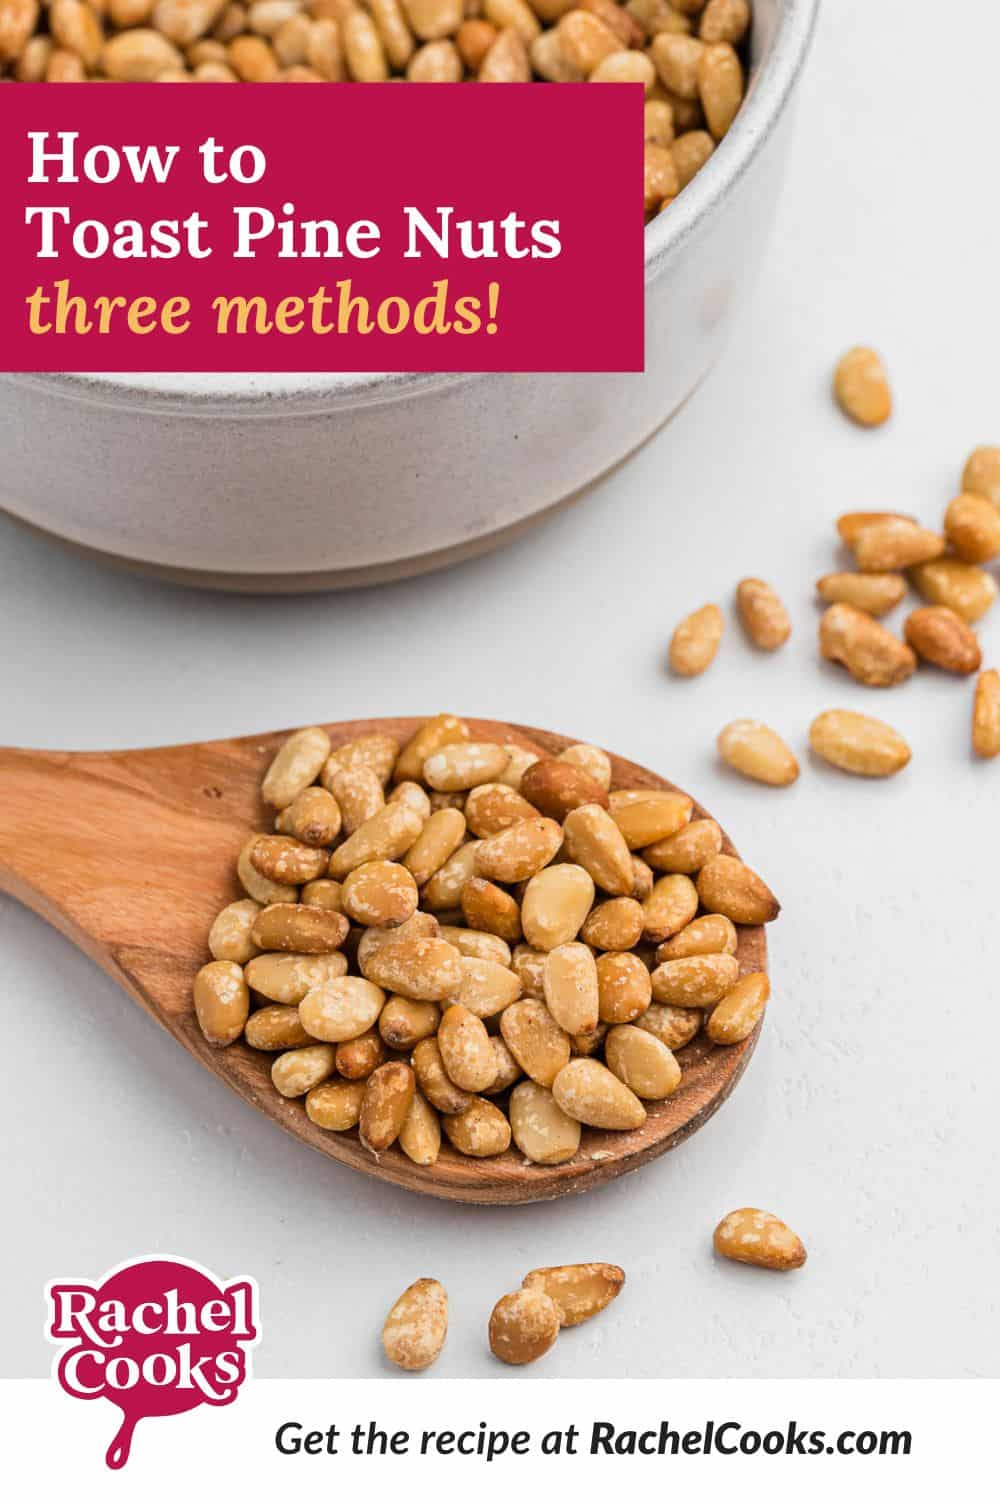
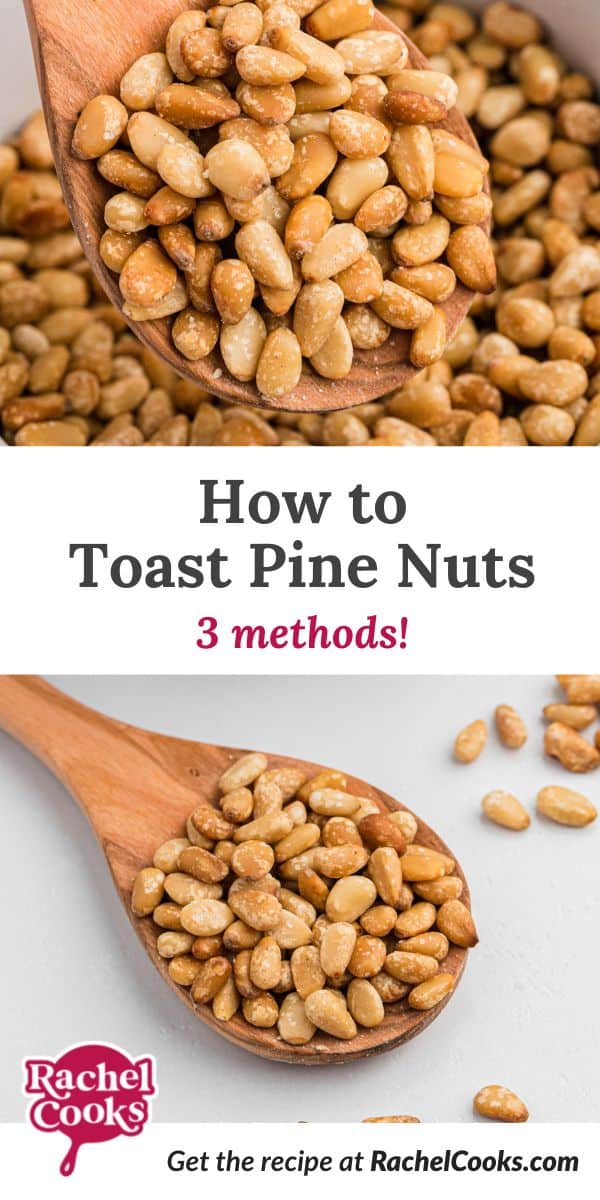
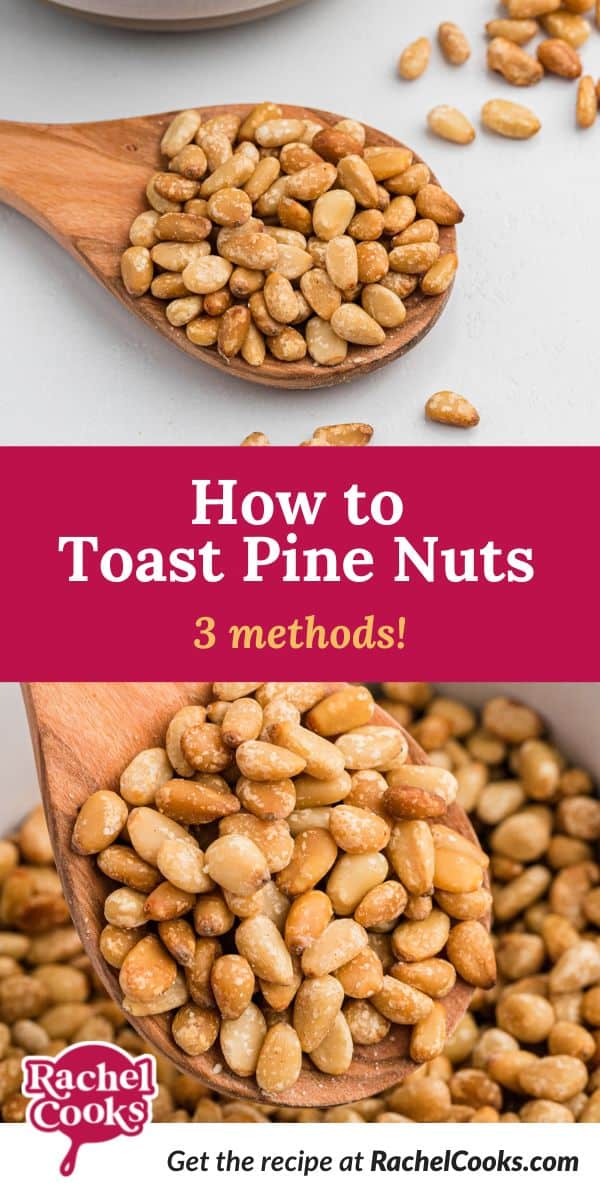
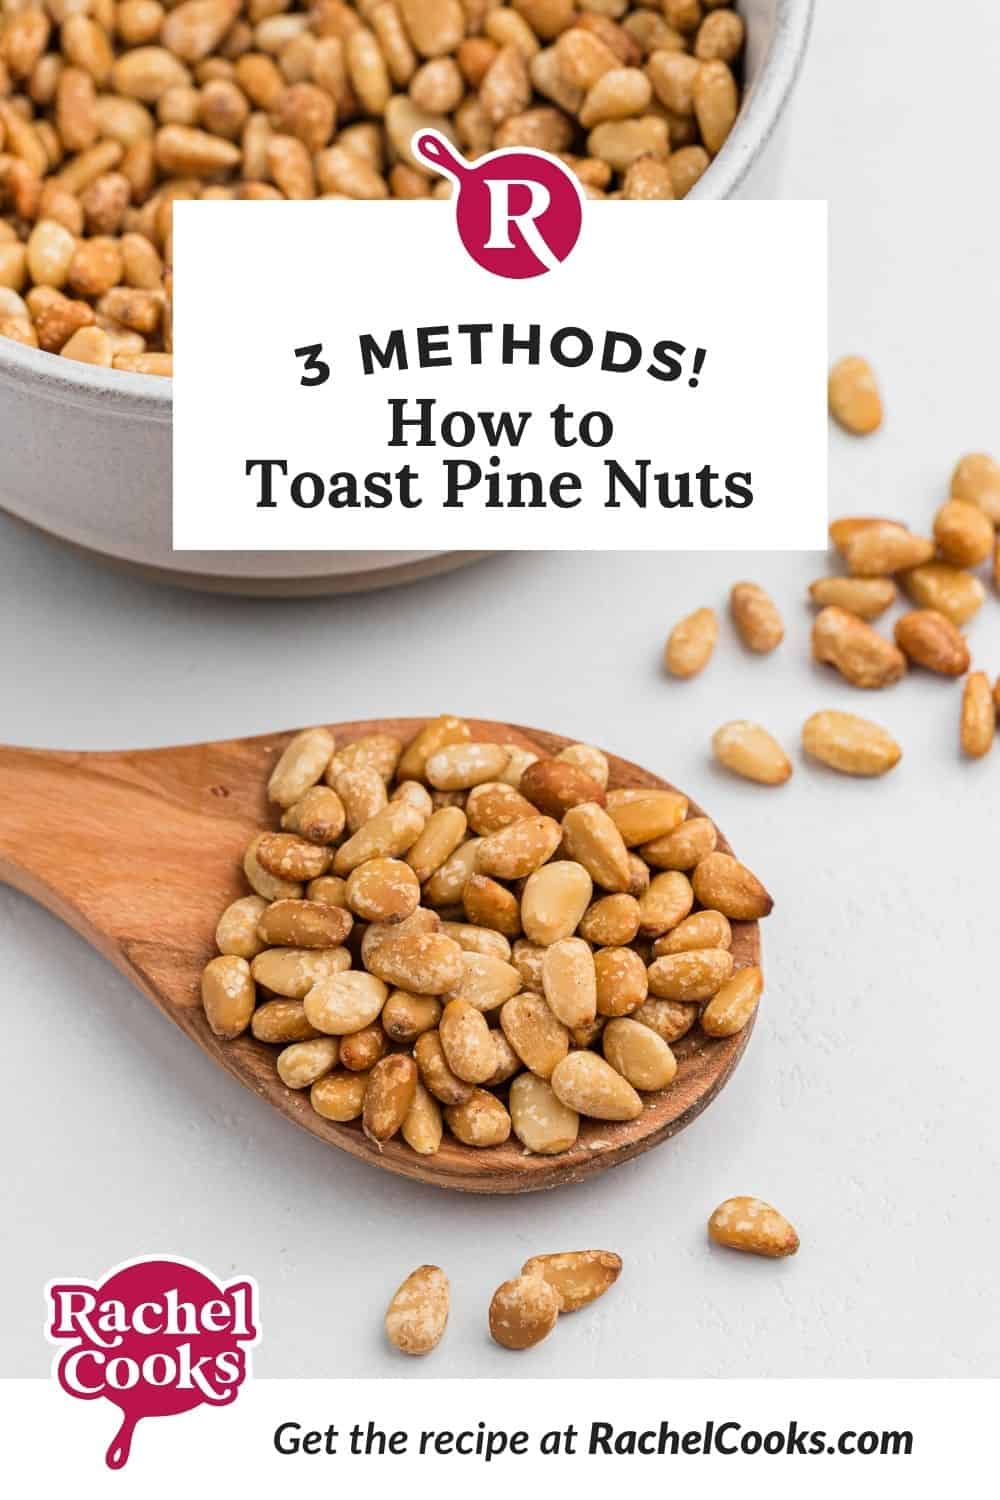
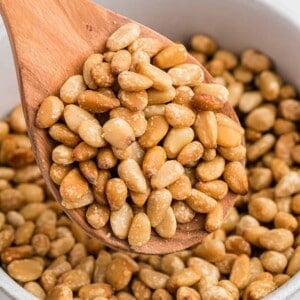
Learning how to toast pine nuts is an essential skill you’ll want in your cooking tool box. Choose which easy method works best for your recipe.
Recipe Overview
Why you’ll love it: Toasting the pine nuts really enhances their flavor. You won’t believe the difference!
How long it takes: depending on the method you choose, 5 to 10 minutes
Equipment you’ll need: a small skillet, microwave-safe plate OR small rimmed baking pan
Servings: makes a half cup, or more if you choose
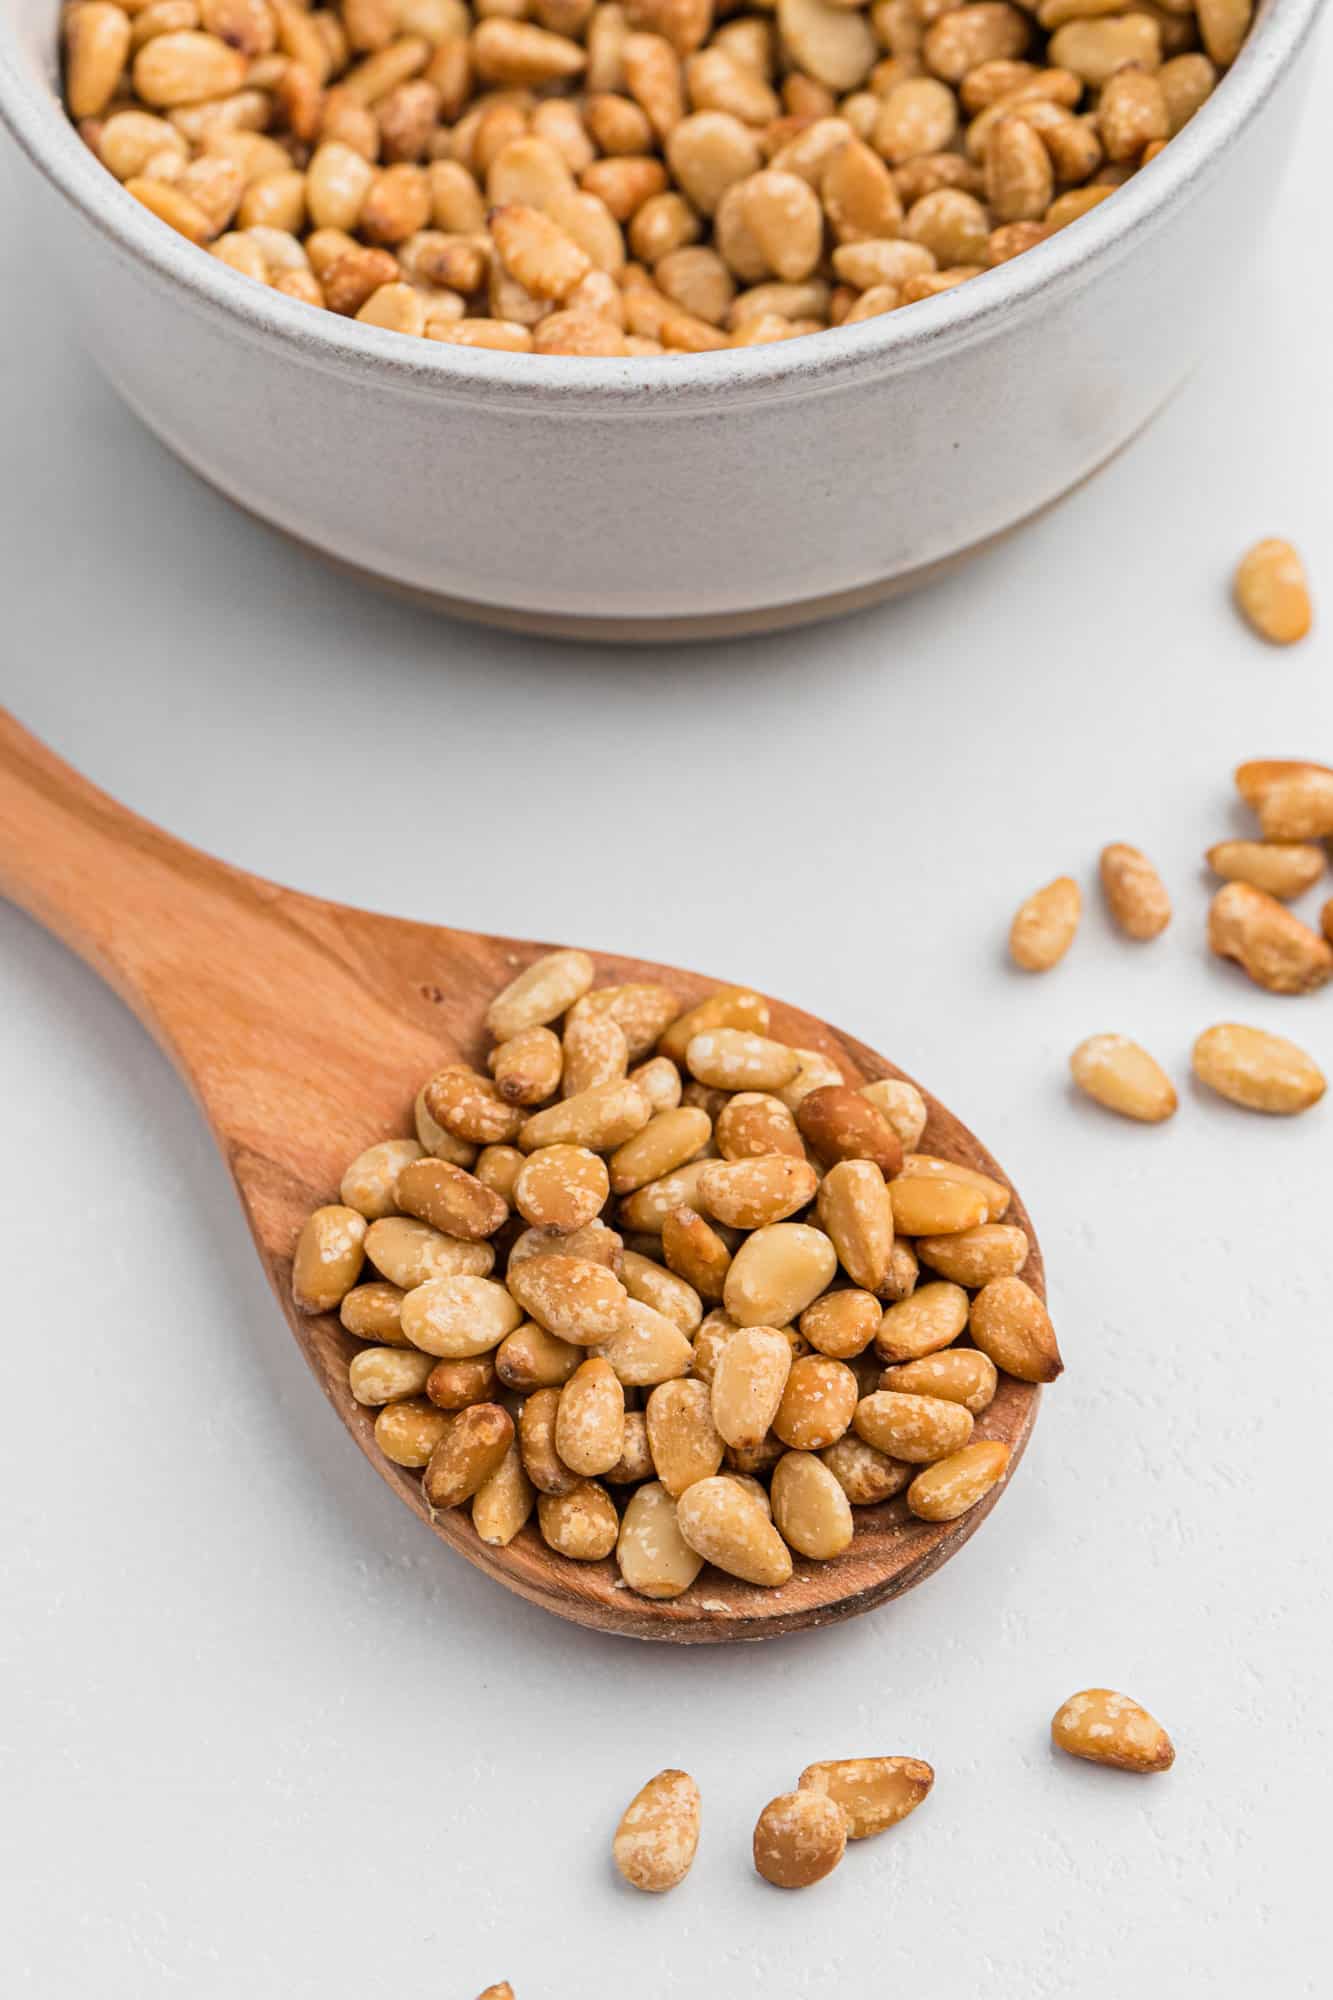
Whether you call them pine nuts, pignoli, pine kernels, or pinon, perfectly toasted pine nuts are a magical thing, aren’t they? I don’t get to experience their beauty and deliciousness as much as I’d like to since my kids have tree nut allergies but it makes them that much more of a treat for me.
Let’s be real, they’re already a bit of a treat given their price tag, but oh are they worth it! Their presence can elevate even the most simple dish and their flavor cannot be replicated by any other ingredient. Not only that, they’re good for you, too.
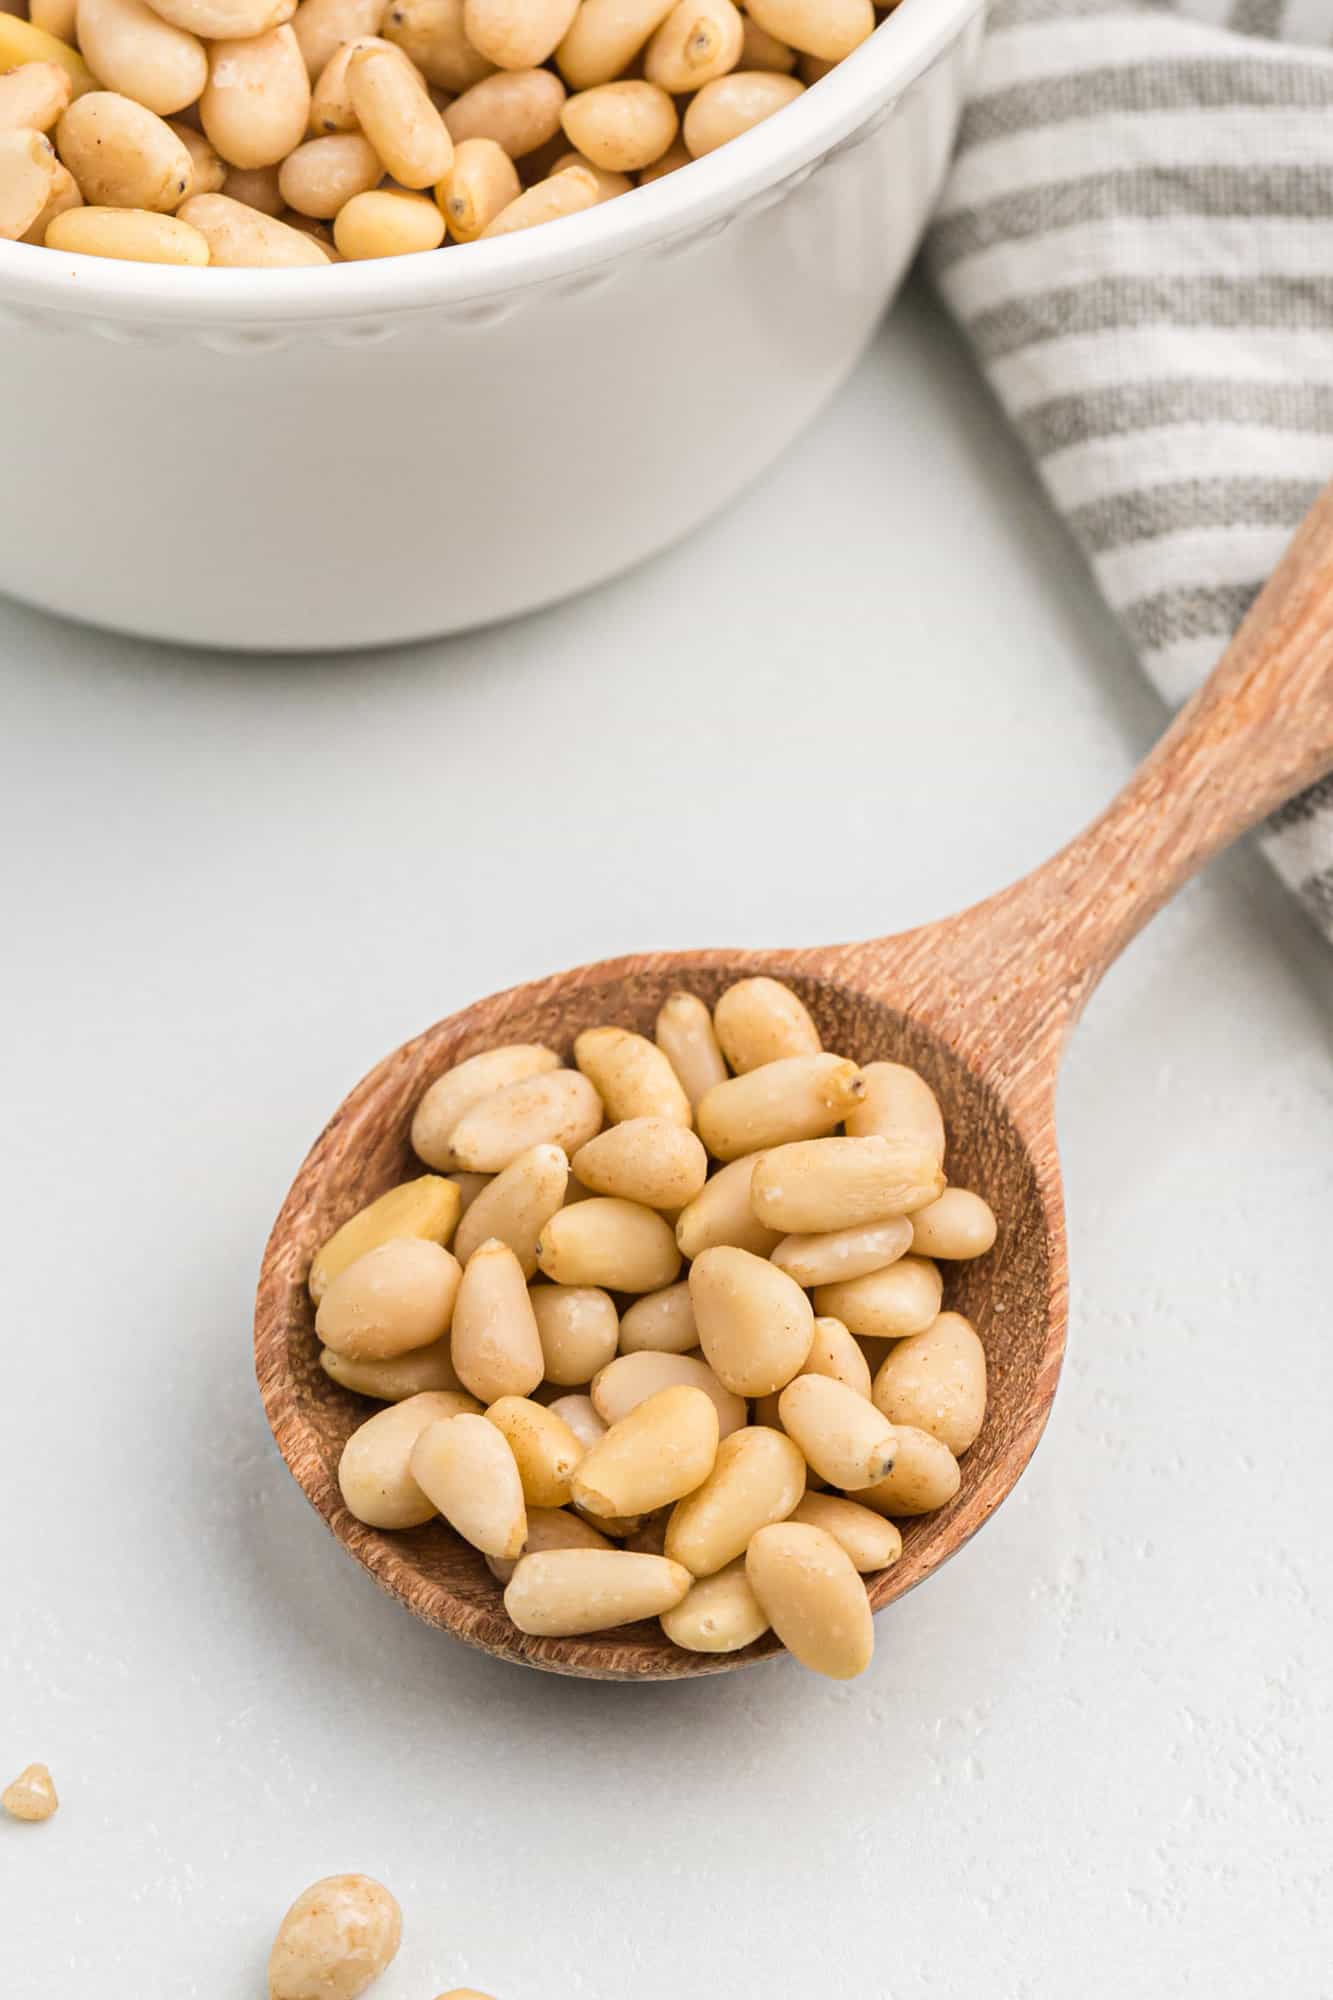
(The image below shows them before toasting.)
They’re especially great on salads (try them on this arugula asparagus salad) or sprinkled on top of a creamy pasta recipe. They’re also fantastic on top of hummus. I’m not even joking when I say that I dream of silky hummus topped with perfectly toasted pine nuts and a drizzle of the best olive oil I can find.
Toasting your pine nuts will also give an unreal depth of flavor to your homemade pesto. Try it, you’ll see.
BUT in case you don’t know how to toast pine nuts, I’m here to help. I’m going to cover three methods in this post and they’re all super easy!
If this seems too elementary for some of you, that’s great! You’re probably already killing it in the kitchen. However, I’ve discovered that there’s quite a bit of interest in basic cooking tutorials like this one. I want to make sure ALL of you are able to nail this technique so you can pull it out of your toolbox anytime you need it.
Here we go!
Cooking Tip
These three methods work well for most nuts and seeds. All nuts and seeds taste so much better when they are lightly roasted/toasted.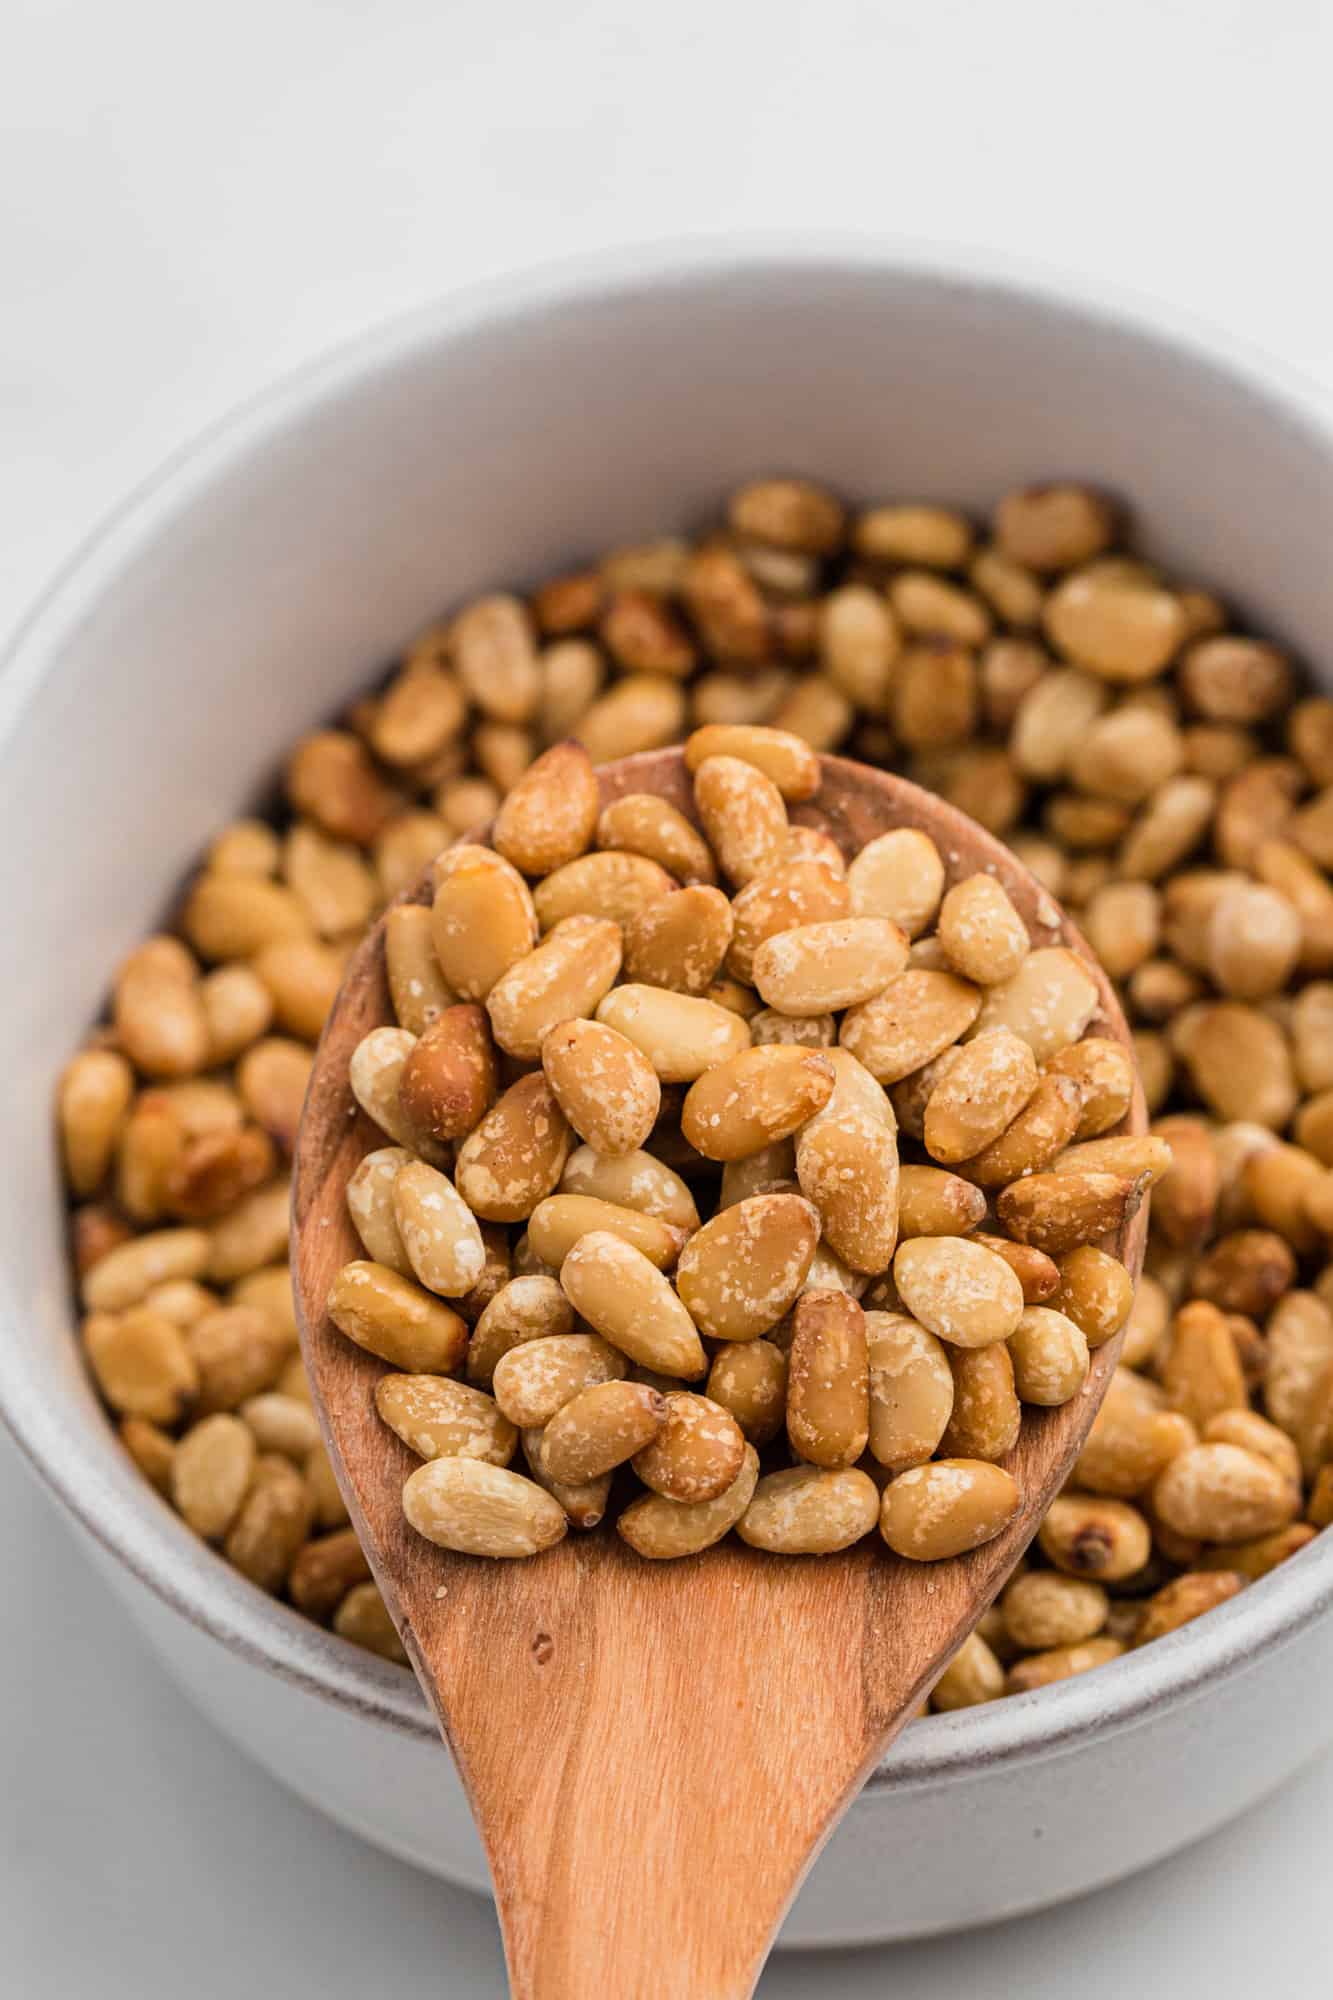
How To Toast Pine Nuts
All of these methods work great. Which method you choose depends a little on how many pine nuts you want to toast at once. I’ll cover that as I go through the methods.
Wondering about toasting them in an air fryer? I don’t prefer that method since pine nuts are small and tend to either fall through the holes of the basket or they fly around inside the air fryer.
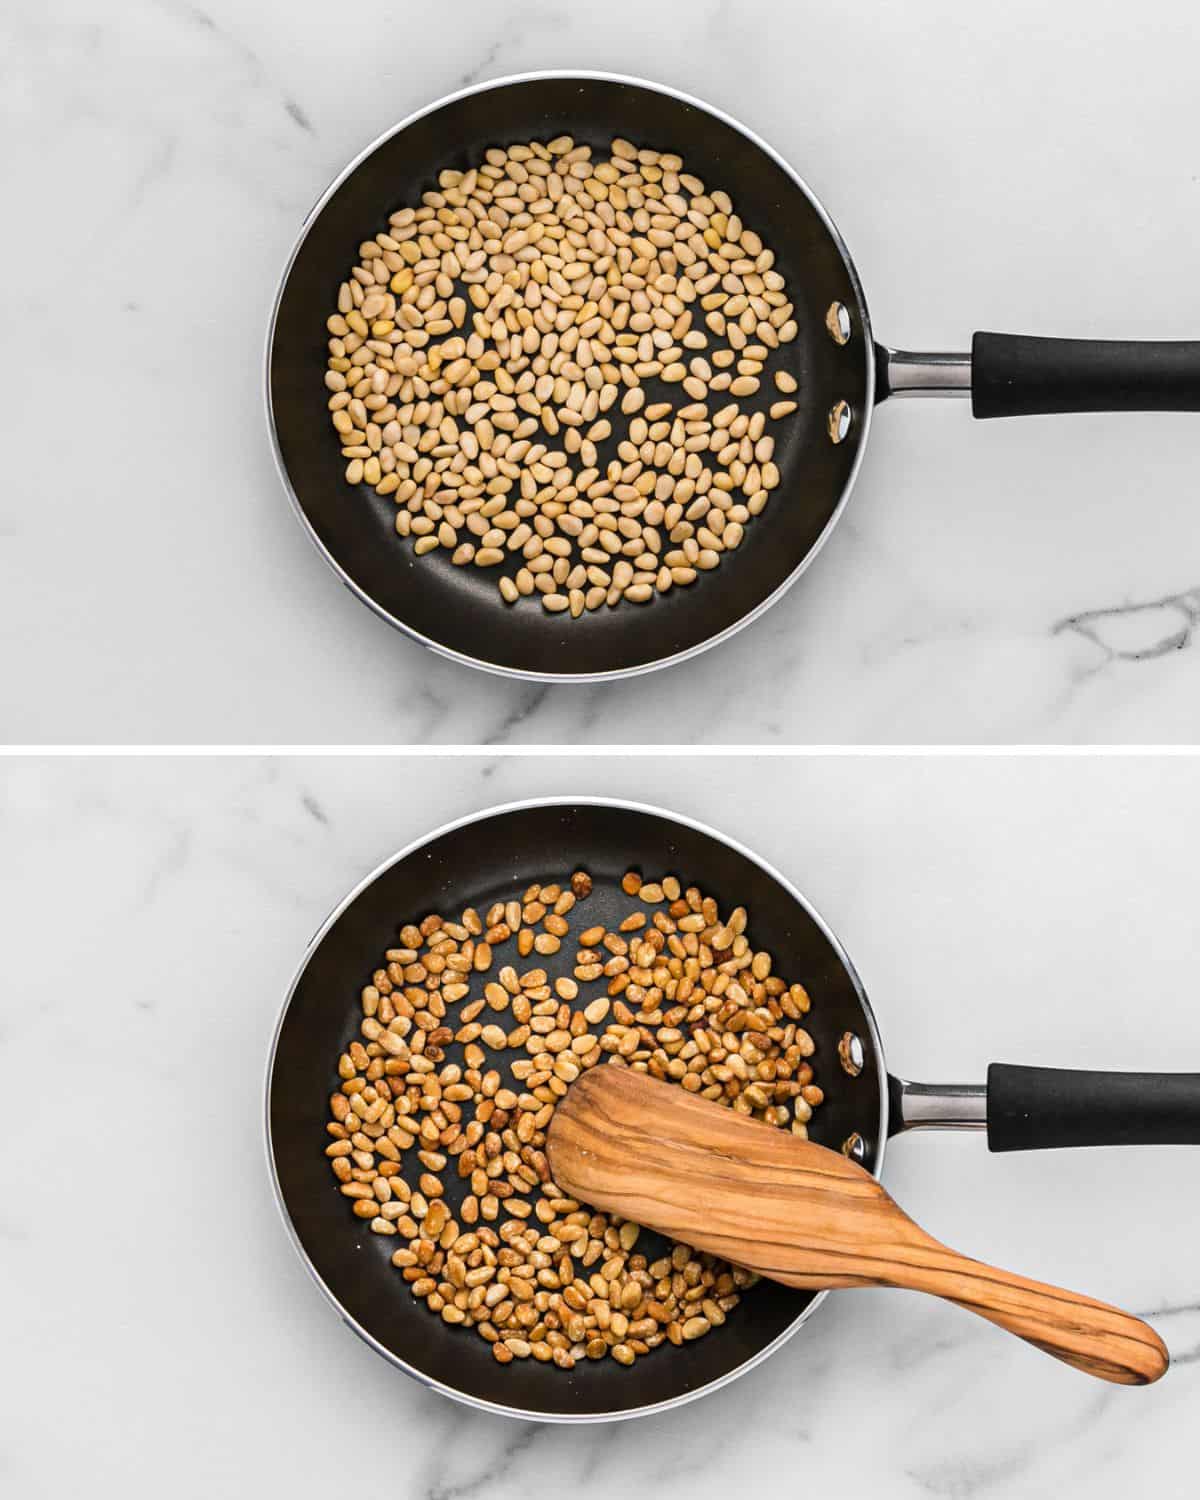
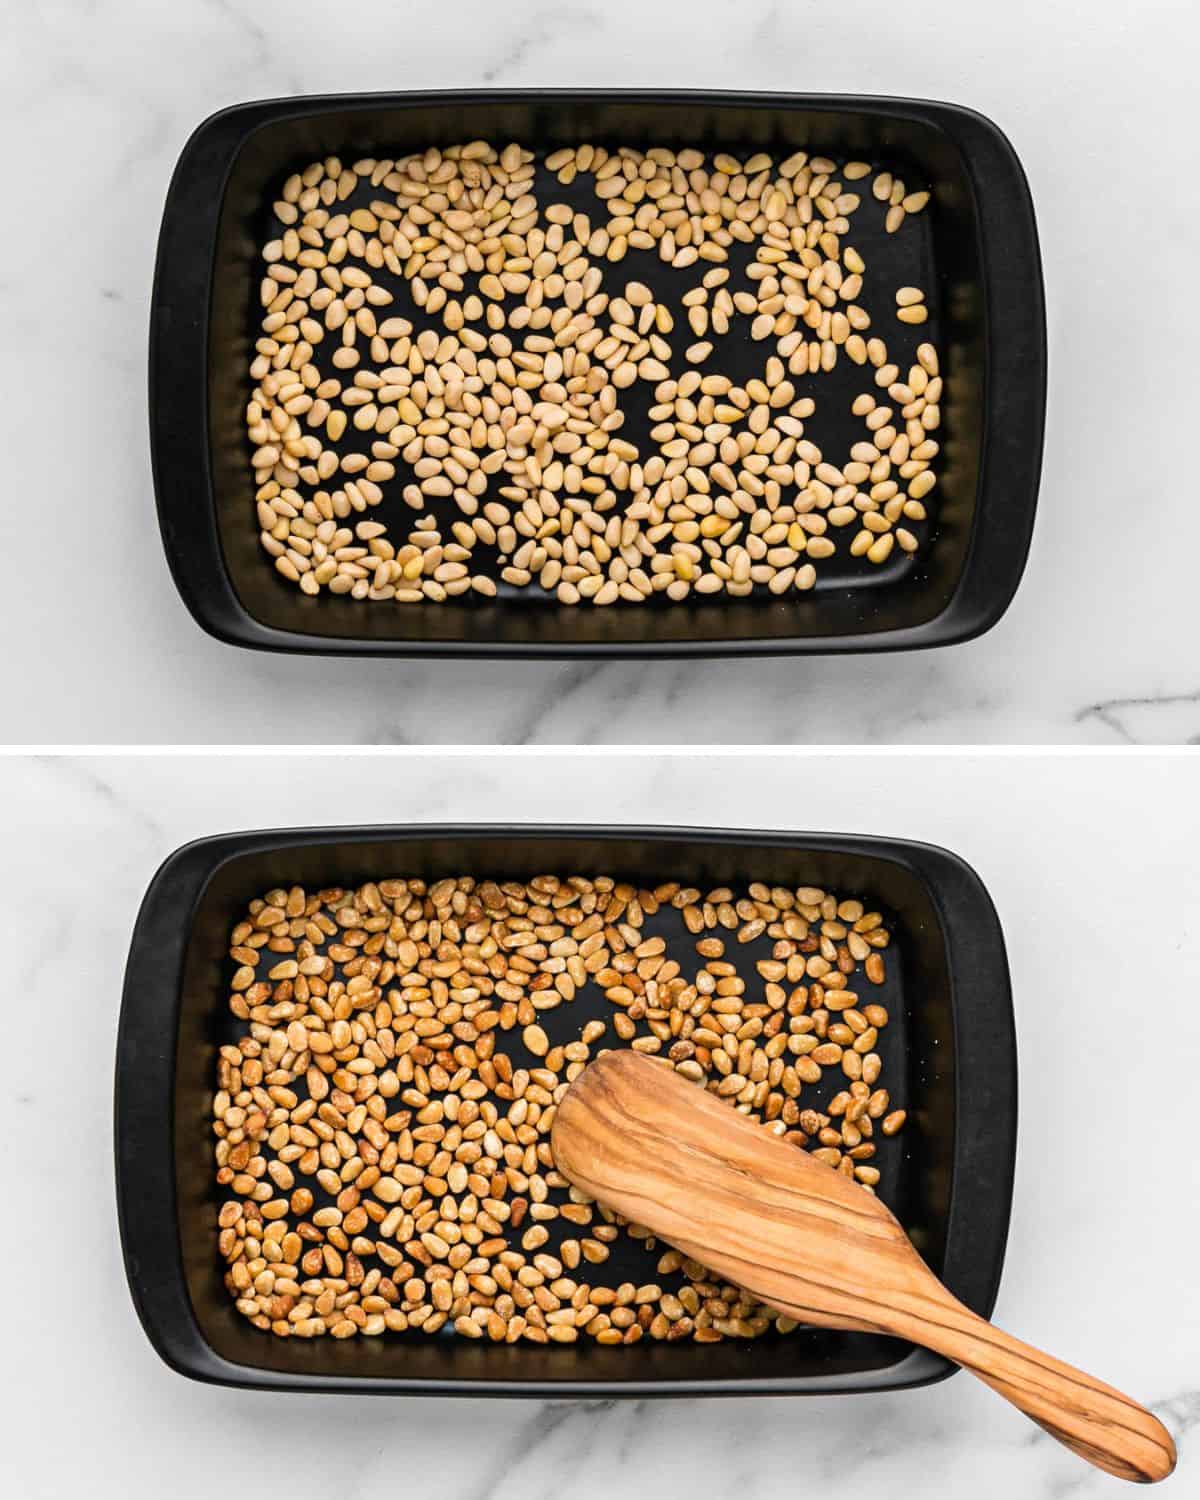
Method 1: on the Stove
This is my preferred method. It’s faster than the oven and a bit more reliable than the microwave. Quite possibly I’m a control freak, and this method gives you the most control and oversight of the process. You can stand right over the pan and watch the pine nuts toast.
On the flip side, it requires a little more hands-on time and monitoring. It works best for small to medium amounts of pine nuts, ¼ cup to 1 cup.
- Place pine nuts in a dry frying pan large enough so you can arrange them in a single layer. “Dry” doesn’t mean the pan isn’t wet; it means you don’t add any oil to it.
- Turn the heat to medium-low and toast the pine nuts until they are fragrant and golden brown. Stir them almost constantly especially when they start browning.
- When they’re golden brown, immediately transfer them out of the hot pan onto a plate to cool. That will ensure the pine nuts won’t continue to cook and possibly get scorched.
- Perhaps you noticed that I didn’t say how long it would take. I did that on purpose. It really depends a lot on how heavy your skillet is. A heavy skillet heats up more slowly. It does a great job of roasting the pine nuts but will take a bit longer. In addition, “medium-low” heat can vary depending on the stove and the person at the controls. If you’re like me, I like to hurry things along a bit and often crank it up just a bit more. However, low and slow heat really does a better job of toasting nuts.
Method 2: in the Microwave
Yes, microwave! I often use the microwave to toast other types of nuts and seeds. For this method, be sure you have a microwave-safe plate. This method works best for small amounts of pine nuts, ¼ cup to ½ cup. You could probably manage up to a cup if you have a large enough plate to accommodate the pine nuts in a single layer.
- Spread the pine nuts on a microwave-safe plate. Microwave on full power for 1 minute, stir, and then continue to microwave in 30 second intervals, stirring each time, until golden brown.
- Be sure to keep an eye on them, especially towards the end, because they can burn quickly. The microwave tends to heat unevenly so it’s important to stir them frequently. Otherwise, you may end up with some of the pine nuts untoasted and some burnt.
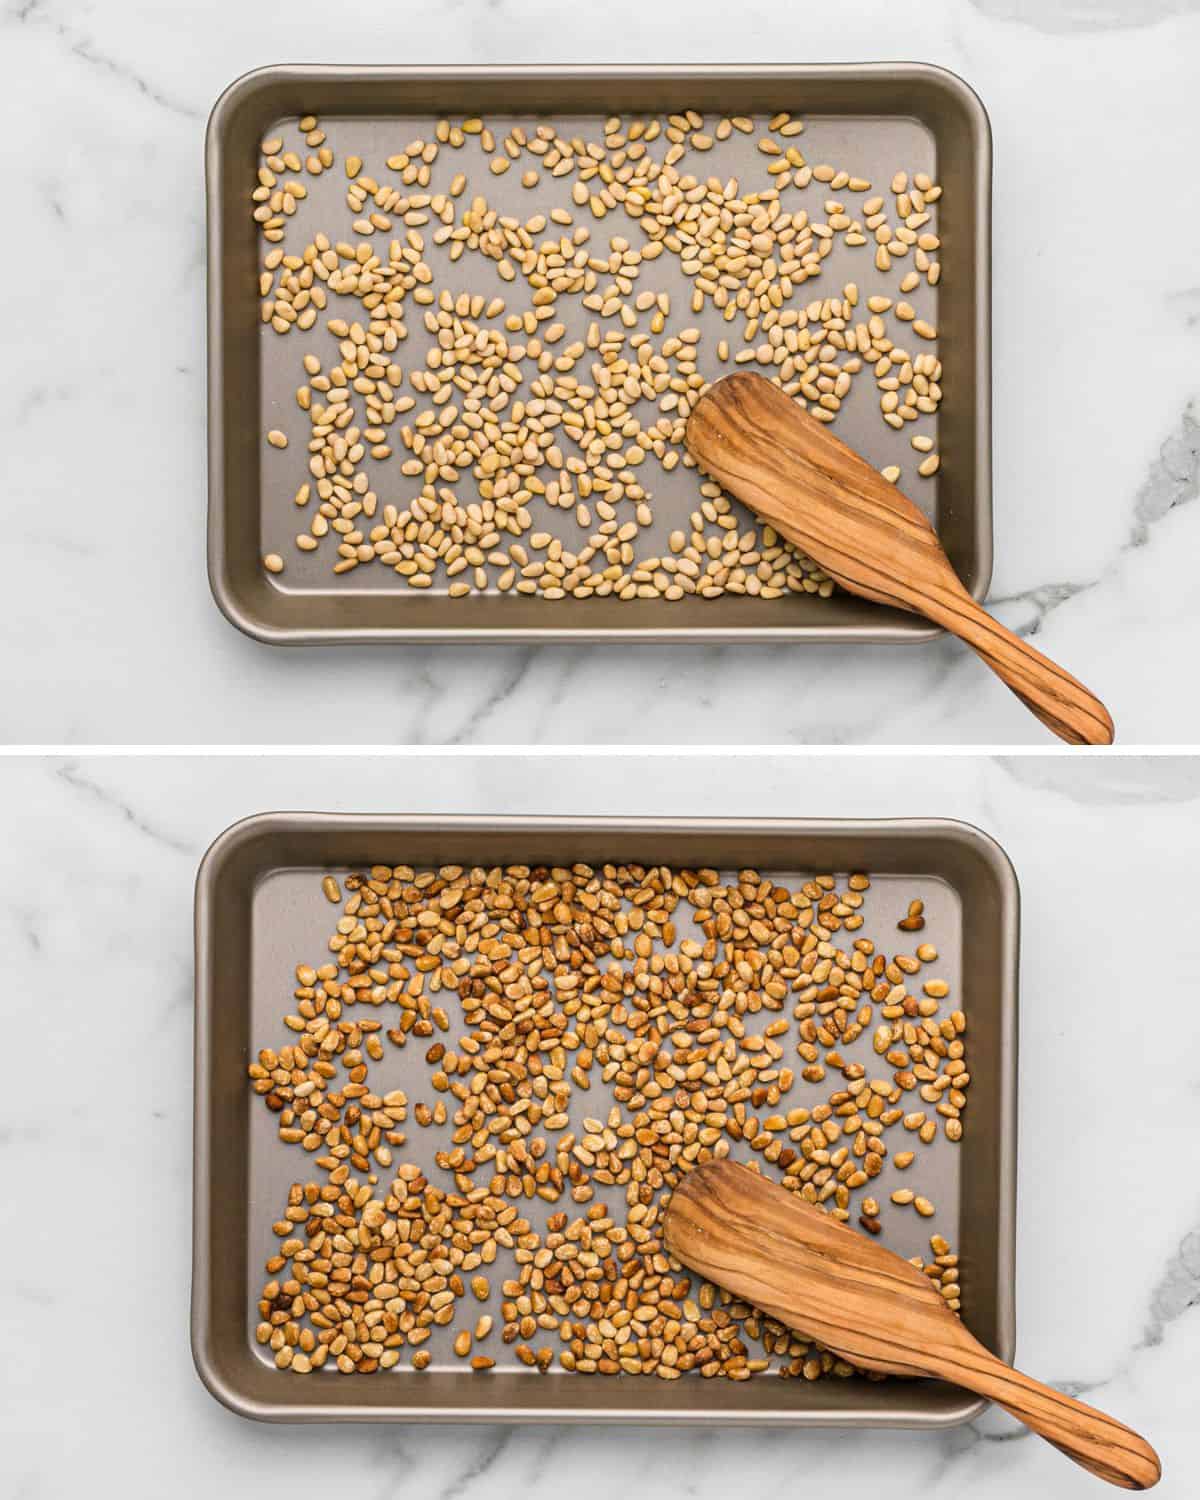
Method 3: in the Oven
This is a great method if you want to toast a lot of pine nuts at once. You can spread them out on a half sheet pan or a quarter sheet pan, depending on how many you have. Remember, they need to be in a single layer. You could toast up to 2 cups or even more using this method.
This method also yields the most even toasting and color on all the pine nuts.
- Preheat oven to 375ºF.
- Spread the pine nuts in a single layer on a rimmed baking sheet.
- Bake for 5 to 10 minutes, stirring every 2 to 3 minutes, or until golden brown.
- Immediately transfer to a plate to cool. The hot pan will continue to cook them and they may scorch even though they are out of the oven.
- Note: if you don’t want to turn on your oven, a toaster oven works well, too.
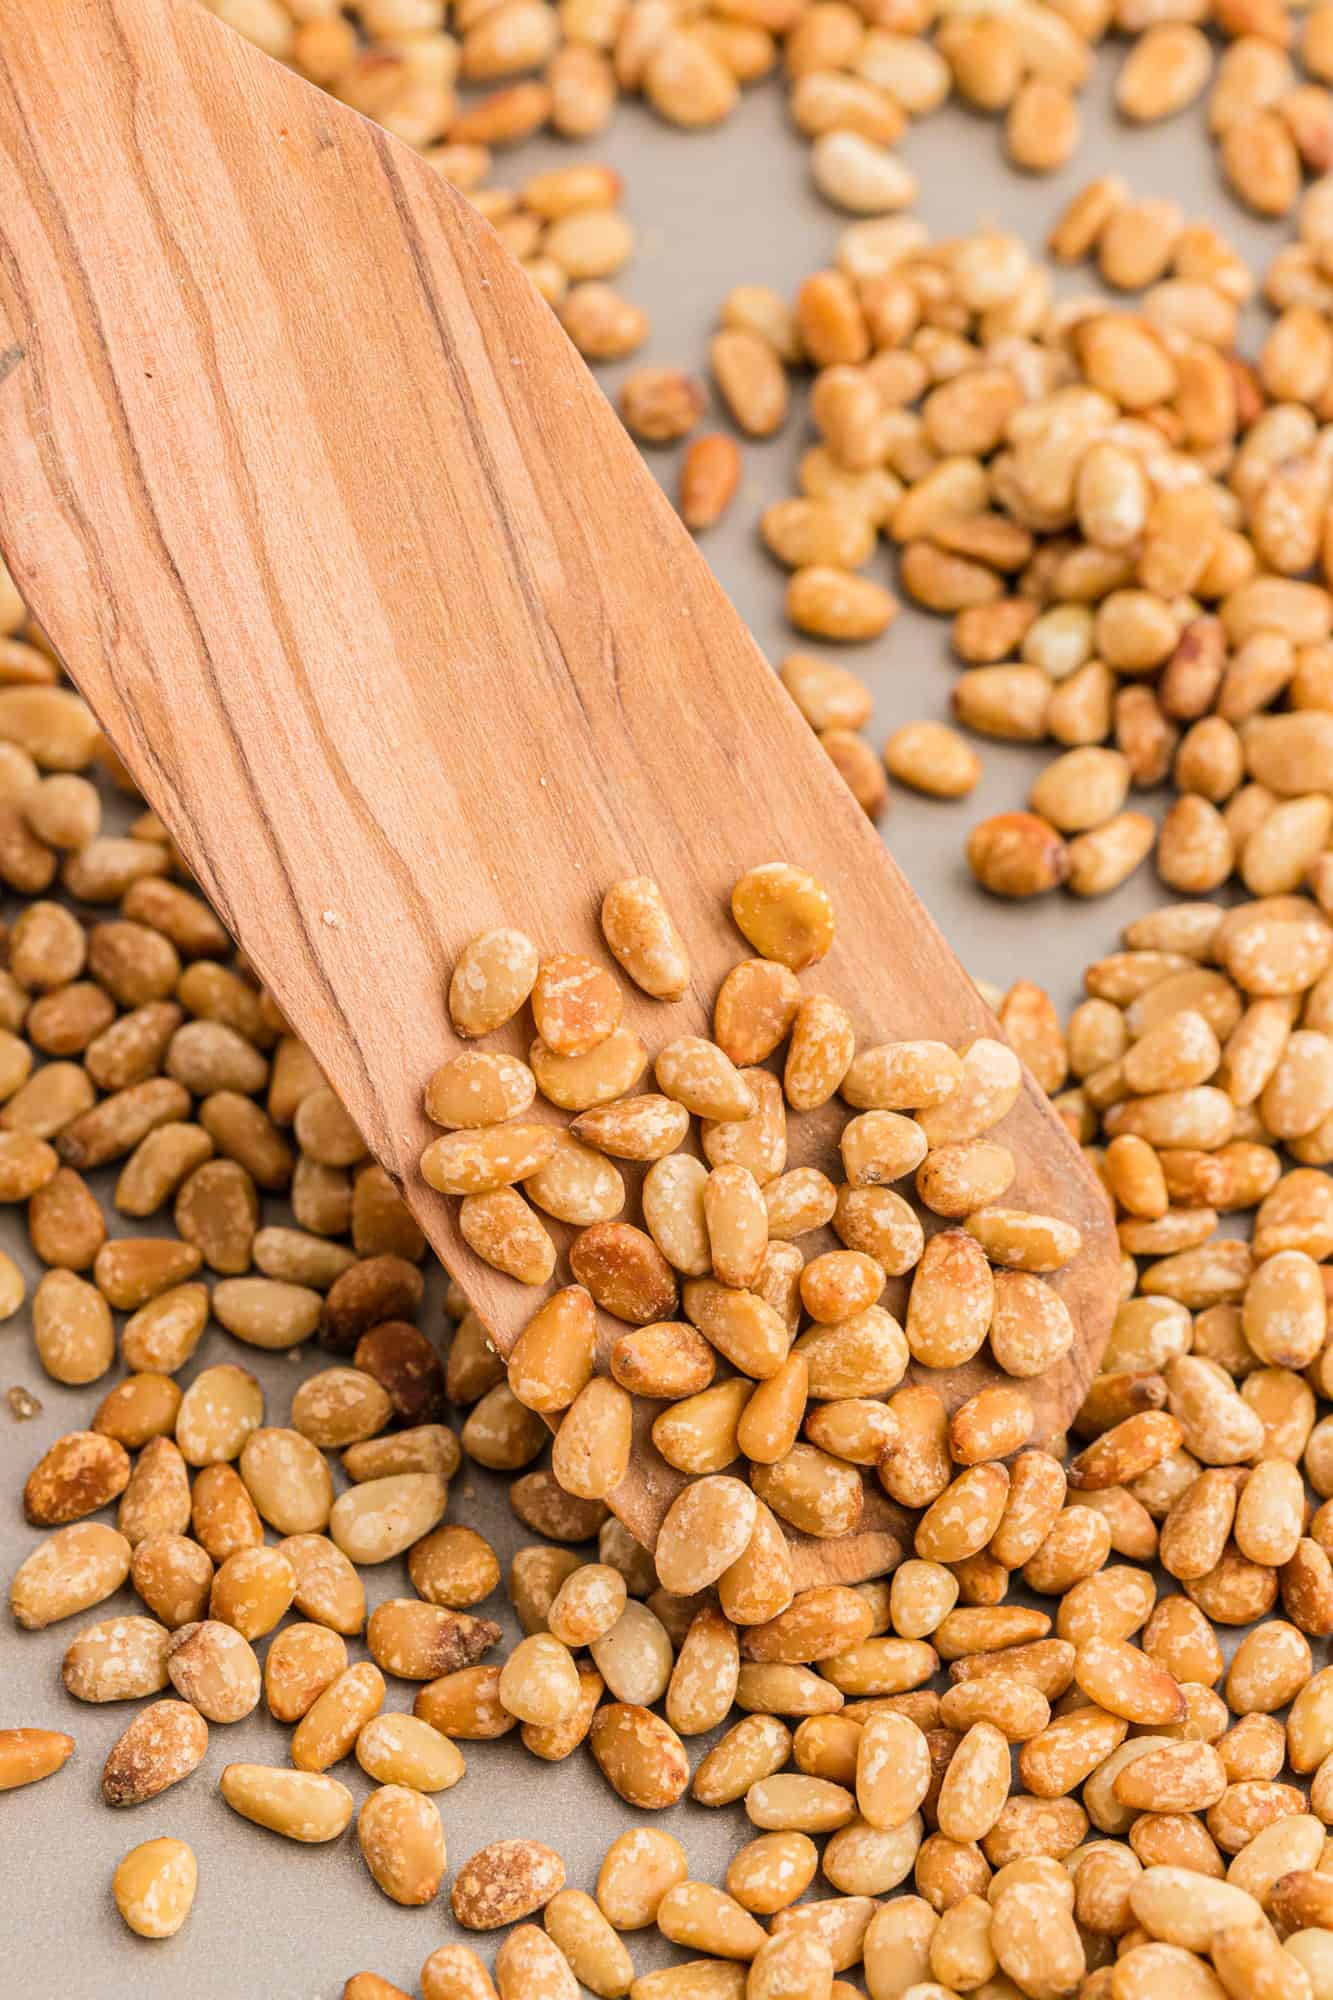
There is no need to add oil when toasting pine nuts. The nuts themselves contain oil.
Pine nuts can be eaten raw or toasted. However, toasting enhances the rich flavor of pine nuts, or any other nut or seed.
You don’t HAVE to toast the pine nuts but since toasting makes their flavor so much richer, you definitely WANT to toast them before adding them to your pesto. They’ll make your pesto that much better tasting.
It’s very important to cool the pine nuts completely before transferring them to an airtight container. You don’t want any steam or condensation in the container or you’ll have soggy pine nuts that may get moldy.
How long do toasted pine nuts last?
Store them at room temperature if you plan to use them within a week. If you wish to store them longer, move them to the fridge to prevent them from becoming rancid. They’ll keep for a few weeks in a tightly covered container or jar. They can be frozen for a few months.
Storing Raw Pine Nuts
Always store raw pine nuts in the refrigerator or the freezer to extend the shelf life and prevent them from becoming rancid. They’re too expensive to let them go bad without using them! You can tell if they are rancid by the smell. They will have a strong odor that doesn’t smell like pine nuts. They’ll taste bad, too.More How To's

How to Toast Pine Nuts – Three Methods
Ingredients
- ½ cup raw pine nuts (see note)
Instructions
Stove Top Method:
- Place the pine nuts in a dry frying pan large enough to hold them in a single layer. Dry means you don't need to add oil or water to the pan.
- Turn the heat to medium-low and toast the pine nuts until fragrant and golden brown, stirring frequently or even constantly, especially as they begin to brown.
- When they're golden brown, immediately transfer them from the hot skillet to a plate to stop the cooking and prevent scorching. Nuts should be in a single layer to cool.
Microwave Method:
- Spread pine nuts in a single layer on a microwave-safe plate. Microwave on full power (100%) for 1 minute, stir, and then continue to microwave in 30 second intervals, stirring each time, until golden brown.
- Keep an eye on them, especially towards the end, because they can burn quickly. The microwave tends to heat unevenly so some nuts may be untoasted while others scorch if you're not watching and stirring every 30 seconds.
- Transfer to another plate to cool; arrange in a single layer.
Oven Method (or toaster oven):
- Preheat oven to 375ºF.
- Spread pine nuts in a single layer on a rimmed baking sheet.
- Bake for 5 to 10 minutes, stirring every 2 to 3 minutes, or until golden brown.
- Immediately transfer to a plate to cool, in a single layer. Don't leave them in the hot pan because they will continue to brown.
Notes
- You can easily toast more than a ½ cup of pine nuts. If you toast more than 1 cup at a time, the oven method works best.
- Store both raw and toasted pine nuts in either the refrigerator or freezer to keep them from becoming rancid.
- All 3 methods can be used to toast other types of nuts and seeds, too.
Video
Nutrition
Nutrition information is automatically calculated, so should only be used as an approximation.


How would you cook them with salt?
You could just sprinkle them with a little salt, I think the natural oils in them would help it stick, but I haven’t tested it so I can’t say for sure. Let me know if you give it a try!
I also have a tree nut allergy and I am able to enjoy pine nuts as they are actually a seed! Just passing along what was an exciting discovery for me.
Thanks! My kids are actually allergic to pine nuts too, so definitely something to check on a case-by-case basis.
I made a mistake and did 325 instead of 375 so I left them in for an extra 3 minutes and didn’t remove them from the pan right away and they turned out great. thank you for the recipe AND the tip that they keep cooking in the pan ;)
You’re so welcome! Glad it worked well for you.
Be careful putting the pine nuts on a plate when taking them out of the oven; my plate broke in half.
Toasted pine nuts taste great.
Oh no! Sorry to hear that. I’ve never had that happen before. Could it be your plate isn’t heat safe?