
Recipe Overview
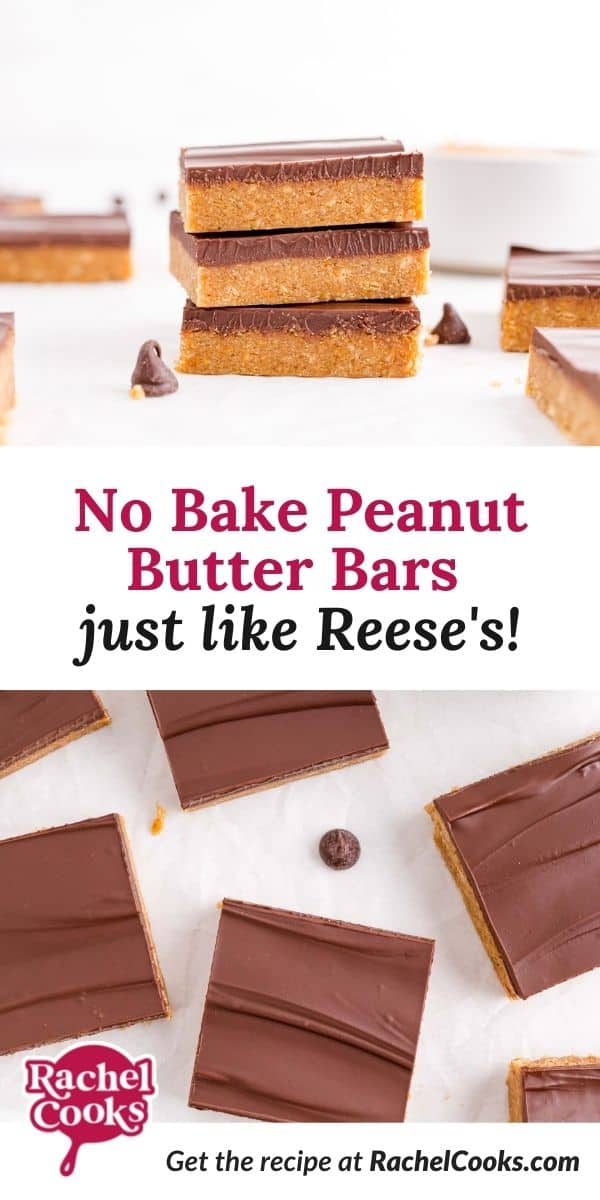
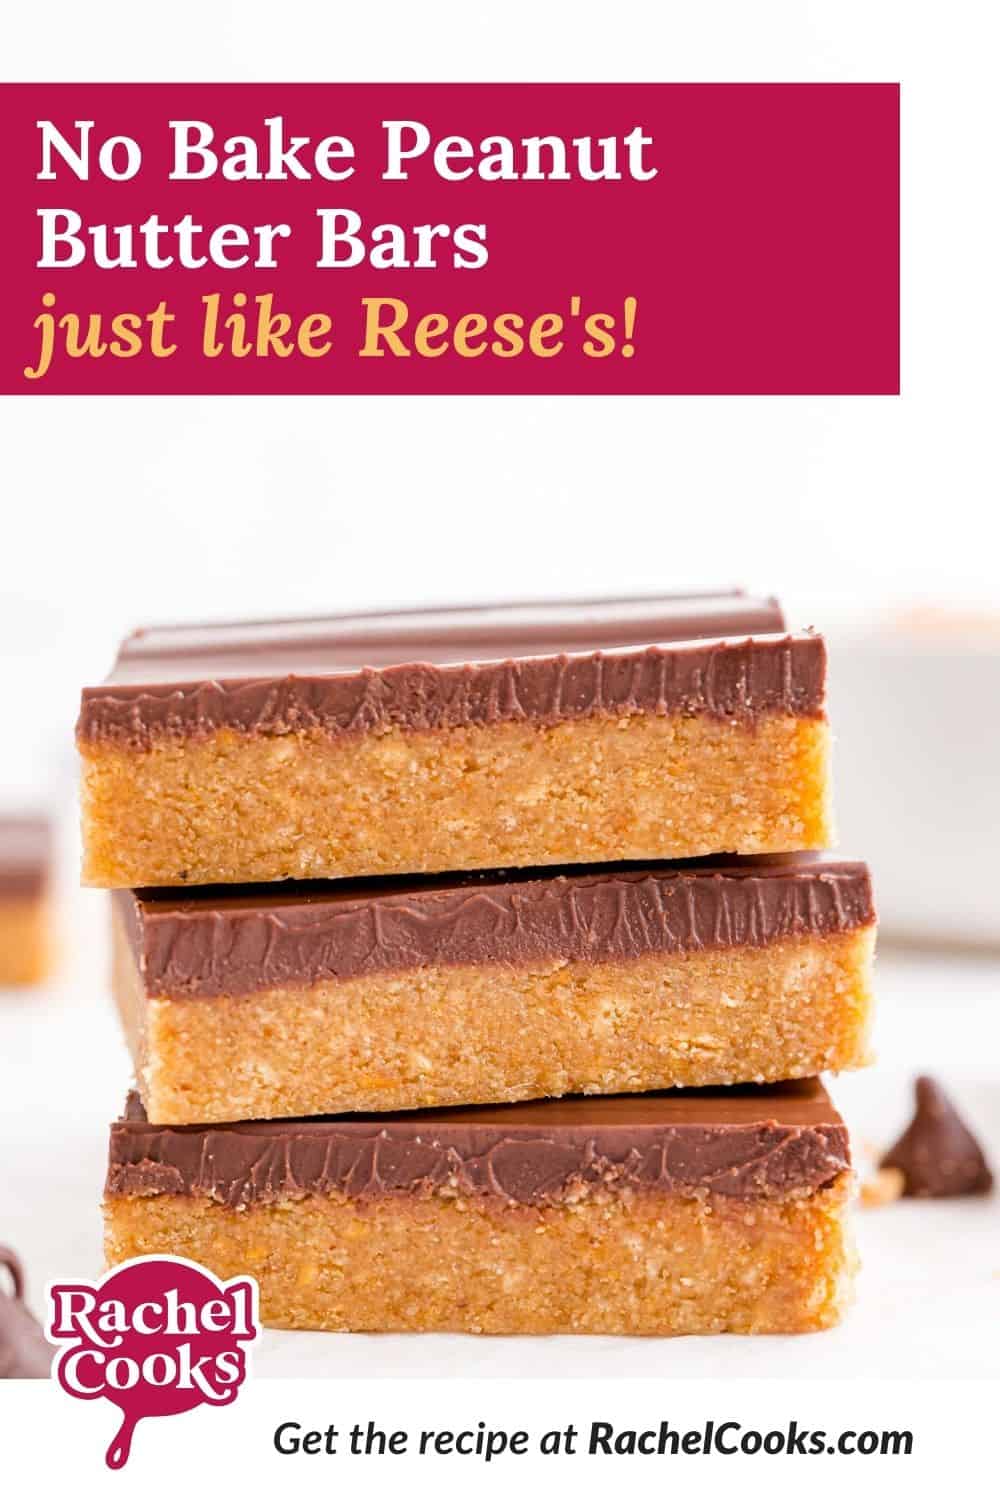
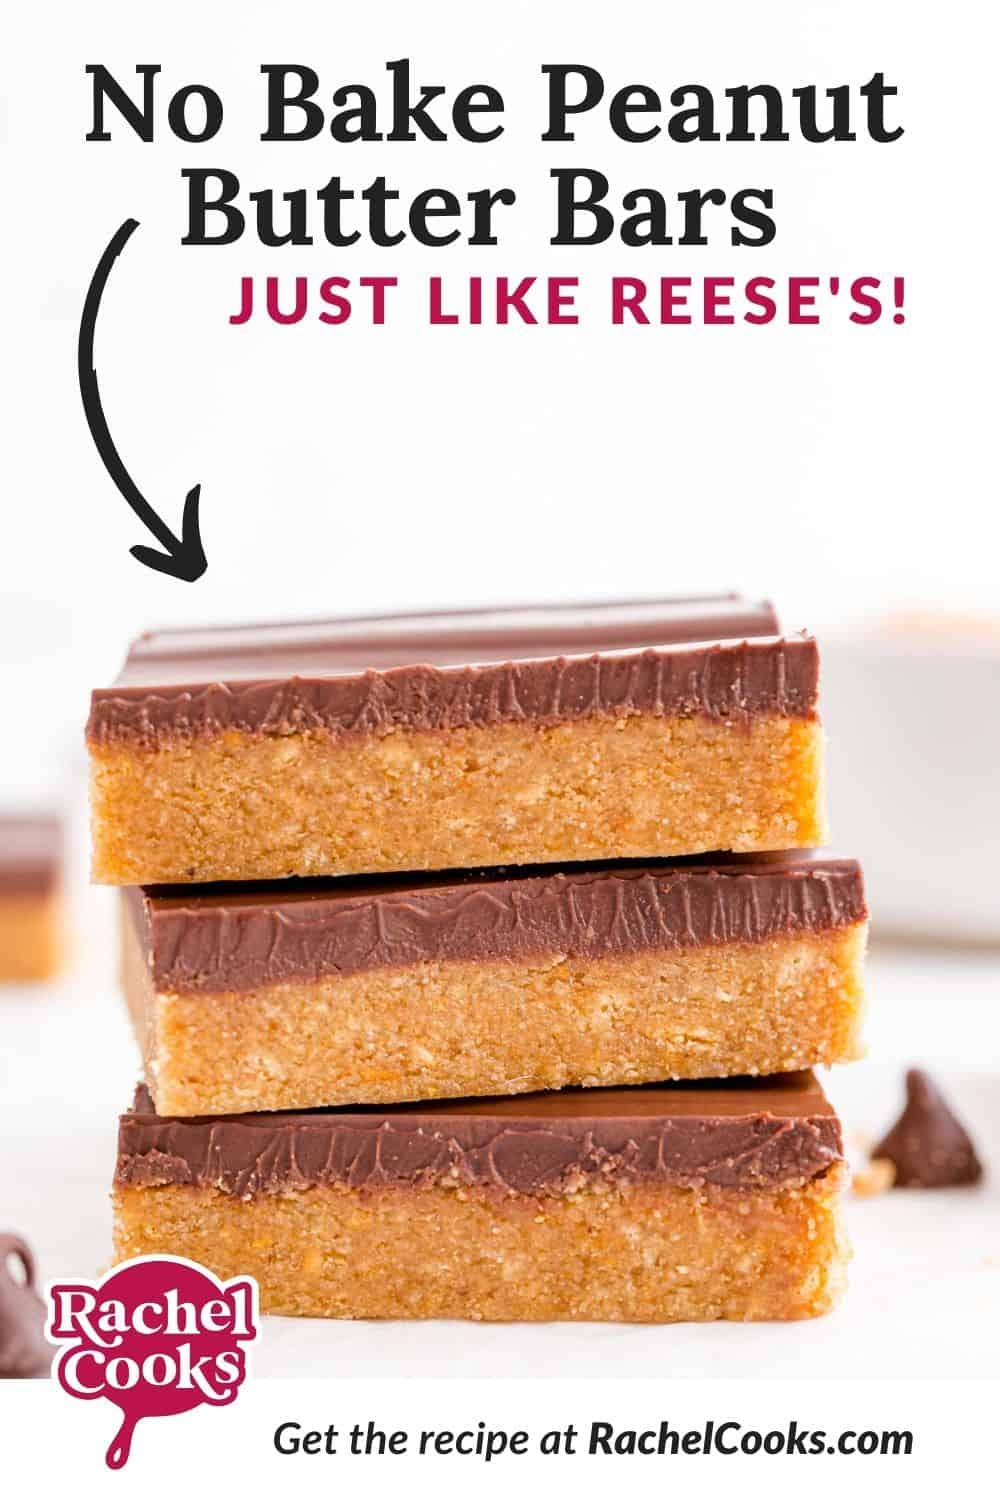
Why you’ll love it: No bake peanut butter bars are the perfect treat. They are easy to make and taste just like Reese’s peanut butter cups. These bars are dangerously good!
How long it takes: 15 minutes hands-on; an additional 1 ½ hours to chill
Equipment you’ll need: saucepan, 9 x 13 inch pan
Servings: 24 bars (generously sized)
Peanut Butter. Chocolate. No-bake. Just like Reese’s. Sounding pretty great, right?
These no-bake peanut butter bars couldn’t be any easier to make, either. You don’t even have to turn the oven on (hence the “no bake,” in case you haven’t had your coffee yet today).
These bars are good. So good! If you make these for any event, your friends and family are going to absolutely rave about them.
If you like the peanut butter and chocolate combination (and I’d guess that most of us do!), try buckeyes (or buckeye brownies!), Oh Henry bars, peanut butter cookie bars (only 5 ingredients!) or drink it in this peanut butter chocolate banana milkshake.
If Oreo cookies are more your thing, try frosted Oreo cookie bars. If you like Oreo cookies AND peanut butter with chocolate, you won’t want to miss my chocolate peanut butter pie (no bake!).
About These No Bake Peanut Butter Bars
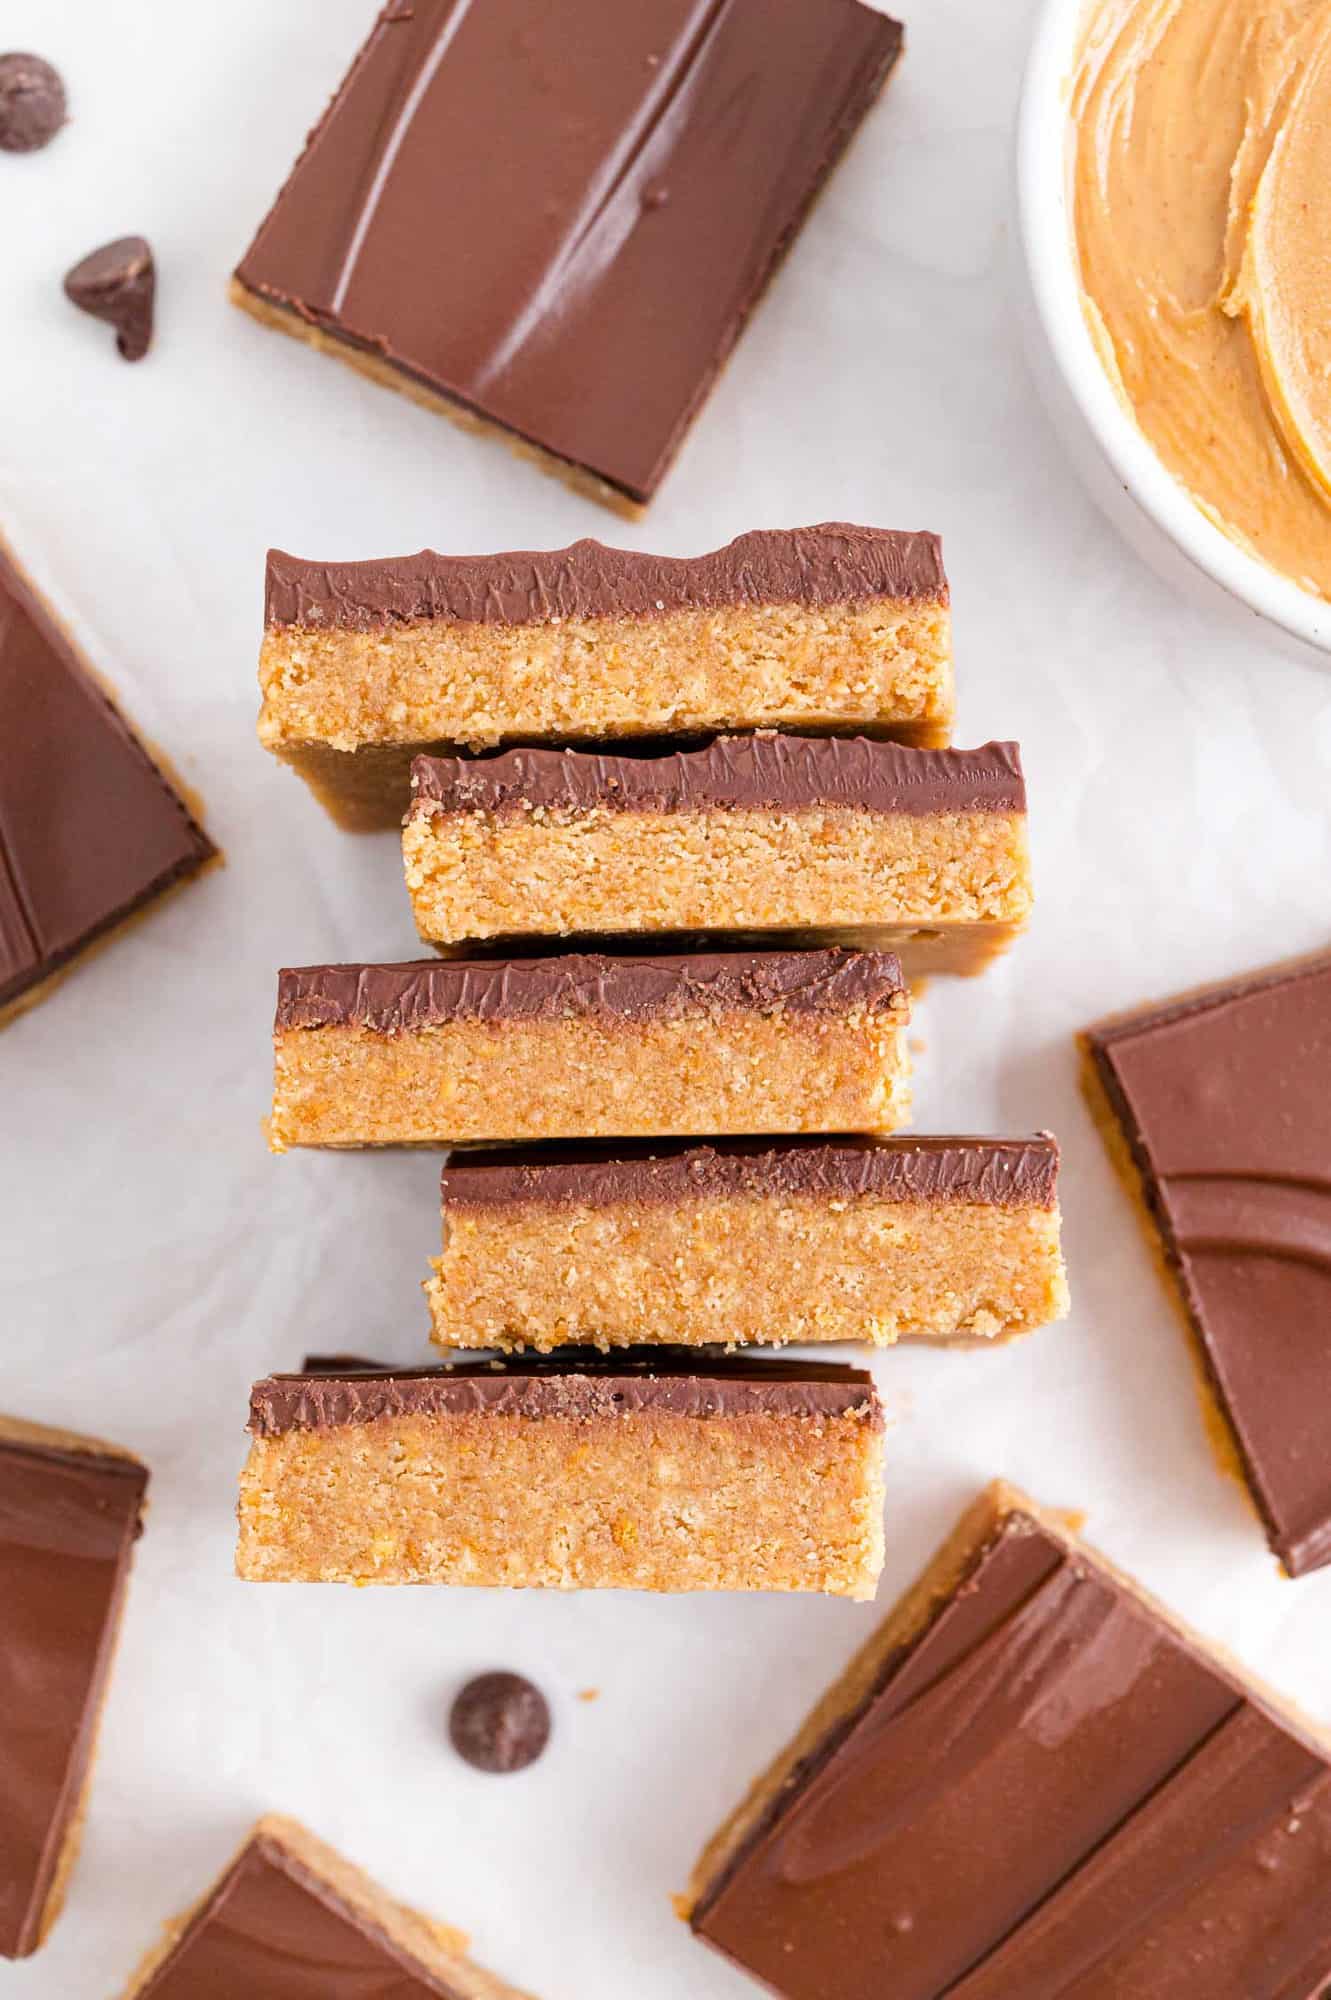
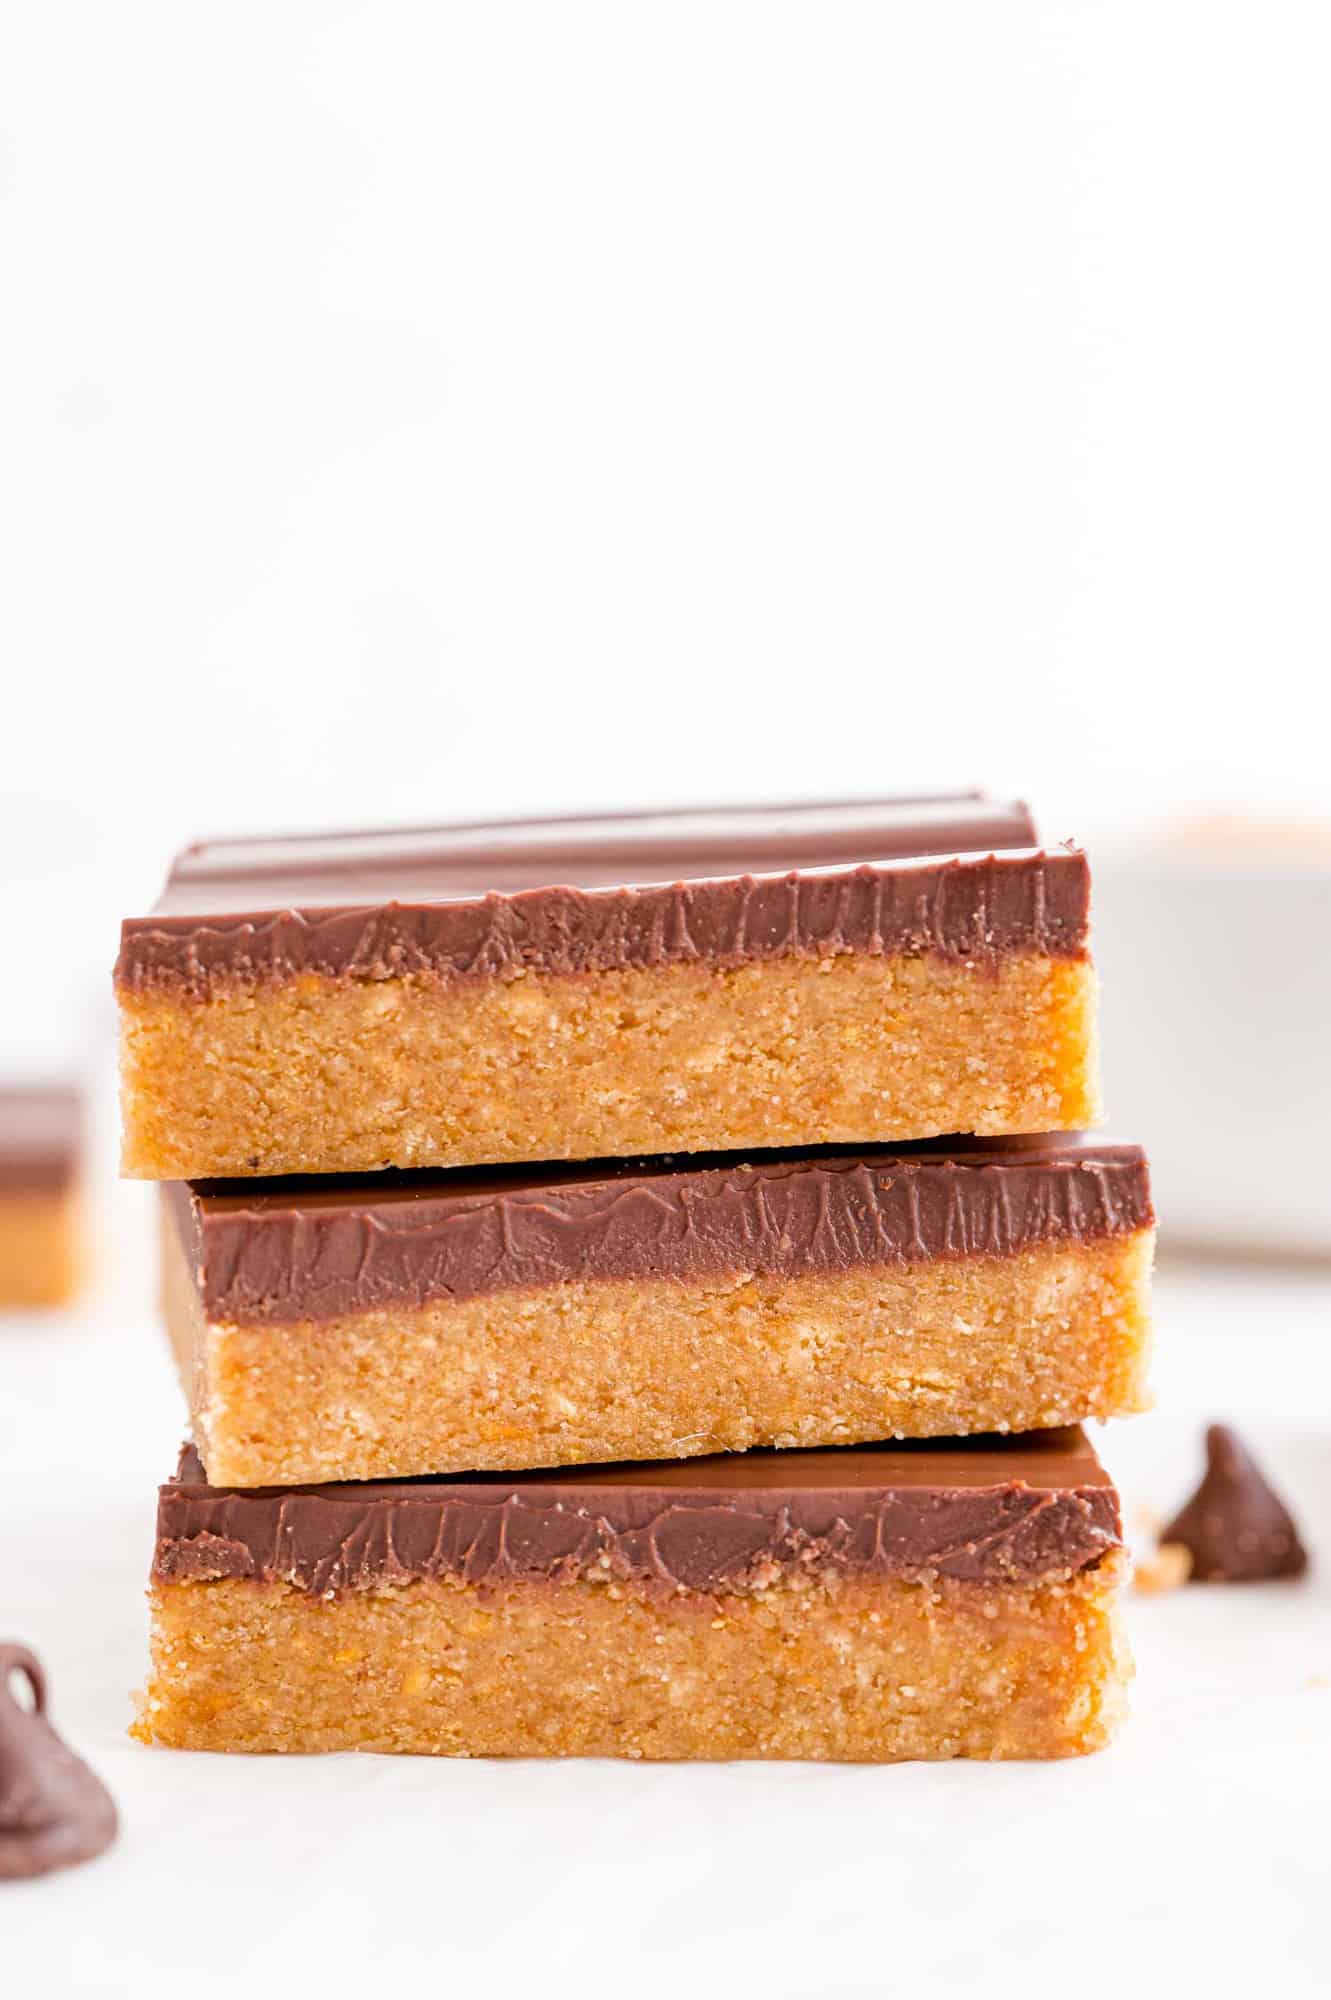
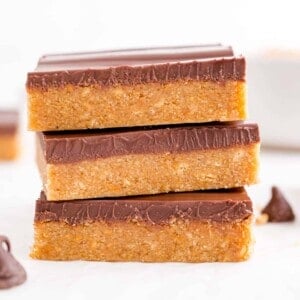
Just the right texture! There’s a secret ingredient which gives the bars the signature texture of Reese’s peanut butter cups, slightly grainy but in a good way.
Easy to make. You’ll only need about 15 minutes to whip up these bars; however, factor in another one and a half hours to chill the bars. The bars have two layers; each layer needs time to chill before you cut the bars. So even though it looks like it takes a long time to make these bars, most of it is time spent in the refrigerator. The bars, that is, not you.
Let’s get rolling on these no-bake bars! I’ll walk you through the recipe here and give you lots of helpful tips. You can also refer to the step-by-step photos and the recipe card below for specific instructions.
Ingredient Notes
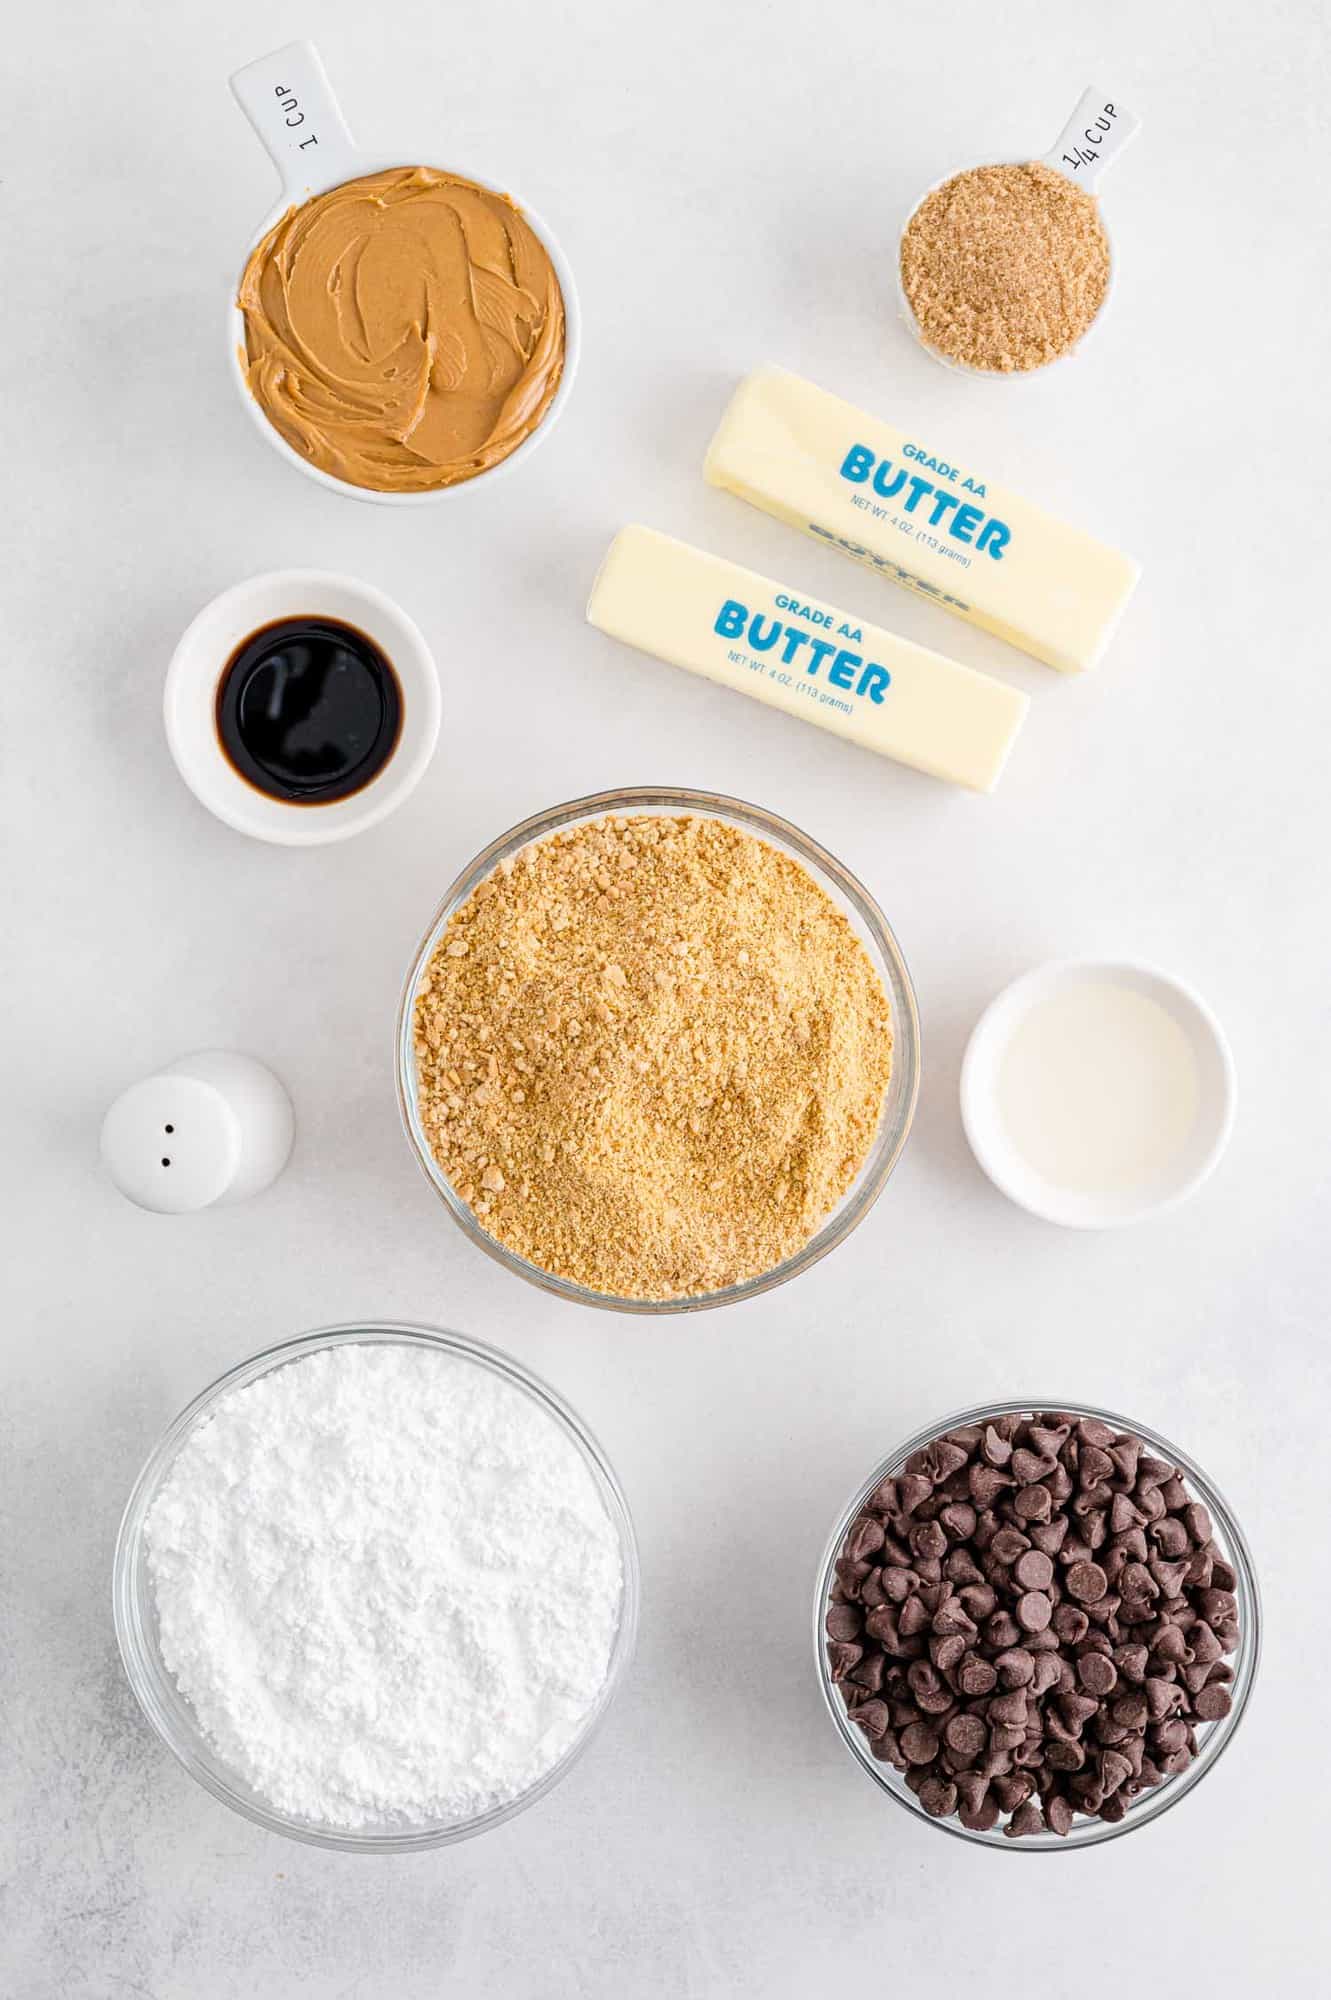
- Butter: Use unsalted butter if you can. You’ll need two sticks. It’s not necessary to soften it for this recipe but it’s a bit easier to make the bars if the butter isn’t rock hard.
- Brown Sugar: While most of the sugar in this recipe is powdered sugar, a bit of brown sugar adds a deeper caramel flavor to the peanut butter layer.
- Powdered Sugar (Confectioner’s Sugar): This finely textured sugar gives the bars the signature creamy filling.
- Peanut Butter: Use a creamy peanut butter like Jif or Skippy, not a natural old-fashioned peanut butter for best results. Crunchy peanut butter is fine.
- Pure Vanilla Extract: Vanilla lends a wonderful flavor that can’t be replicated.
- Graham Crackers: You’ll need 14 whole crackers to make 2 cups of crumbs. Crush them in a resealable bag with a rolling pin or wine bottle. They should be pretty finely crushed for the best texture. Buy pre-made graham cracker crumbs if you prefer. (In case you’re wondering, this is the secret ingredient!)
- Chocolate Chips: Use semi-sweet chocolate chips or milk chocolate chips, whichever you like best. You’ll need a 12 oz. bag.
- Vegetable Oil: Just a teaspoon of oil is added to the chips so they melt smoothly and spread well.
How To Make These Peanut Butter Bars
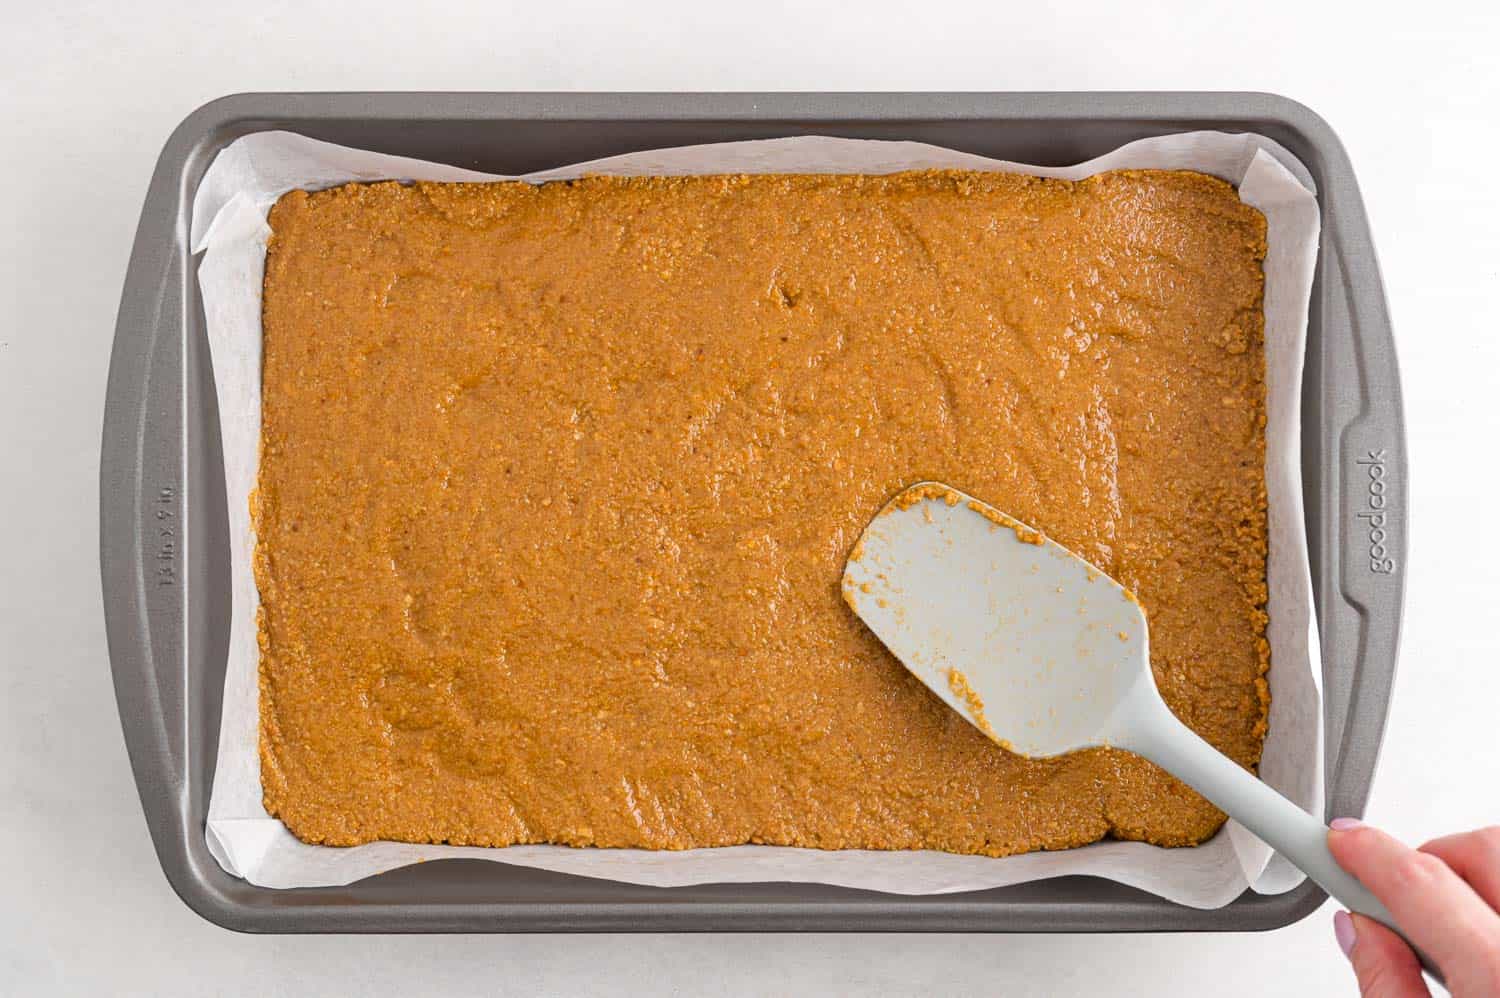
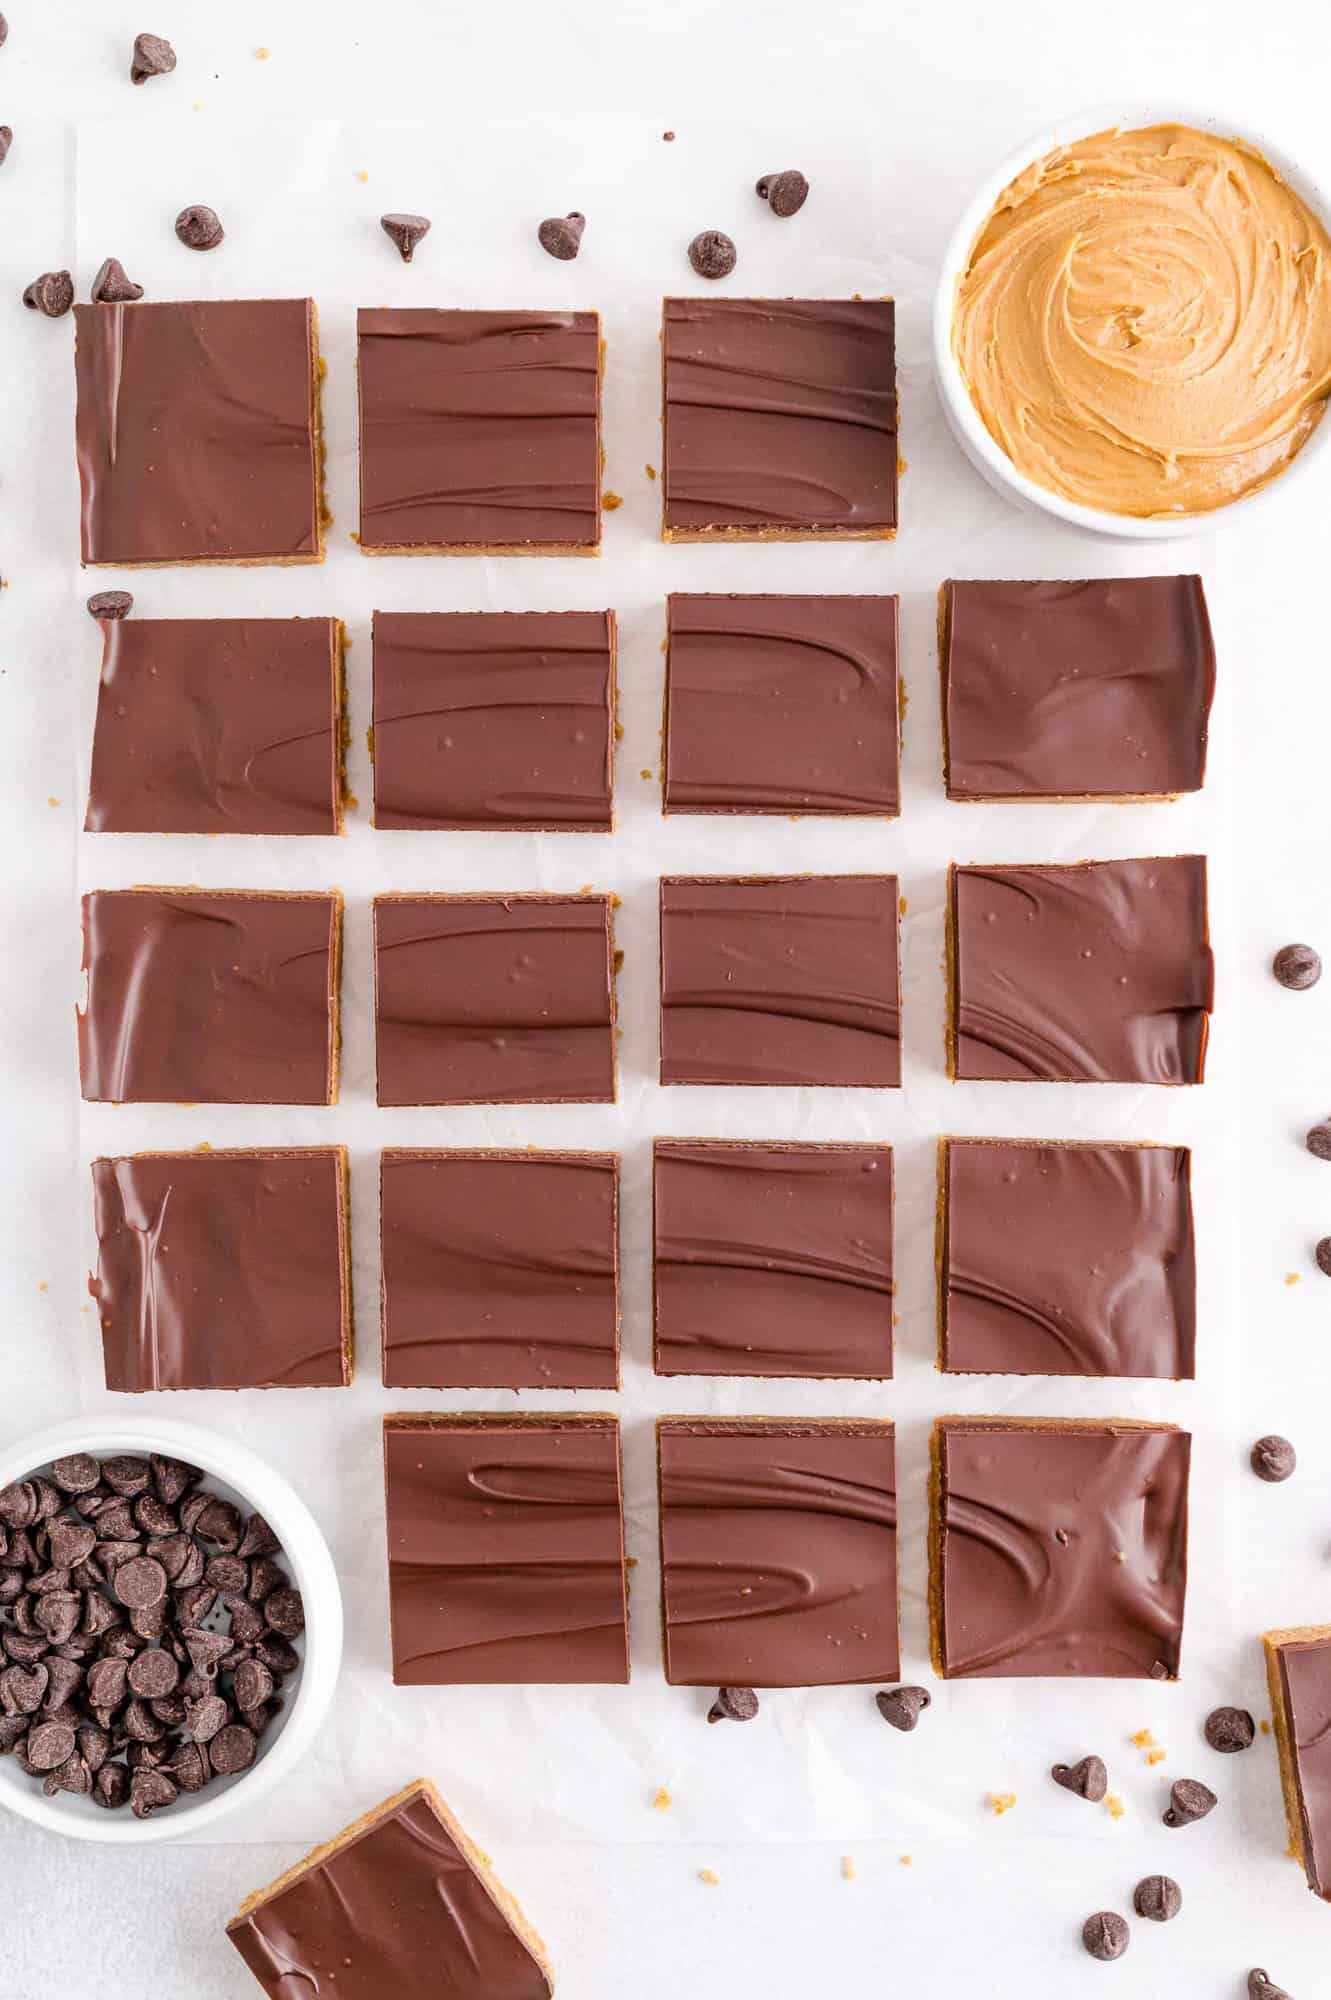
Prep the pan. To get started, line a 9 x13 -inch pan with parchment paper. I like to spray the pan lightly with cooking spray so the paper stays put. Leave wings on at least two sides so you’ll be able to lift the bars out to cut. You’ll find that most bars are much easier to cut into squares when they are on a flat surface and not in the pan.
Crush the graham crackers. Before you get started on this layer, make sure your crackers are crushed so they’ll be all ready to go.
Make the 1st layer. You’ll need a medium to large sauce pan. Add the butter, brown sugar, confectioner’s sugar, peanut butter, vanilla, and salt to the pan. Over medium low heat, cook and stir the mixture until it’s well combined. The butter and peanut butter should be completely melted and the sugars incorporated into the mixture. Remove the pan from the heat and stir in the crumbs.

Chill for 30 minutes. Spoon the contents of the sauce pan into the prepared pan and spread the mixture out evenly. Tap the pan on the counter to smooth everything out. Put the pan into the refrigerator and chill the first layer at least 30 minutes. It doesn’t matter if it goes longer.
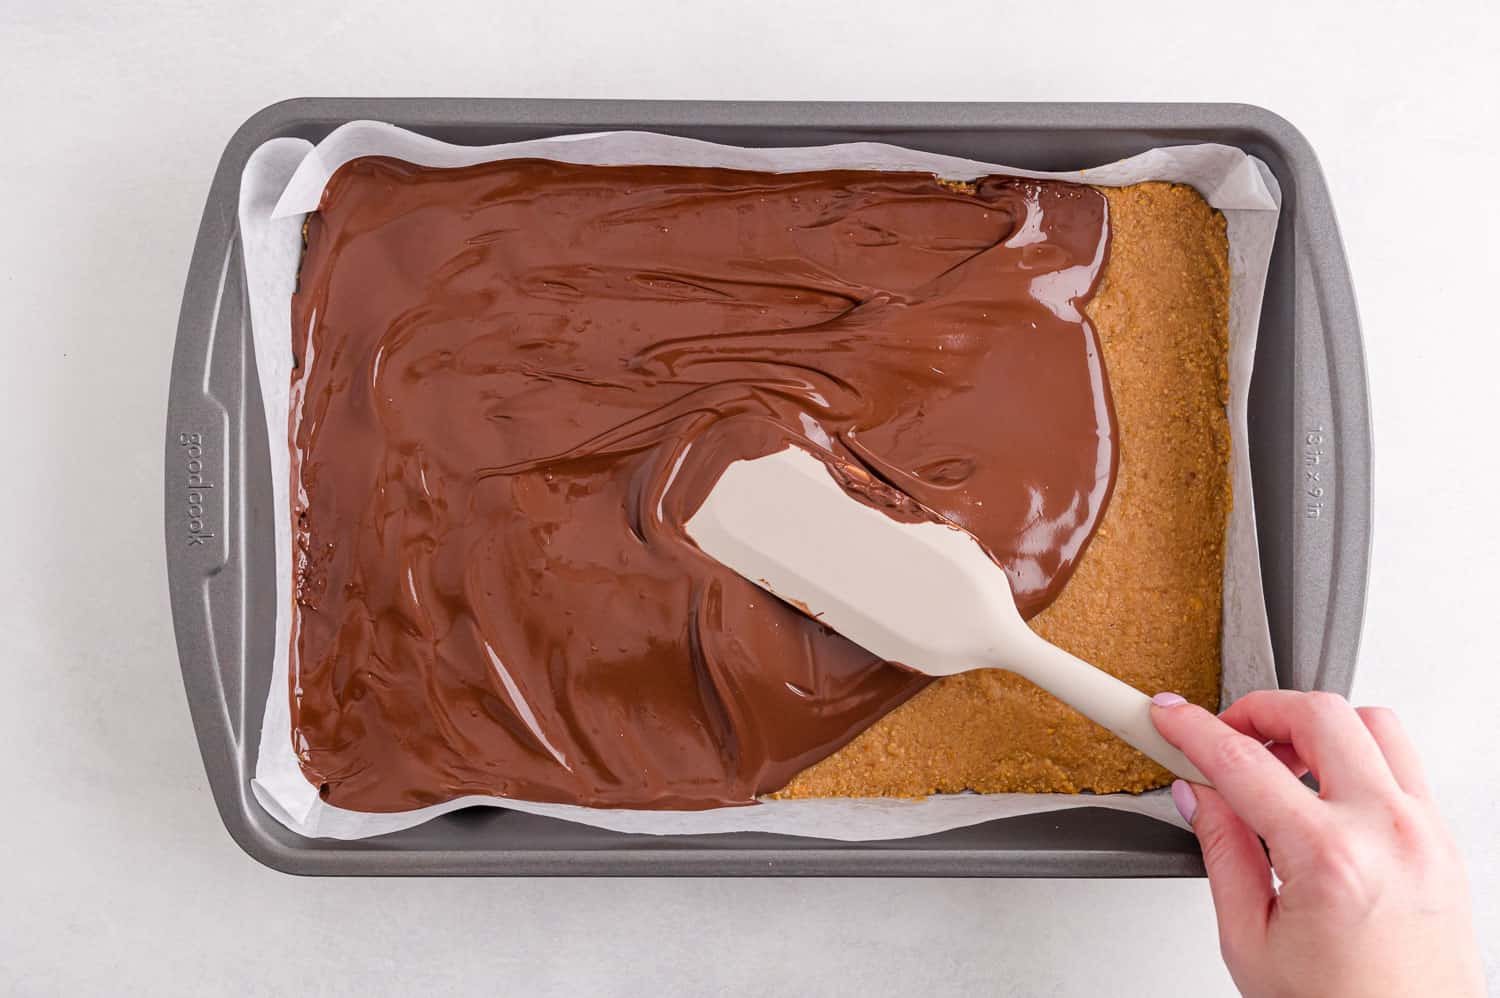
Make the 2nd layer. Melt the chocolate chips with the oil. There are a couple of ways to do this. You can do it in the microwave in a bowl. Heat the chocolate in 15 to 30 second increments, stirring well between each time interval. Don’t overheat the chocolate. Often the residual heat from the bowl will continue to melt the chocolate as you stir it.
If you prefer to melt the chocolate slowly in a double boiler, that’s a perfectly fine way to do it too.
Okay, once your chocolate is melted, remove the pan from the fridge and pour it on the peanut butter layer. Spread it to the edges and again, a sharp tap on the counter will remove any air bubbles and smooth out the chocolate layer.
Refrigerate for 1 hour. Back into the refrigerator it goes. This time you’ll want to chill it for at least an hour. Be patient, my friends! I know you’re dying to try one. Trust me, the bars will be much easier to cut into squares if they are cold.
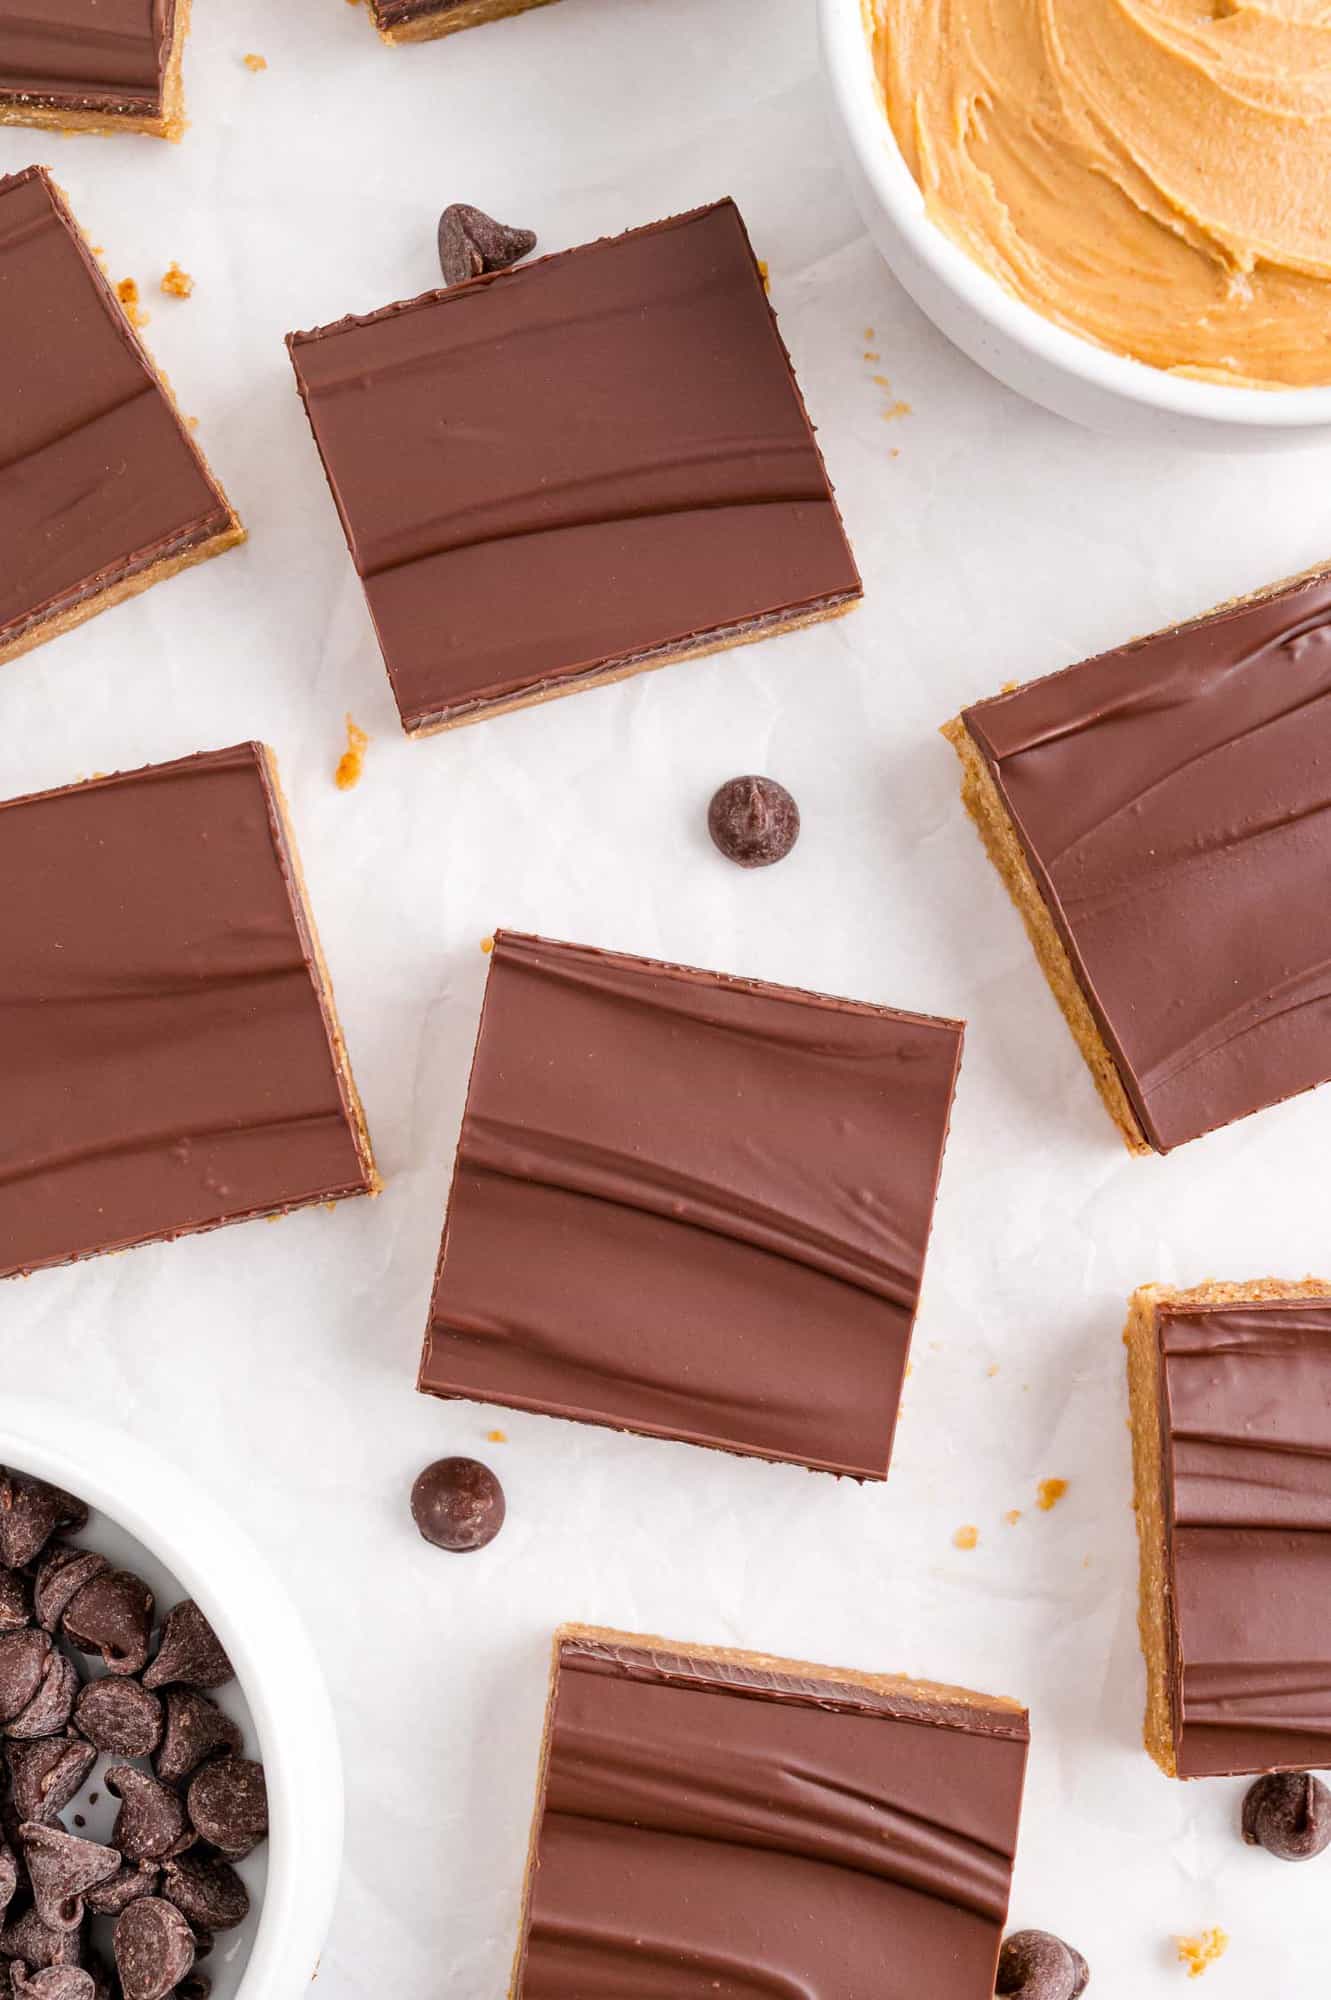
Cut into bars. It’s up to you how large you want to cut the squares. I’ll admit, mine are pretty large. If you want to make them closer to bite-sized, that’s perfectly acceptable but admit it, then you’ll probably want to have at least two.
Make These Peanut Butter Bars Your Own
Since writing this post, my son has been diagnosed with a peanut allergy (amongst other food allergies), and seeing these photos reminds me of how much I loved peanut butter. Thankfully he is able to enjoy sunflower seed butter!
- Nut-free option: If peanuts are a no-no, make these bars with sunflower seed butter (sun butter) instead of peanut butter.
- Use milk chocolate: If you’re not a fan of dark chocolate, substitute milk chocolate for the semi-sweet chocolate chips.
- Add more crunch. Use crunchy peanut butter instead of creamy. Stir chopped peanuts into the chocolate layer or on top.
Refrigerate/Freeze: Once you’ve cut the bars into squares, put them into an airtight container with parchment paper or waxed paper between the layers. They definitely need to be kept in the refrigerator or someplace cool because they get quite soft at room temperature. They will keep for at least a week or up to 3 months in the freezer.
More No-Bake Treats
- No Bake Lemon Berry Cheesecakes — one of my favorites!
- Easy Strawberry Trifle Recipe
- Pink Lemonade No-Bake Mini Cheesecakes
- Classic Rice Krispie Treats (my recipe is the best!)
- Fruity Pebbles Bars — kids love these!
- Chocolate Tart Recipe – NO BAKE – 4 Ingredients!
No Bake Peanut Butter Bars
Ingredients
- 1 cup unsalted butter (2 sticks)
- ¼ cup packed light brown sugar
- 1 ¾ cups powdered sugar (confectioner's sugar)
- 1 cup smooth peanut butter (such as Jif or Skippy)
- 1 teaspoon pure vanilla extract
- pinch of salt
- 2 cups graham cracker crumbs (see note)
- 2 cups semisweet chocolate chips (12 oz. bag)
- 1 teaspoon vegetable oil
Instructions
- Line a 9 × 13 inch pan with parchment paper, leaving wings on the side, and set aside.
- In a saucepan over medium-low heat, combine butter, brown sugar, powdered sugar, peanut butter, vanilla and salt. Stir frequently until butter is melted and all ingredients are combined.1 cup unsalted butter, ¼ cup packed light brown sugar, 1 ¾ cups powdered sugar, 1 cup smooth peanut butter, 1 teaspoon pure vanilla extract, pinch of salt
- Remove from heat and stir in graham cracker crumbs. Spread into prepared pan, tapping down on counter to level it out. Place in fridge for at least 30 minutes.2 cups graham cracker crumbs
- Gently melt chocolate chips and oil in microwave in 30 second intervals, stirring well in between each interval until smooth. Don't overheat the chocolate. Spread the chocolate over the peanut butter mixture, tapping down on the counter again to smooth out and get rid of any air bubbles.2 cups semisweet chocolate chips, 1 teaspoon vegetable oil
- Chill for at least one hour (it's much easier to cut the bars after they have chilled). Lift bars out of pan using parchment paper wings and place on a flat surface. Using a large sharp knife, cut into 24 squares, for pretty generously sized bars. If you prefer smaller bars, cut into 32 squares instead.
Notes
- Graham cracker crumbs: You’ll need approximately 14 whole graham crackers (rectangles) to make 2 cups of crumbs. Make the crumbs using a food processor or put the crackers in a resealable bag and crush them with a rolling pin.
- Possible substitutions: If desired, substitute sunflower butter or crunchy peanut butter for the creamy peanut butter. Milk chocolate chips can be substituted for the semi-sweet chips.
- Storage: Store leftover bars in the refrigerator or freezer in an airtight container with parchment or waxed paper between layers. They’ll keep for up to 3 months in the freezer.
Video
Nutrition
Nutrition information is automatically calculated, so should only be used as an approximation.


OMG! These are so good, I made them after lunch and the smell was so good my neighbor knocked on my door to ask what I was making.
Looks like I’ll be making these on a regular basis. They are so good, my husband and oldest son are devouring them!!!!!!!!!
Yes! SO glad you liked them. I need to make them again but that’s pretty much a guarantee I’ll gain ten pounds. ;)
I made these last night…they are DANGEROUSLY good! Sending them in with the hubs to work so they’re out of the house!!!
My husband saw the photo for these bars while I was scrolling through Facebook. “I could eat some of those right now,” he commented. So I whipped up a batch. They were delicious! :D
I love that! Thanks for letting me know :)
Oooooo, Buckeye Bars! My favorite growing up, though we didn’t add the graham cracker crumbs. I have no doubt they would only enhance the bars. :)
i used to make these all the time a few years ago, and stopped for obvious reasons. it’s been way too long… and frozen was my favorite way to eat these too!
I all too often put things in the freezer to hide them from myself, and the hallmark of a good recipe is if I risk tooth-breaking to eat it straight. These would pose a SERIOUS risk. But one I’m willing to take.
I think I have died and gone to heaven. Reese’s peanut butter cups are my absolute favorite thing in the world. And you know I will be the one eating them out of the freezer breaking my teeth. So if you see someone on the street with chocolate all over their face and broken in half teeth, you are probably seeing me :)
haha! Your comment made my day!
These would be dangerous at my house! We’d devour them in no time!
yum