
Recipe Overview
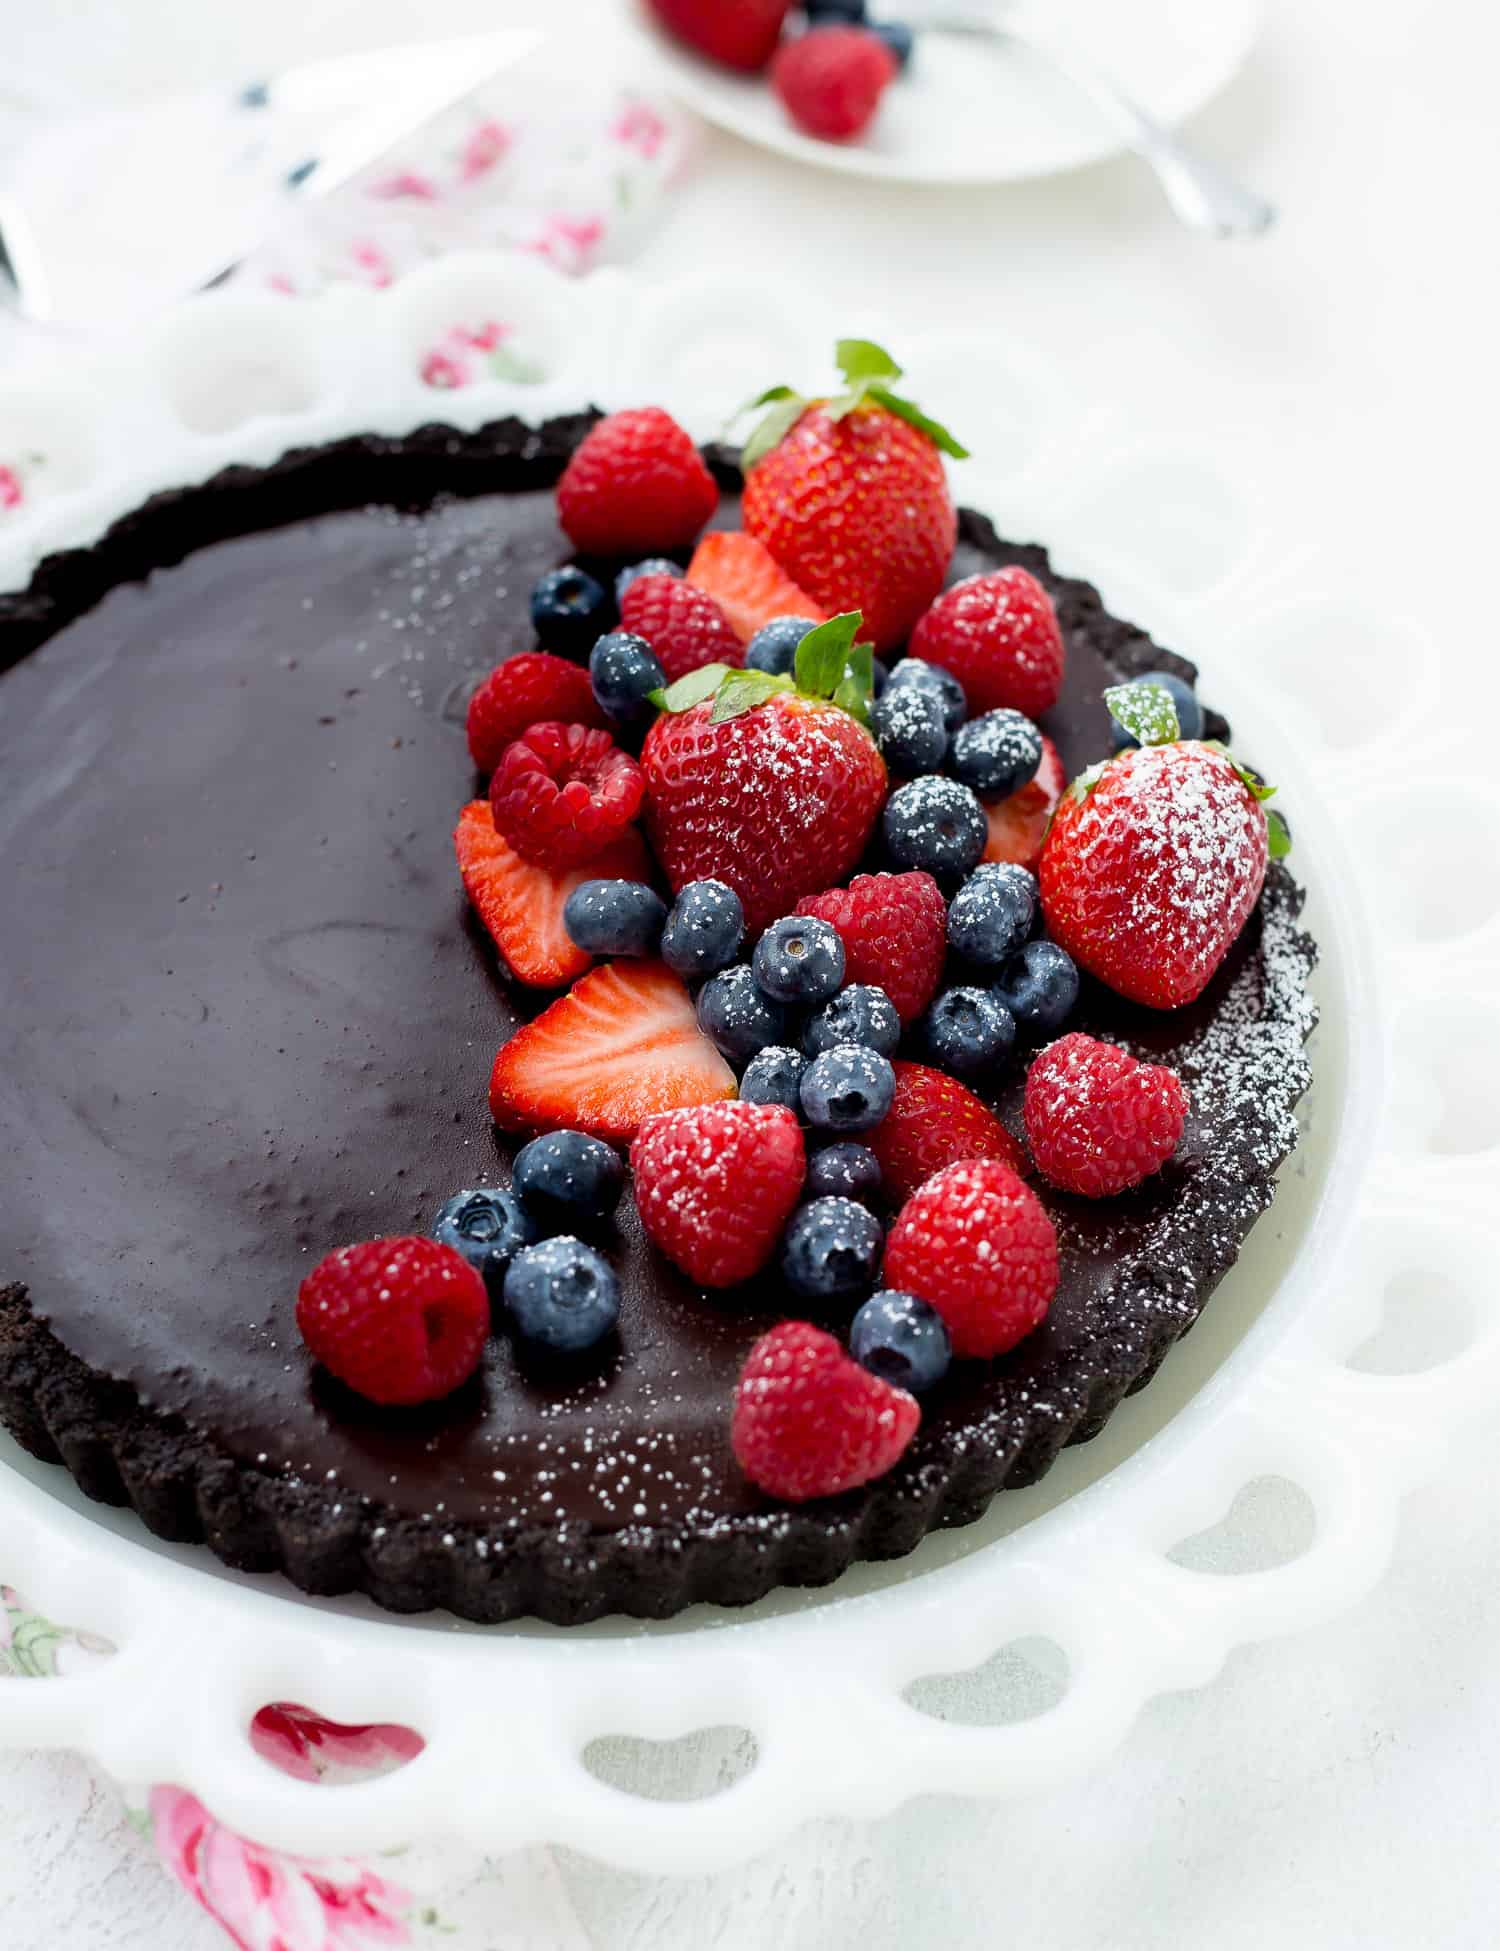
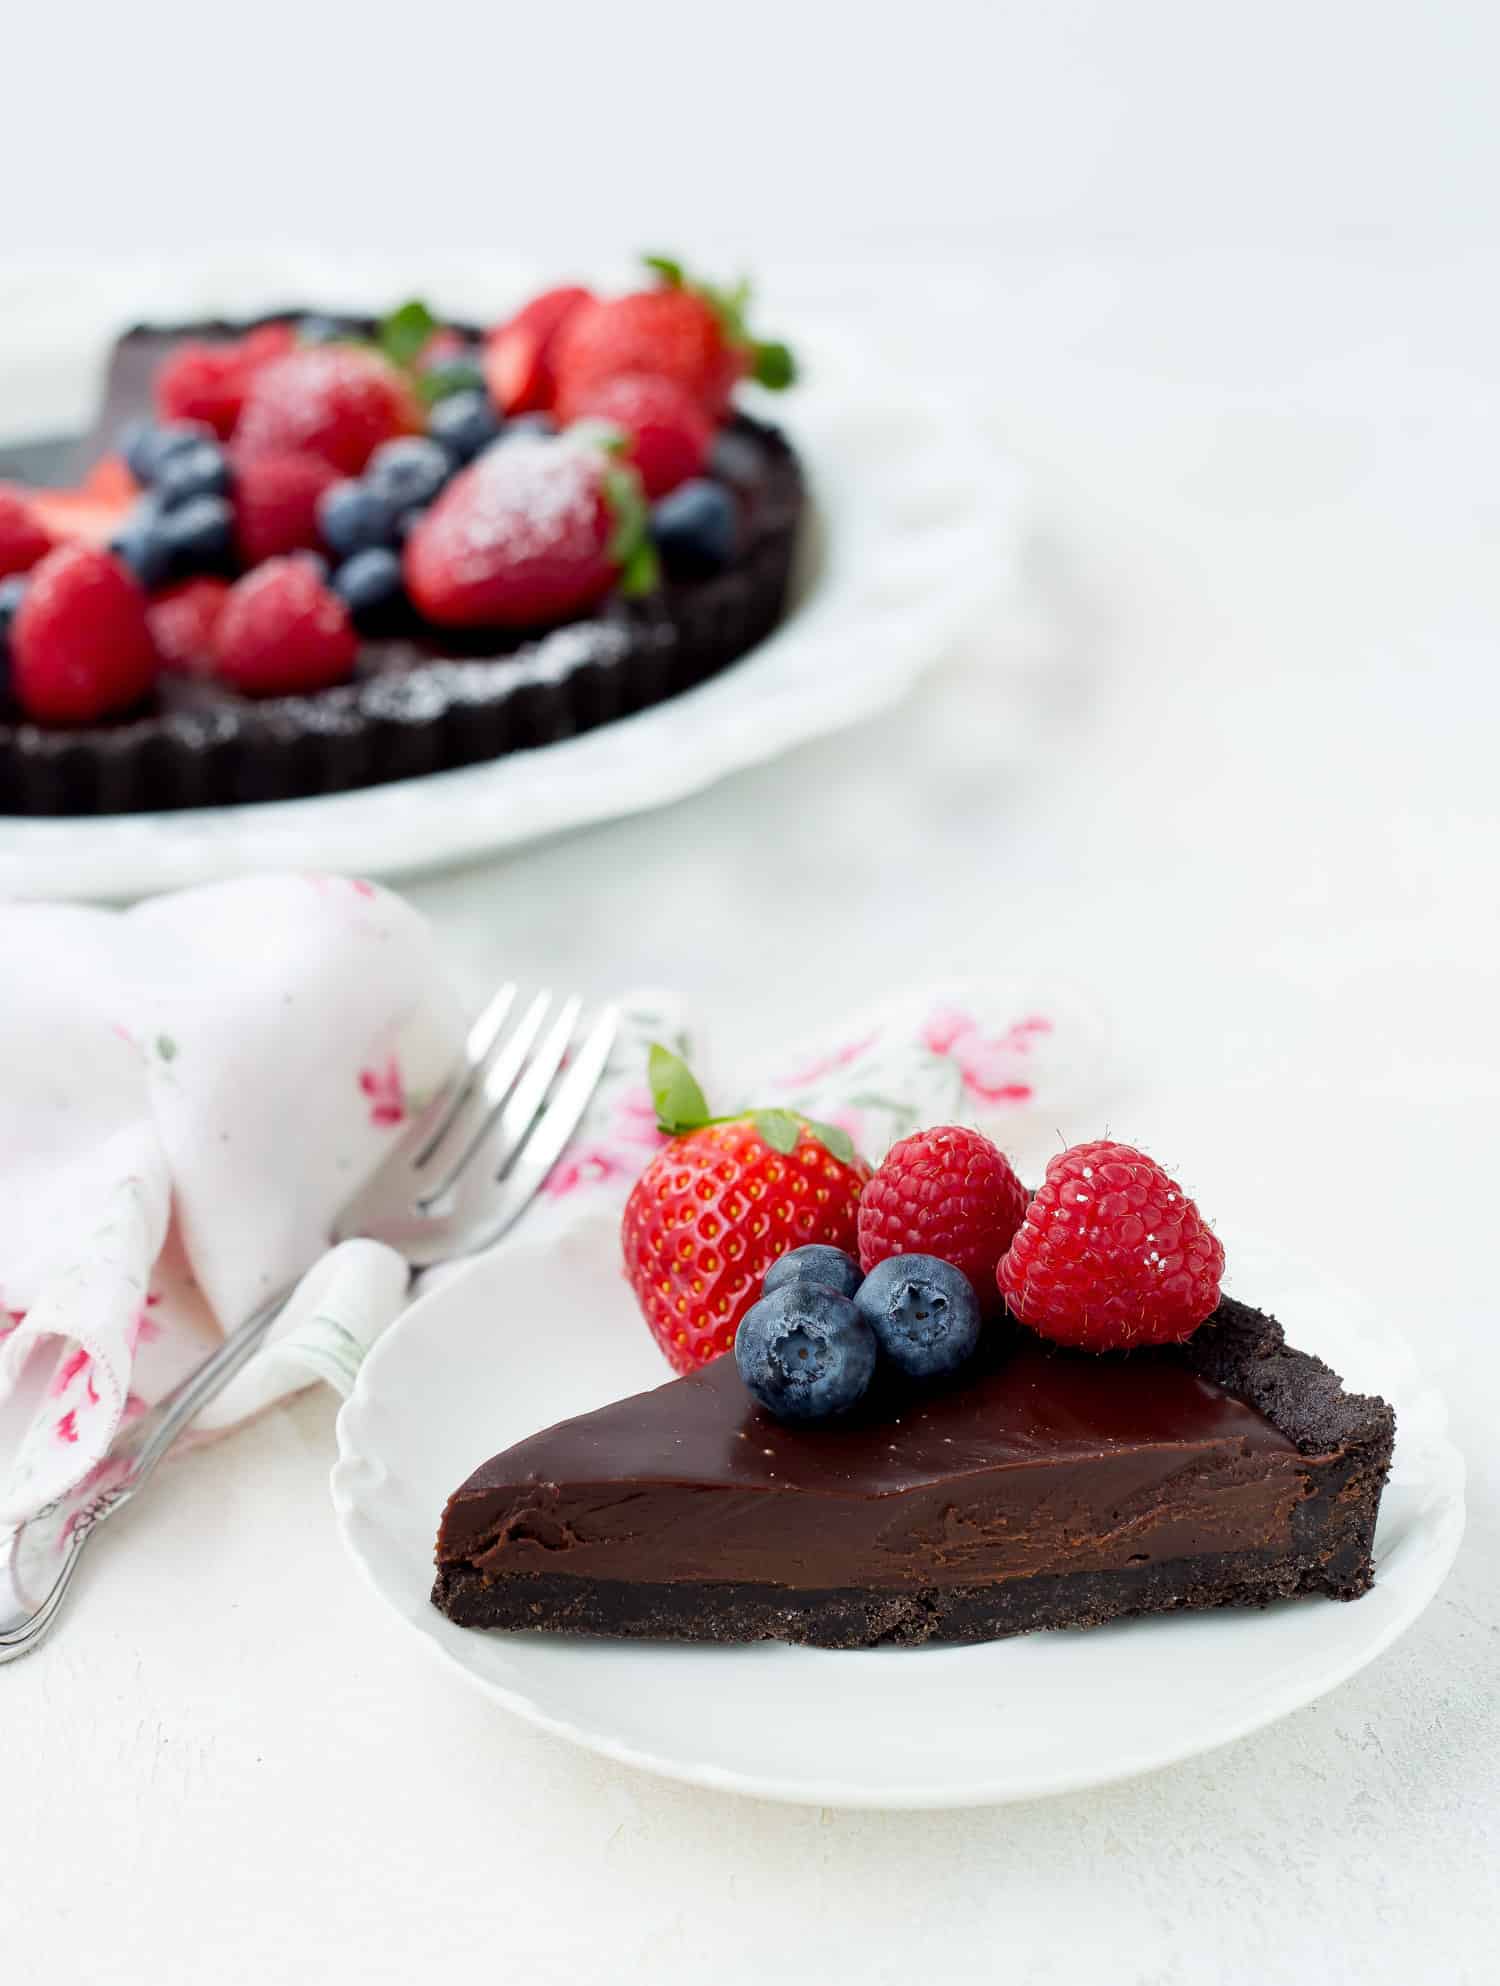
Why you’ll love it: This no-bake chocolate tart recipe combines the richness of a crunchy chocolate crust with a silky ganache filling, topped with fresh berries. This chocolate tart dessert looks so fancy but it is seriously easy to make and it’s amazingly delicious.
How long it takes: 15 minutes to prep, 3 hours to chill
Equipment you’ll need: food processor, tart pan with removable sides, small sauce pan
Servings: 12

Best Chocolate Dessert
A chocolate tart recipe that is no bake and only uses four ingredients? It may sound too good to be true, but it is indeed true and my husband even deemed this the best dessert he’s ever had!
It’s a smooth, silky, rich chocolate tart that’s so easy to make!
About this chocolate tart
Only four ingredients! Five, if you feel the need to count the berries but they’re technically optional so I’m not counting them. The short ingredient list makes this recipe an automatic win: butter, Oreo cookies, heavy cream, and chocolate chips.
No bake. You don’t even have to turn your oven on to make this dessert which makes it a perfect treat for summer.
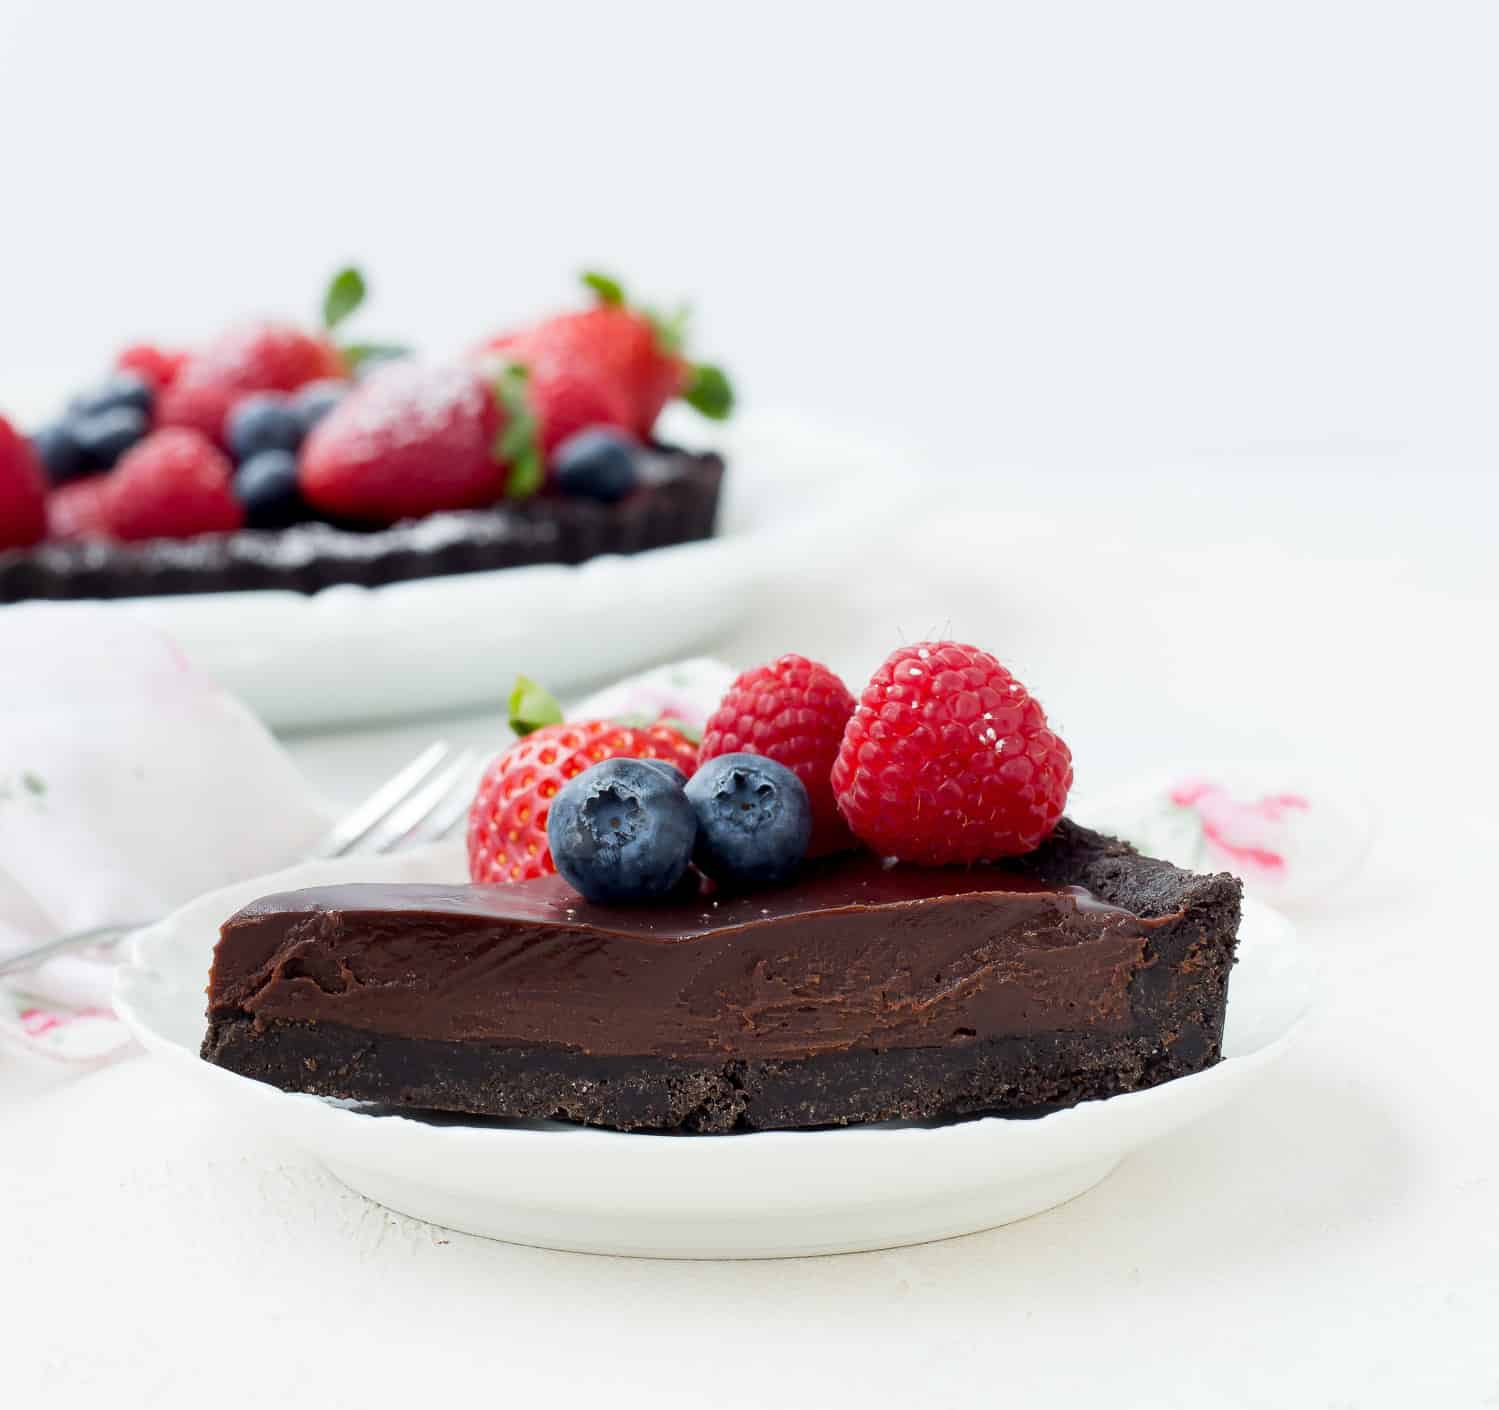
Rich and decadent. I never claimed this was healthy, right? It’s definitely a treat. It’s so rich and chocolatey that even a small sliver is unbelievably satisfying. I feel the same way about chocolate peanut butter pie. High in calories, but so worth it! I’d take those calories over ten low-calorie “desserts” any day.
“SOOOO GOOD! My husband’s favorite dessert of all time! I also took them to our friends and they were arguing over who got to eat the last slice. Thank you for this amazing recipe!!!
Ingredient Notes
- Butter: Use unsalted butter. You’ll need one stick which is 8 tablespoons, or a half cup.
- Oreo Cookies: Look for regular Oreos, not Double Stuf or anything fancy. One 14.3 oz. package has about 36 cookies. This recipe calls for 32 cookies so you’ll just have a few left over.
- Heavy Cream: You really do have to use heavy cream. Don’t substitute anything else, including whipping cream or half-and-half. They just don’t work well.
- Chocolate Chips: Choose semi-sweet or dark chocolate chips for the best flavor. Good quality chocolate chips make a difference.
How To Make This Chocolate Tart
I love this recipe because it looks and tastes SO impressive but it’s really quite easy to make. Here we go!
- Process Oreos in a food processor until they are fine crumbs. Pour in butter and pulse until butter is evenly distributed.
- Press cookie crumbs into the bottom and sides of a 9 inch tart pan (no need to grease it).
- Prepare ganache by warming cream and pouring over chocolate. After a couple of minutes, start stirring until it forms a smooth silky ganache.
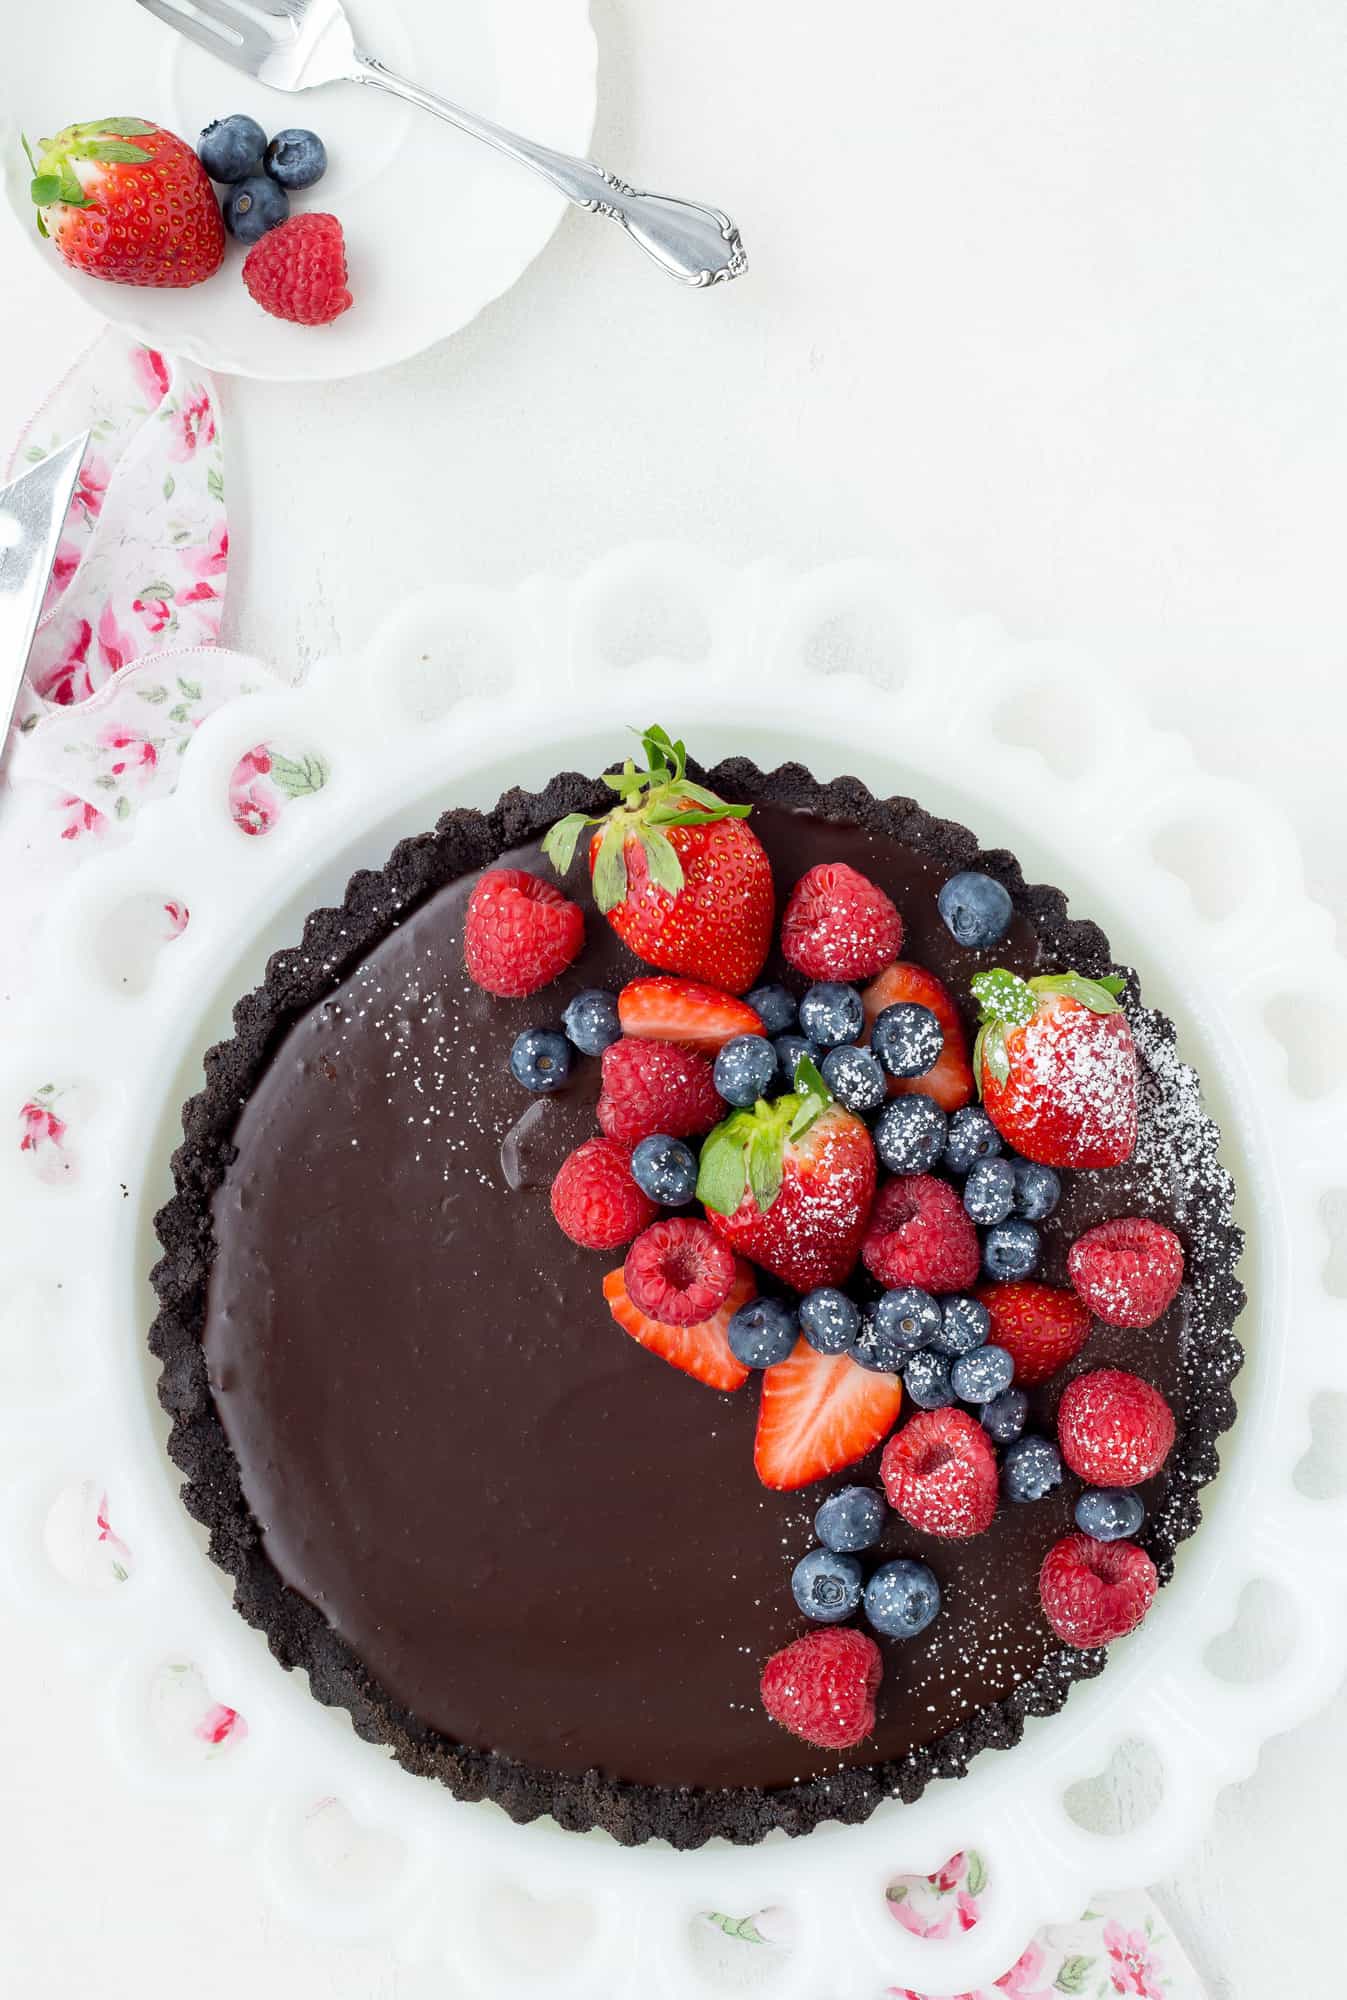
- Pour ganache into prepared crust and refrigerate for at least three hours.
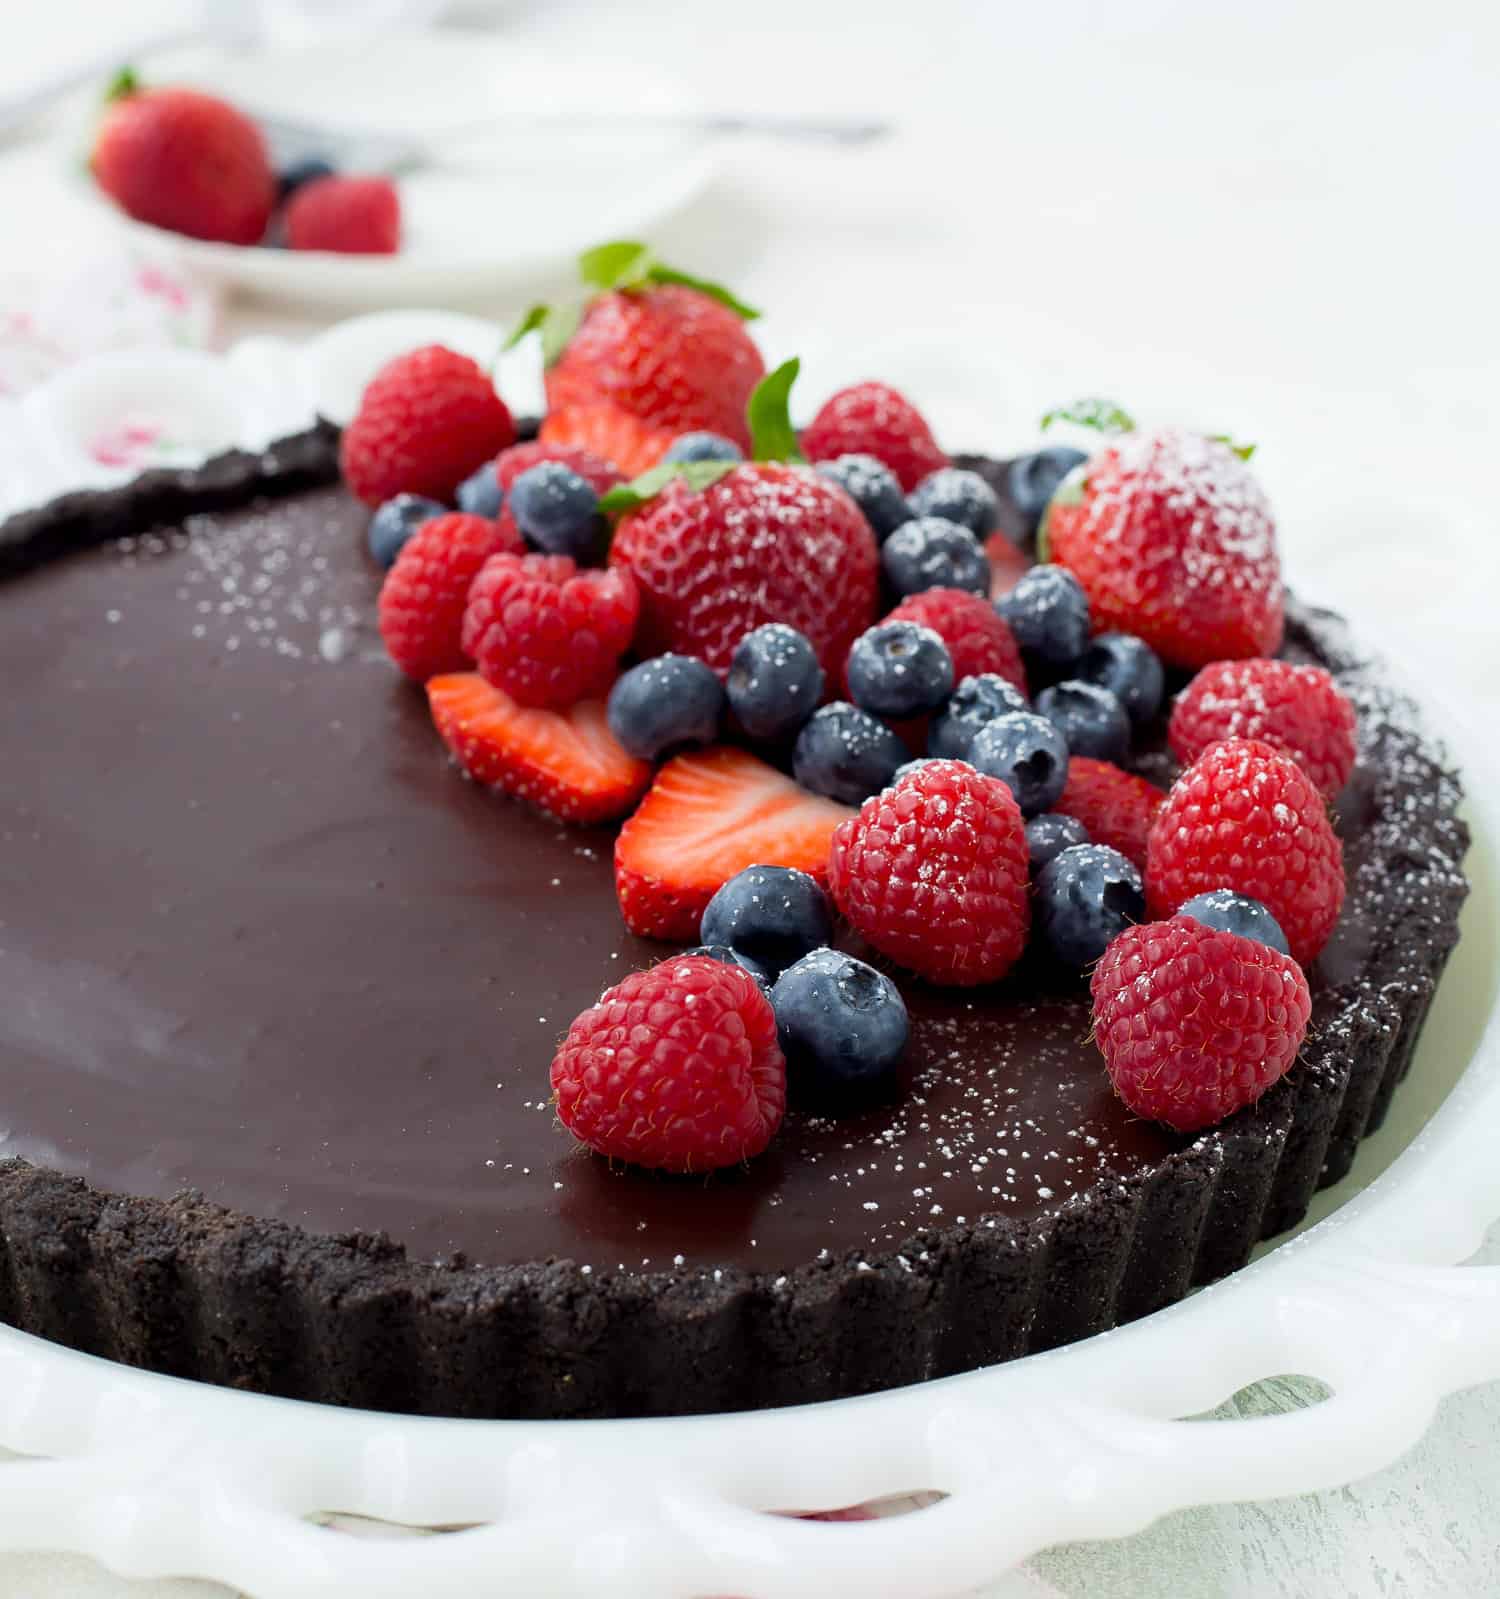
- Right before serving, top with berries (make sure they are dry) and powdered sugar, and enjoy!
Recipe Variations
- Use a different pan. For the photos, a 9-inch tart pan was used but you can make individual mini chocolate tarts using 4 or 5-inch tart pans like these. I haven’t tested this personally but I’m pretty sure it would yield 4 small tarts. You could also make it into a rectangular tart, and how fun would this heart shaped one be?
- Make it mocha. Add a touch of espresso powder to give the chocolate another dimension of flavor. Use ¾ teaspoon for a just little intrigue and 1 tablespoon for a solid mocha flavor.
- Use a flavored Oreo. I like the classic chocolate, but there are so many different Oreos to choose from. If you’re a peanut butter lover, peanut butter Oreos could be fun!
- Top with whipped cream. Very lightly sweetened homemade whipped cream is fantastic on this tart. You can never have enough heavy cream in your life, right?
Helpful Tips
- Use a measuring cup with straight sides to press the Oreos into the tart pan. You can use your hands but a measuring cup will yield a really pretty result and it makes it way easier.
- Don’t boil the cream! When it starts to form tiny bubbles around the edges of the pan, it’s hot enough.
- Wait 2 minutes before stirring after pouring the cream over the chocolate. I know, it’s SO tempting to stir it early and watch the magic happen as it transforms into ganache, but waiting will give you a better result with less frustration.
- Add berries immediately before serving and make sure they aren’t wet. Water and/or juice from the berries will puddle and discolor the top of the tart and it just doesn’t look as attractive.
- Garnish with powdered sugar. Sprinkle on just a touch of powdered sugar for a really polished and pretty final look. I use a mini fine-mesh strainer but you could also use a fancy little sifter made just for this task. I don’t make enough desserts to have a separate tool just for dusting things with powdered sugar, but it is a fun gadget!
This tart can be made a day ahead, perfect for when you’re having guests. It will keep up to four days in the refrigerator. Make sure it’s wrapped well with foil or plastic wrap.
More Chocolate Recipes

Chocolate Tart Recipe – NO BAKE – 4 Ingredients!

Ingredients
- 32 Oreo cookies
- ½ cup (1 stick) unsalted butter, melted
- 2 cups semisweet or dark chocolate chips (12 ounce bag)
- 1 cup heavy cream
- mixed berries of choice, optional
- powdered sugar for dusting, optional
Instructions
- Place Oreos into a food processor and blend until mixture resembles fine crumbs. Pour melted butter over the crushed cookies. Pulse until the butter is evenly distributed.32 Oreo cookies, ½ cup (1 stick) unsalted butter, melted
- Press cookie mixture evenly into the bottom and sides of a 9 inch tart pan with removable sides. Use the back of a measuring cup and your fingers. Place in fridge or freezer while you prepare the filling.
- Place chocolate chips in a medium sized bowl. In a small saucepan, heat the cream over medium-low heat until tiny bubbles just start to form around the edges of the pan. Do not boil or even simmer. Remove from heat and pour warm cream over chocolate chips. Leave it alone for 2 minutes and then stir until all the cream is blended with the chocolate.2 cups semisweet or dark chocolate chips, 1 cup heavy cream
- Pour the ganache filling over the crust and return it to the fridge. Refrigerate for at least 3 hours or overnight.
- Before serving, pop out the sides of the tart pan and place tart on a decorative flat plate. Top with berries and sprinkle with powdered sugar. Cut into 12 small slices and serve!
Notes
- Helpful tip #1: Use a measuring cup with straight sides to press the Oreos into the tart pan. You can use your hands, but a measuring cup will yield a really pretty result and it makes it way easier.
- Helpful tip #2: Don’t boil the cream! When it starts to form tiny bubbles around the edges of the pan, it’s hot enough.
- Helpful tip #3: Don’t stir the ganache for two minutes after pouring the cream over the chocolate. I know, it’s SO tempting to stir it early and watch the magic happen as it transforms into ganache, but waiting will give you a better result with less frustration.
- Helpful tip #4: Add berries immediately before serving and make sure they aren’t wet. The water/juice from the berries discolors the ganache. It will taste and look better if you wait until just before serving.
- Finishing touch: Sprinkle a dusting of powdered sugar over each slice for a really polished, pretty final look. I use a mini fine-mesh strainer but you could also use a fancy little sifter made just for this task.
Video
Nutrition
Nutrition information is automatically calculated, so should only be used as an approximation.


did you try freezing it?
I have not tried freezing this, sorry!
this is a truly fabulous recipe… i doubled it and had no issues at all… made mini tarts in muffin tins…
Question… can the finished product be frozen???
thanks
So glad you liked it, thank you for leaving a review! I haven’t tried freezing this recipe, sorry.
This was so easy to throw together. I did have to put my bowl of chocolate and cream in a bain Marie to melt the chocolate after waiting the 2 mins and stirring. Worked like a charm. I am using caramel as the topping but can’t wait to eat it tonight. I made up the day before and stored in an air tight container.
Hope you loved it!