Recipe Overview
Why you’ll love it: Meltingly tender and oh so sweet, caramelized onions are a special treat. Learn how to caramelize onions yourself! It’s easy and you only need a few ingredients. This recipe makes a pretty large batch; caramelized onions can be refrigerated or frozen for later use.
How long it takes: 15 minutes to prep, approx. 1½ hours to cook
Equipment you’ll need: large heavy pan with a lid
Servings: makes 2 cups
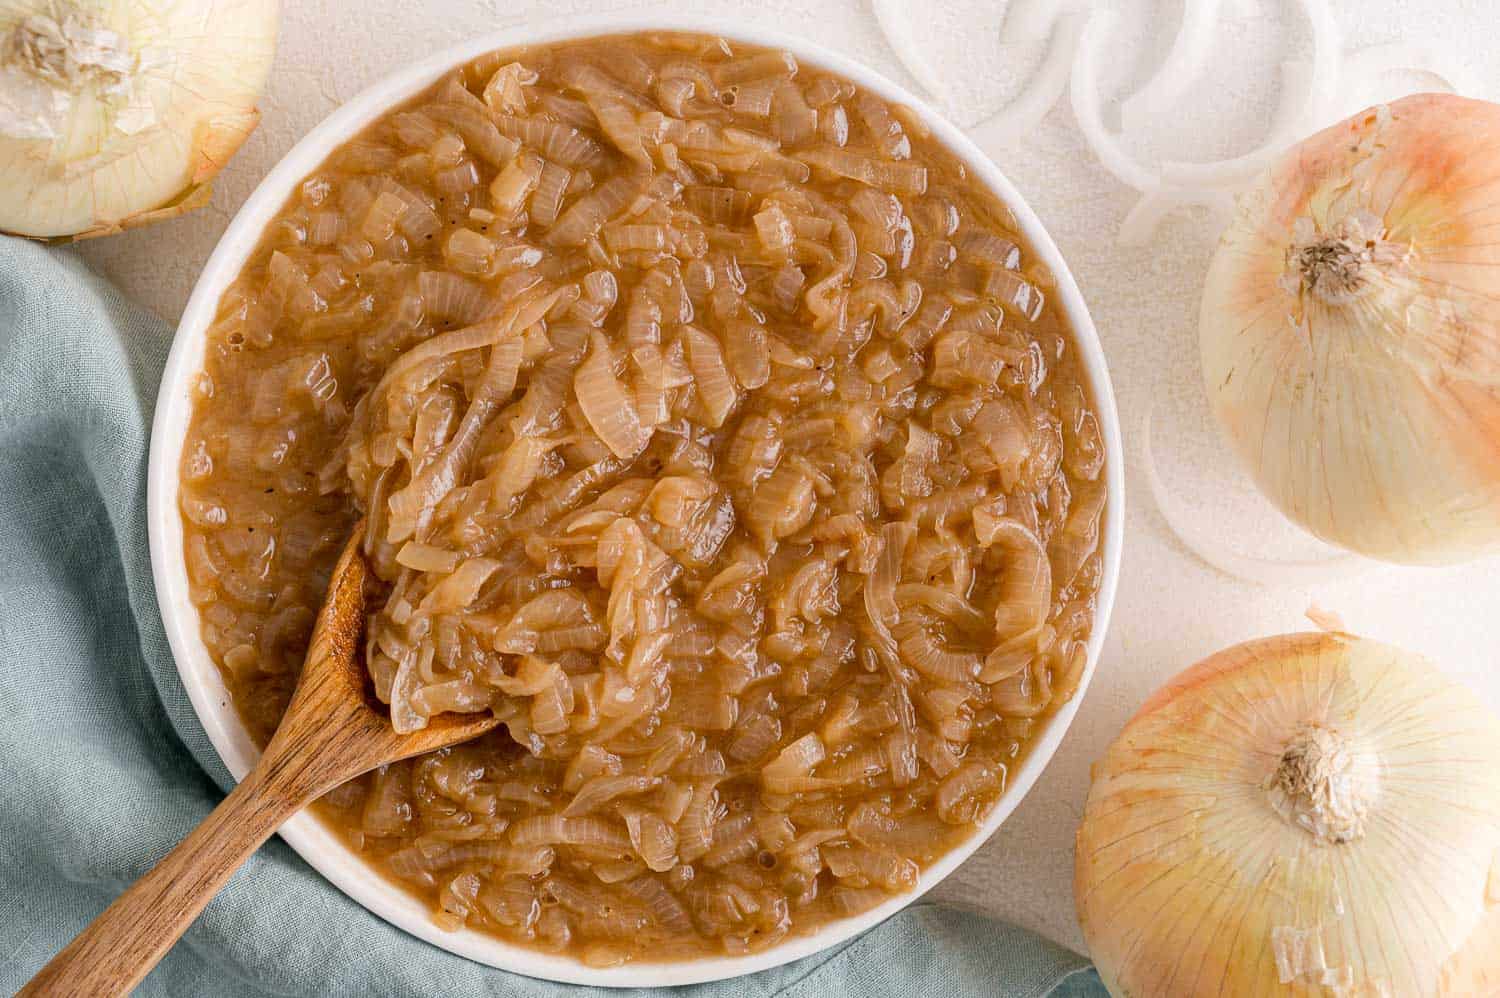
Delectable Caramelized Onions
A magical transformation. By some mysterious alchemy, crisp raw onions, pungently sharp in flavor, are transformed into a jammy, sweet, and oh-so-delectable treat. They really hardly taste like onions at all but more like, well, caramel!
Versatile topping. Caramelized onions are so good you can eat them by the spoonful. Pile them on burgers, grilled steak, or pork chops, and you’ll wish you had more. Add them to a charcuterie board; they are fabulous with cheese and crackers. Serve them for breakfast, lunch, and dinner.
It’s easy! Are you in love with caramelized onions but afraid of making your own? Well, I’m here to assure you that it’s easy to do. There’s nothing mysterious about it and you won’t need magical skills. It does takes some time but a side benefit is that you’ll be able to enjoy the wonderful aroma while they are slow cooking.
Is There A Quicker Way?
You will be able to find recipes that claim to make caramelized onions in just 15 minutes over high heat with lots of added water to keep them from burning. Trust me, they won’t be the same. If you’re looking for a faster option, try my sautéed onions. They’re not as soft and sweet as caramelized onions but they work perfectly as a side or topping.
Ingredient Notes
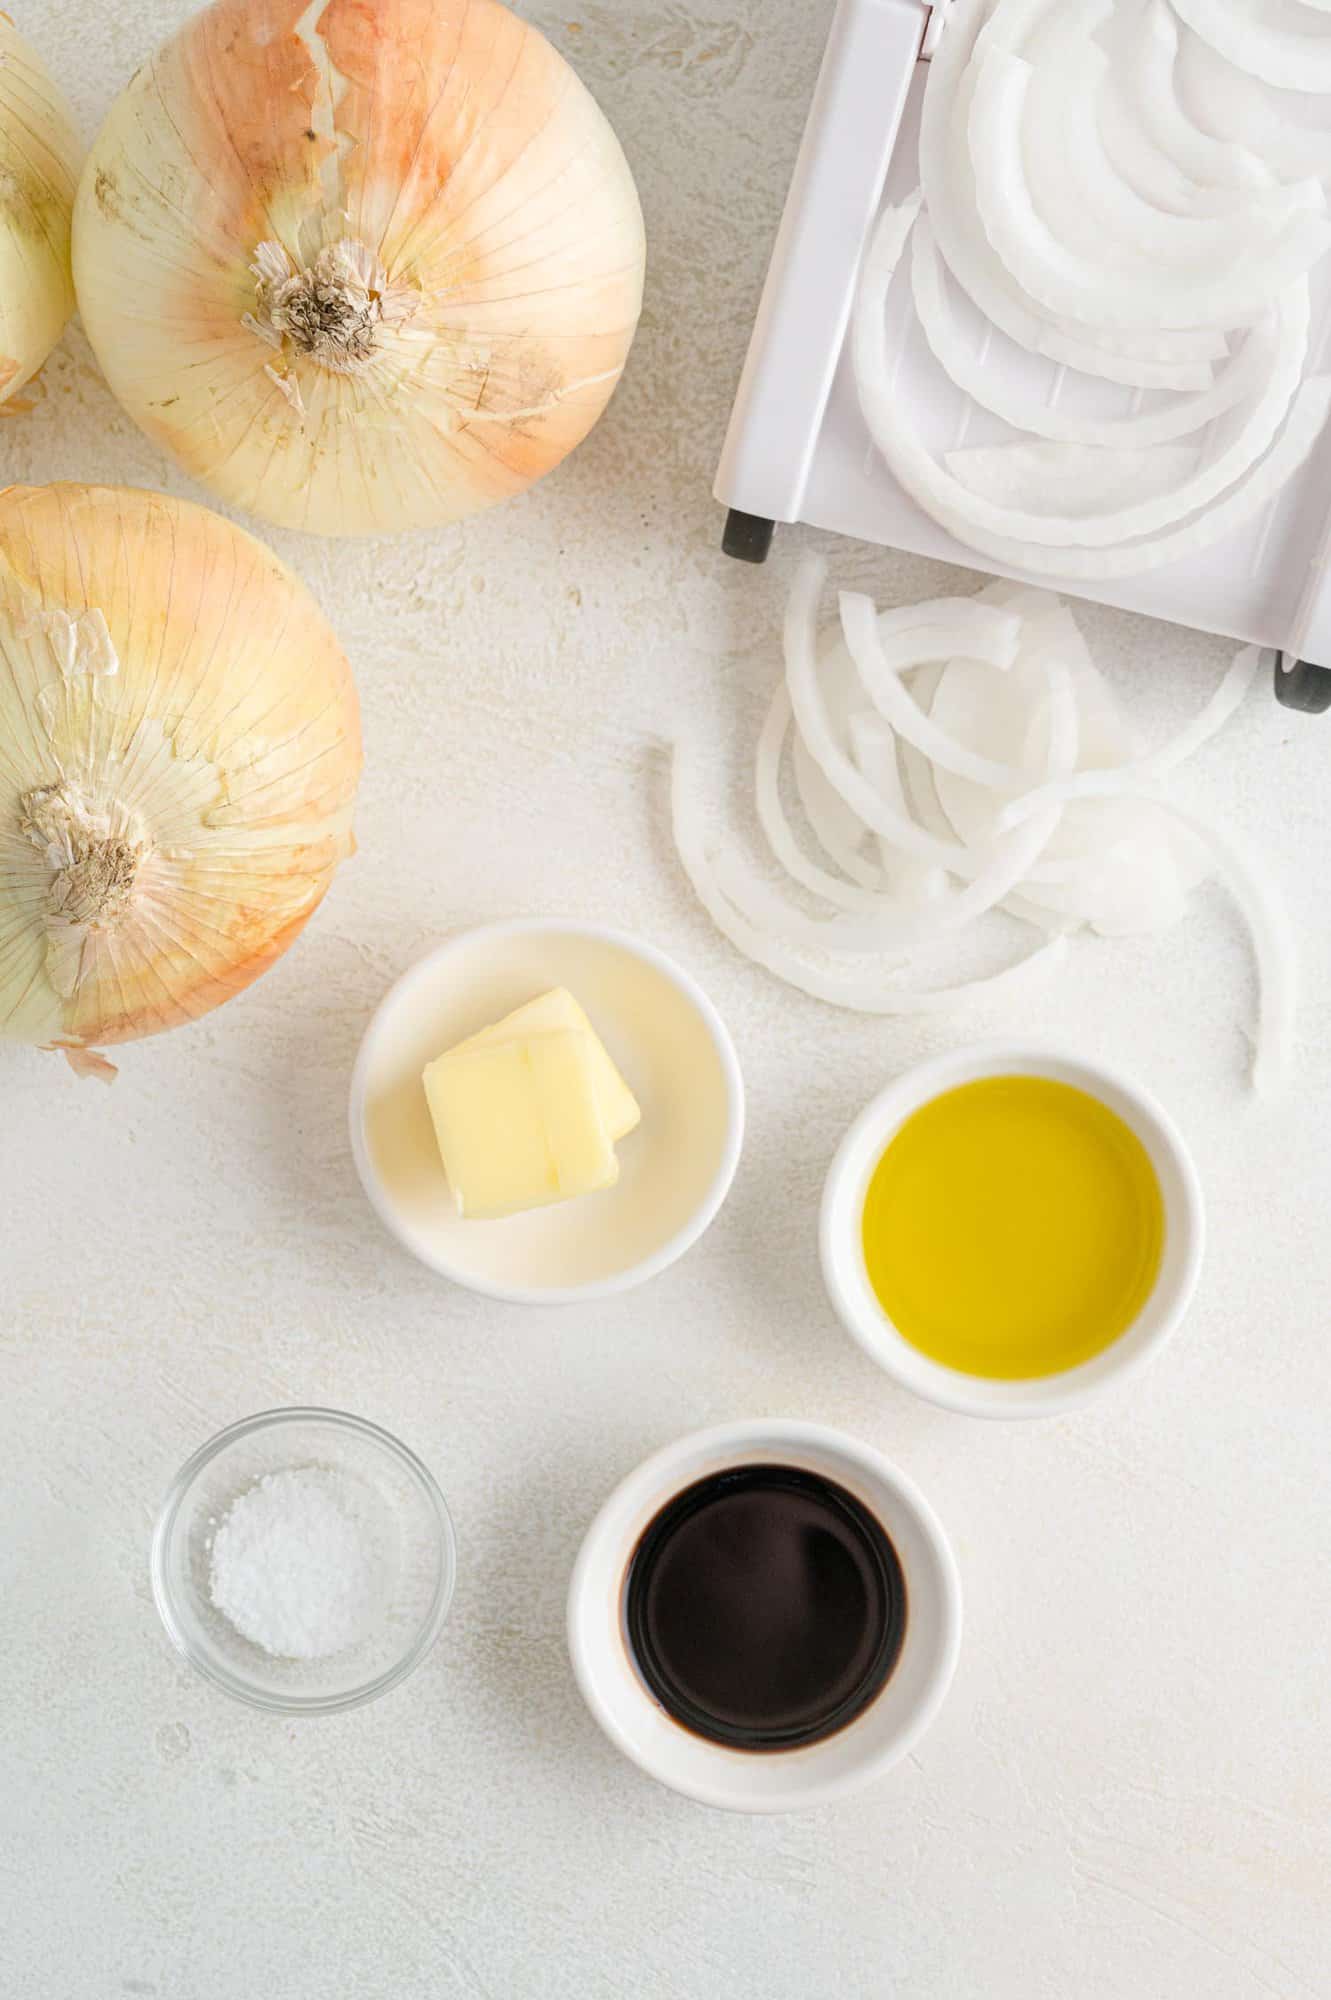
- Onions: Since the onions cook down considerably, you’ll need to begin with a lot of onions. Look for large onions, about 12 to 14 ounces each, and buy 6 of them. If the onions are smaller in size, buy more of them so that you end up with roughly the same amount (about 5 pounds).
What Variety Of Onion Is Best?
All types of onions can be caramelized and the flavor of the caramelized onions will vary depending on which variety you choose. I usually choose a sweet onion, like Vidalia, because it’s sweeter when caramelized, too. Yellow, white, or red onions are perfectly acceptable, or even shallots, although you would need a lot of them!
- Olive Oil: The oil and butter combination is used to sauté the onions in the first step of the cooking process.
- Butter: Choose unsalted butter for cooking the onions. If you prefer, skip the butter and substitute more olive oil, but we love the flavor the butter adds.
- Salt: Use kosher salt, if possible.
- Balsamic Vinegar, optional: The vinegar enhances the flavor of the onions and deepens the color.

Looking For A Good Pan?
You need a very large, heavy pan with a lid to caramelize onions. An enamel coated cast iron Dutch oven is ideal. Mine is similar to this one and I use it often. It’s great for soups and stews, baking bread, or roasting larger cuts of meat. They can be a little pricey, but last a lifetime.
How to make Caramelized Onions
Prep the onions. Remove the papery outer skin of each onion and rinse the onion to remove any dirt or dust.
Cut the onions vertically, from the stem end to the blossom end. Position each half, cut side down, on your cutting board. Using a sharp knife, slice the onion into half moons, about a quarter inch thick. Discard the ends.
Slicing Onions Without Tears
Does the thought of slicing all those onions make your eyes sting before you even get started? Here’s a few tips that may help.- Use a very sharp knife. A dull knife crushes the onion, releasing more of the tear-causing compound.
- Make sure your kitchen is well-ventilated. A fan is helpful.
- Refrigerate the onions a half hour before slicing them, or freeze them for 15 minutes.
- Wear your contact lenses if you have them. It really does help.
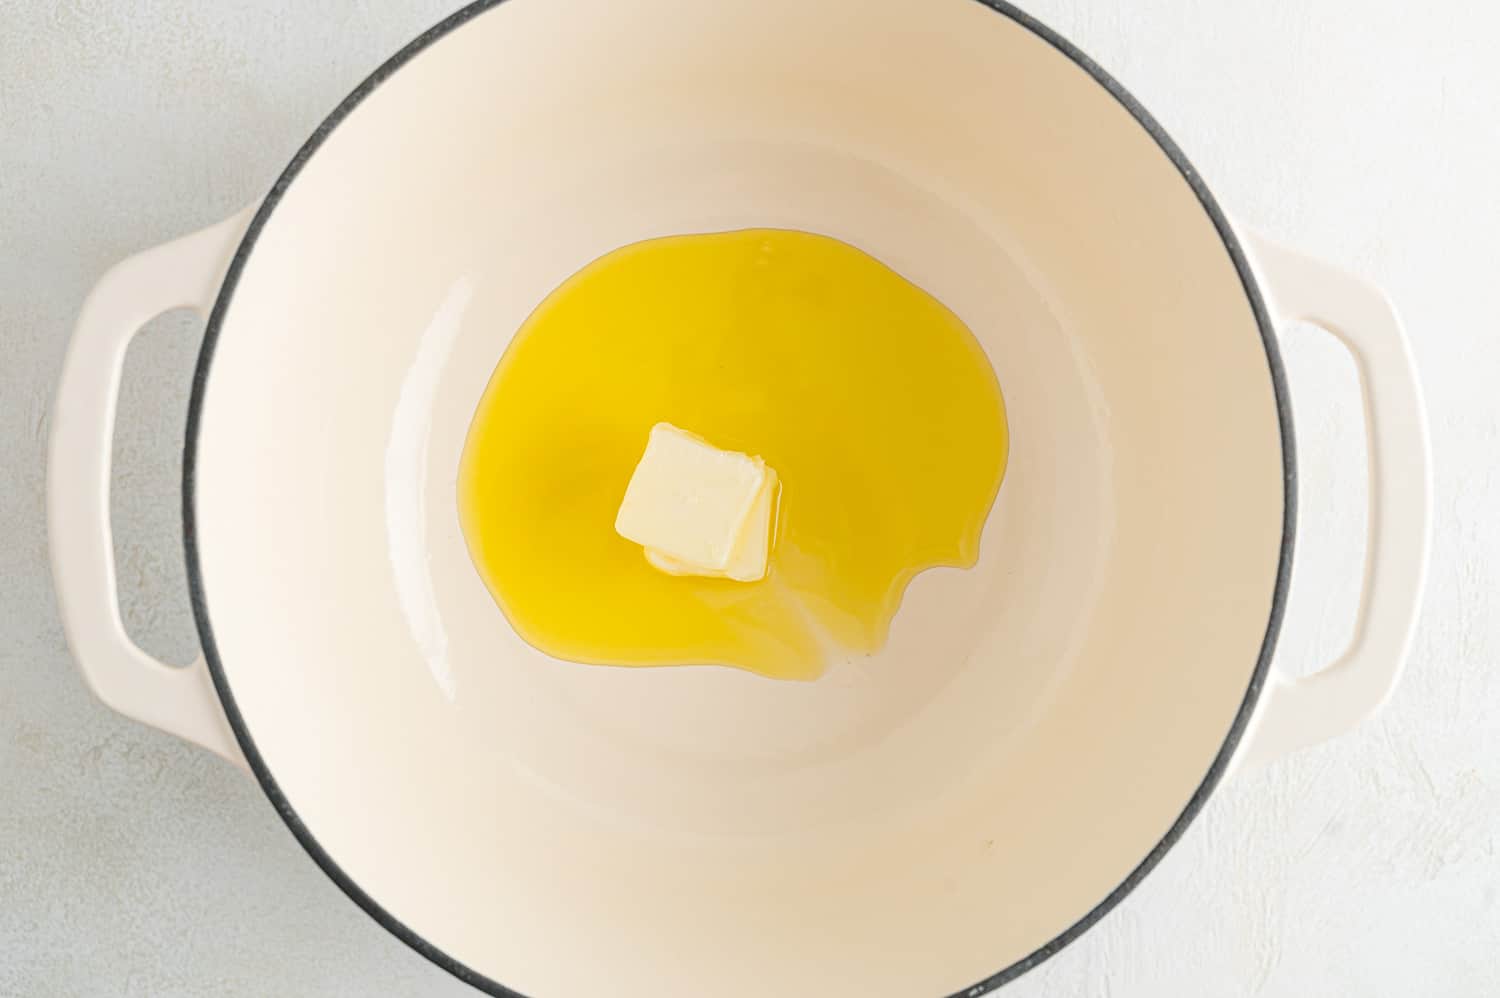
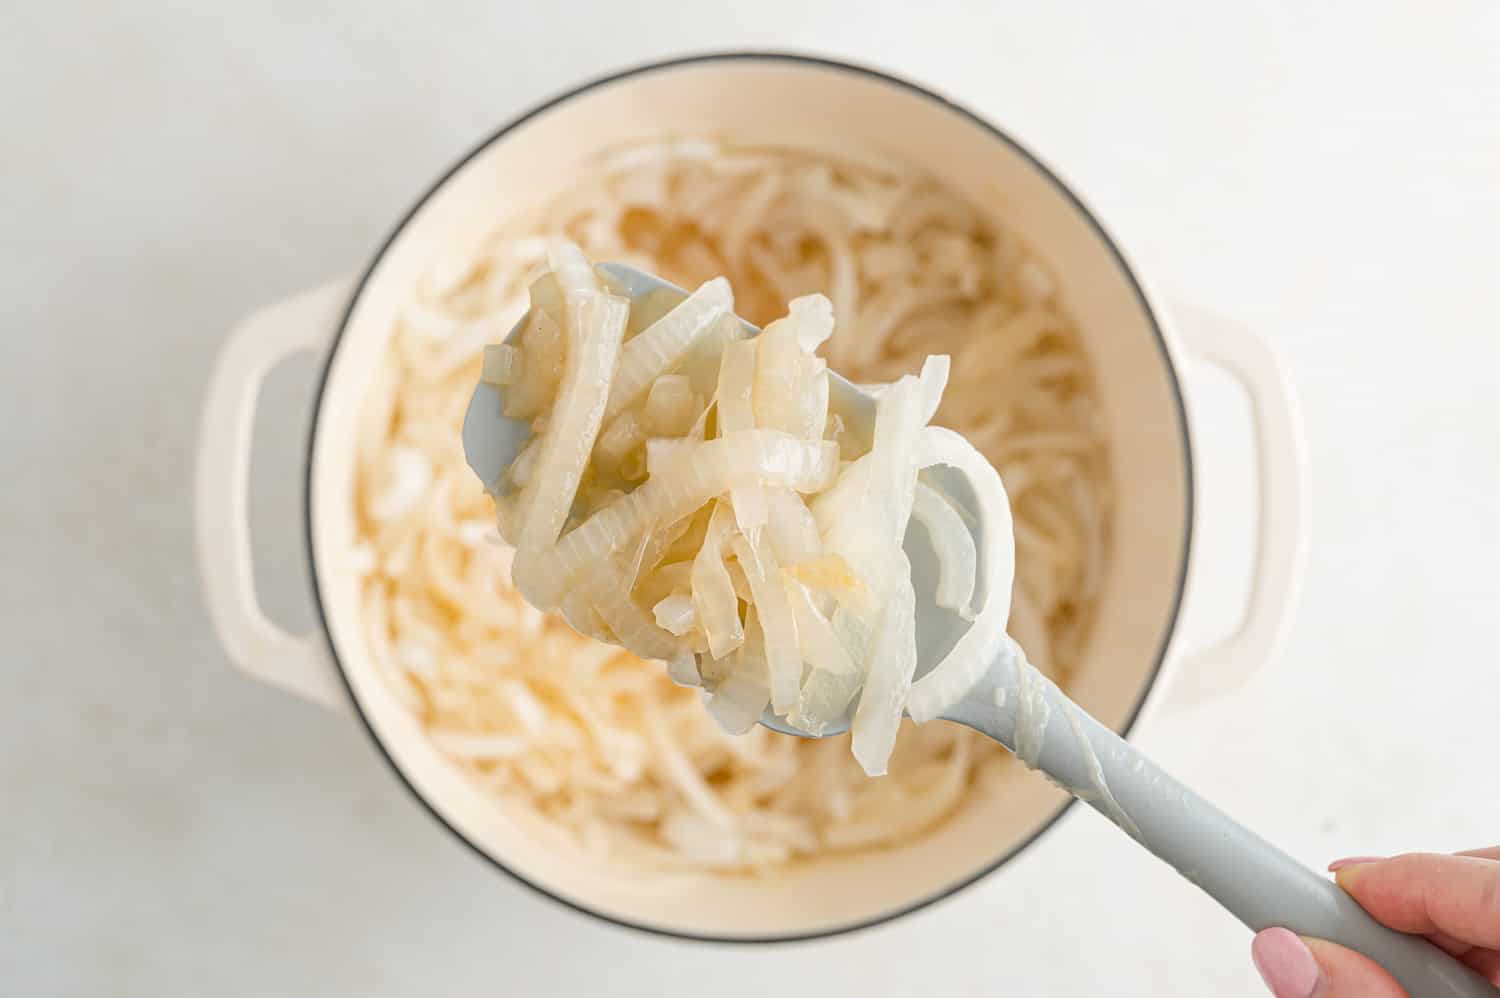
Heat the pan. Once you have those onions sliced, heat up a large heavy pan over medium heat. Add the olive oil and butter; heat until the butter melts.
Cook the onions. Add the onions and the salt. Hopefully you have a large enough pan for all of them to fit into! The onions will cook down so don’t worry if the pan is very full to start with. Give it time and you’ll see.
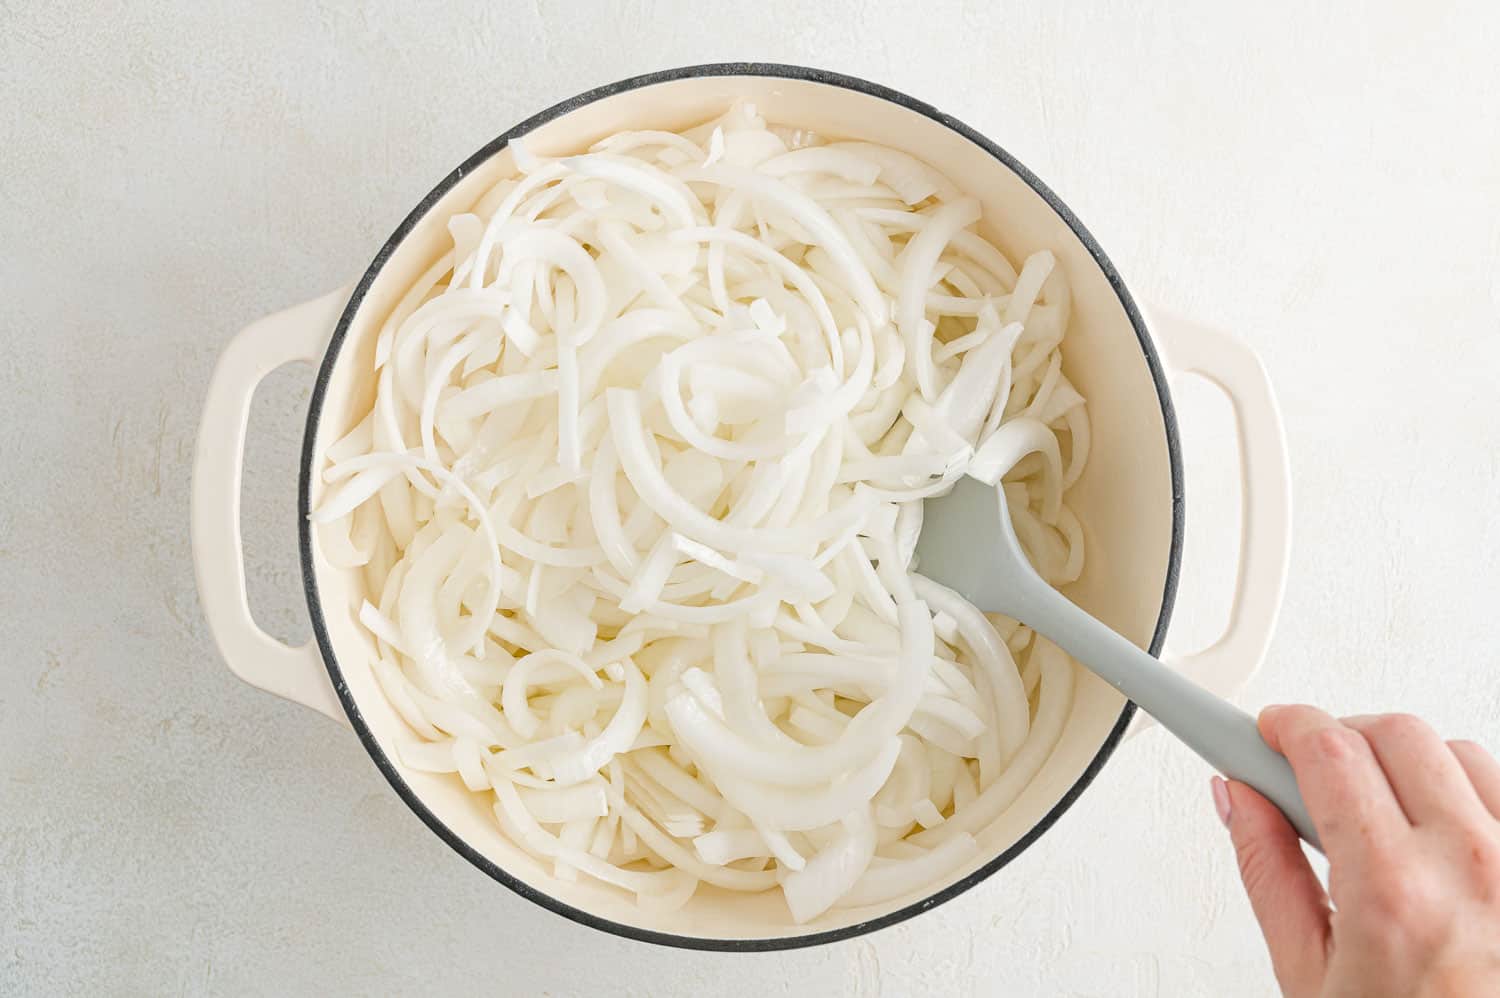
Stir the onions well with a long handled spoon so they get coated with the oil mixture. Cover the pan and cook for ten minutes.
Uncover the pan and turn the heat down to medium low. Cook the onions for at least an hour. It may take even more time, depending on how you like them.
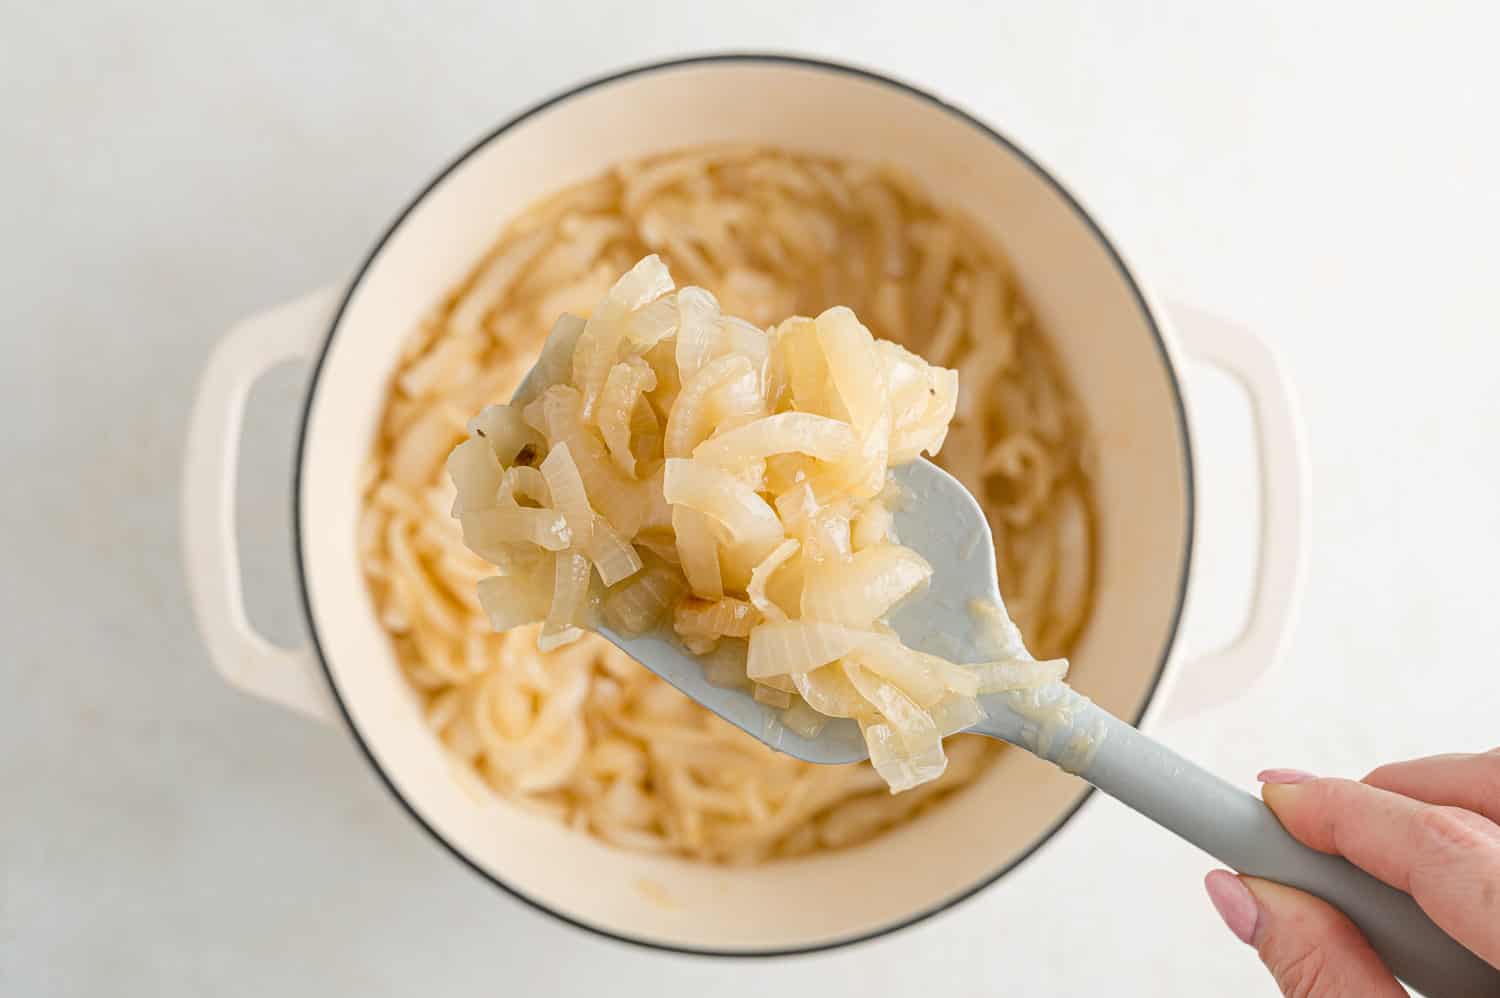
Stir them occasionally, more frequently toward the end of the cooking time. Make sure they aren’t sticking to the bottom. If they are, lower the heat. You don’t want them to dry out. If absolutely necessary, add a tablespoon of water.
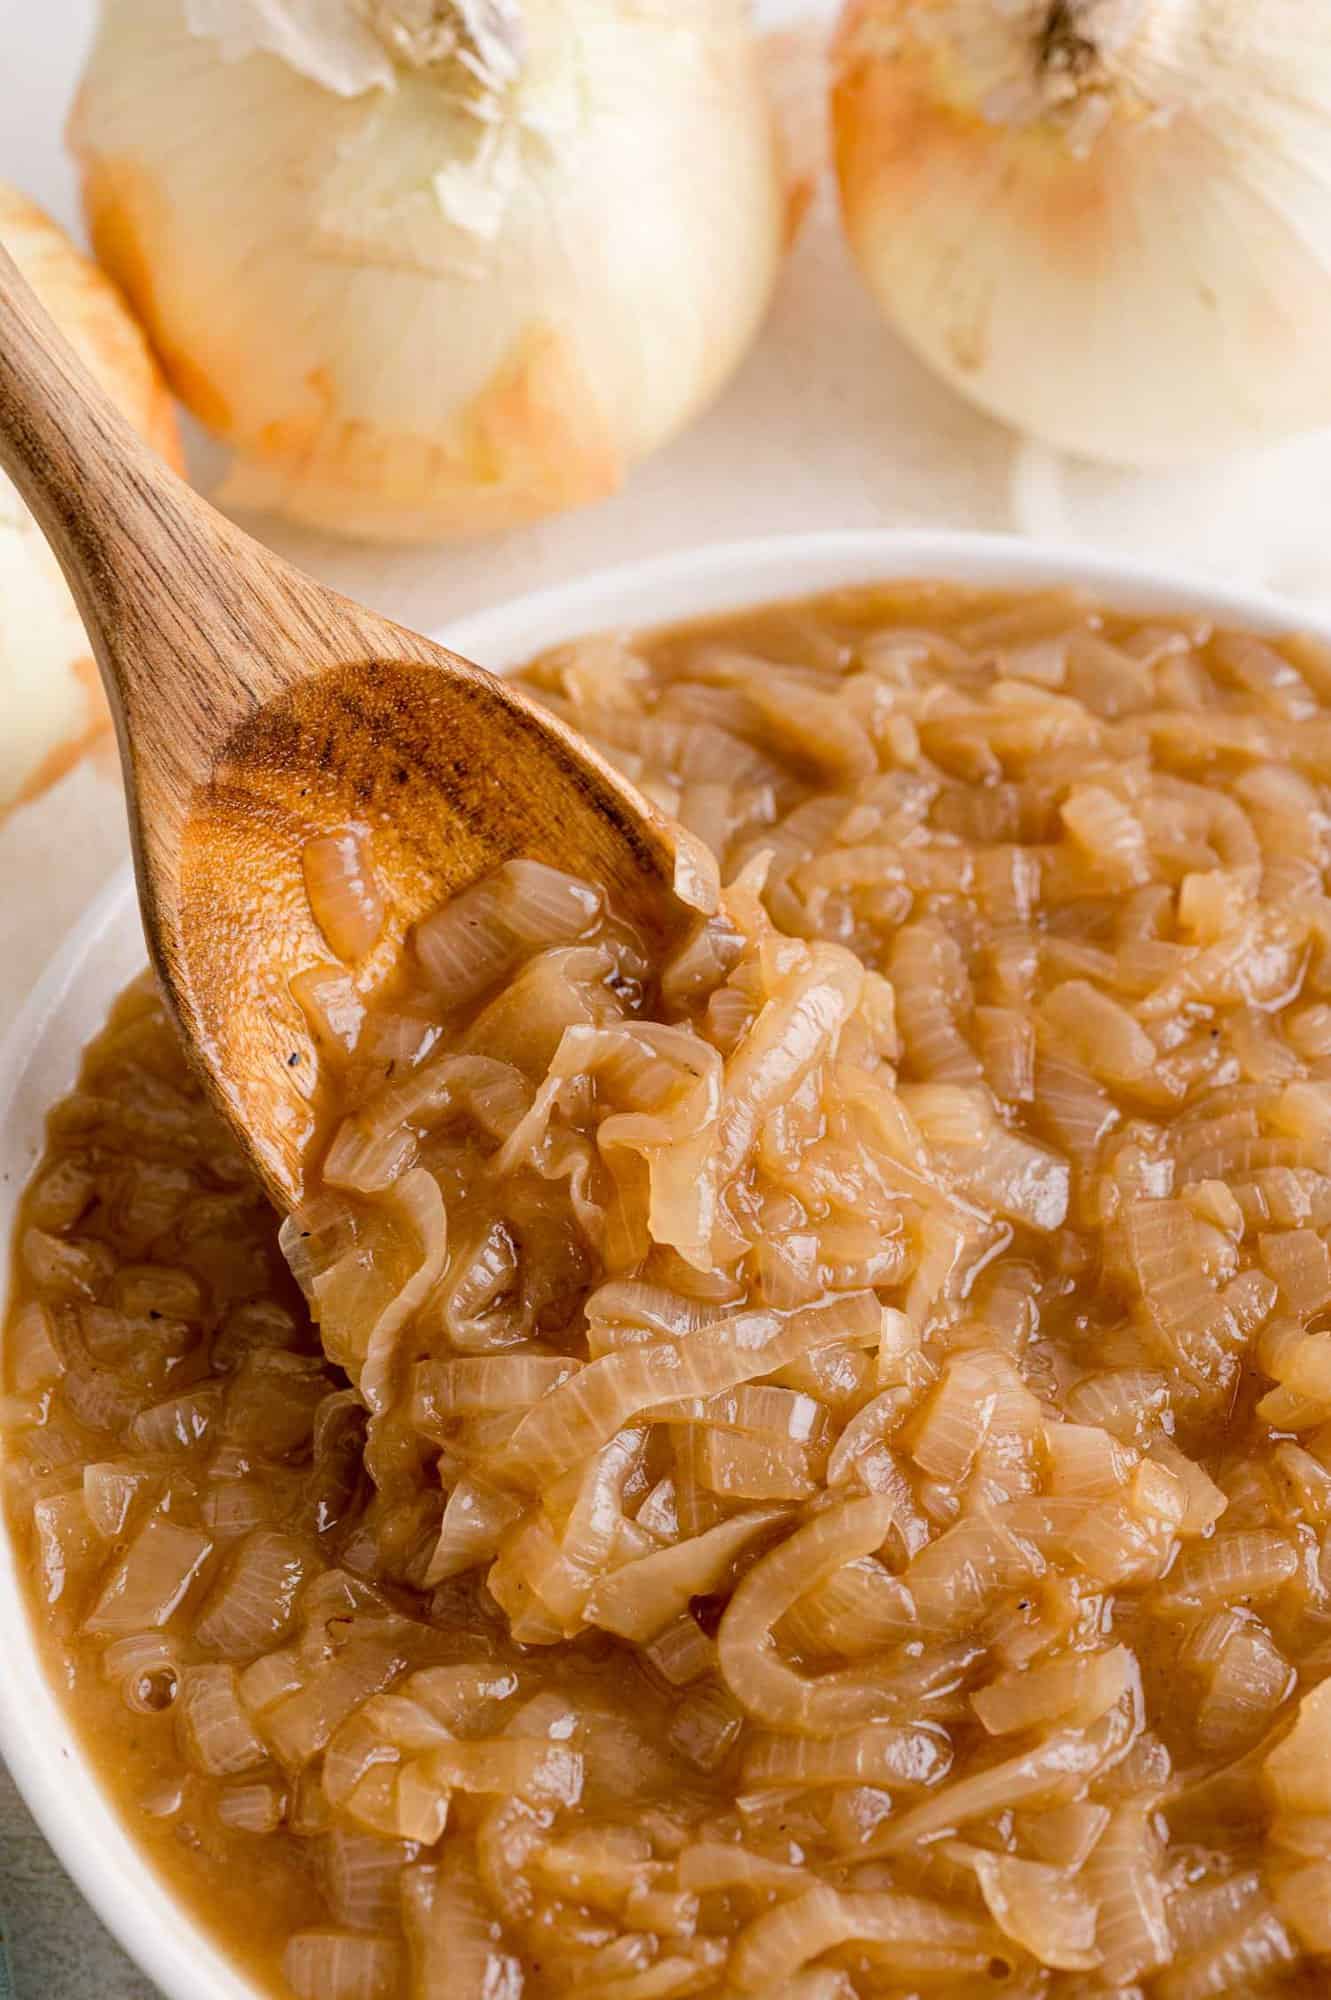
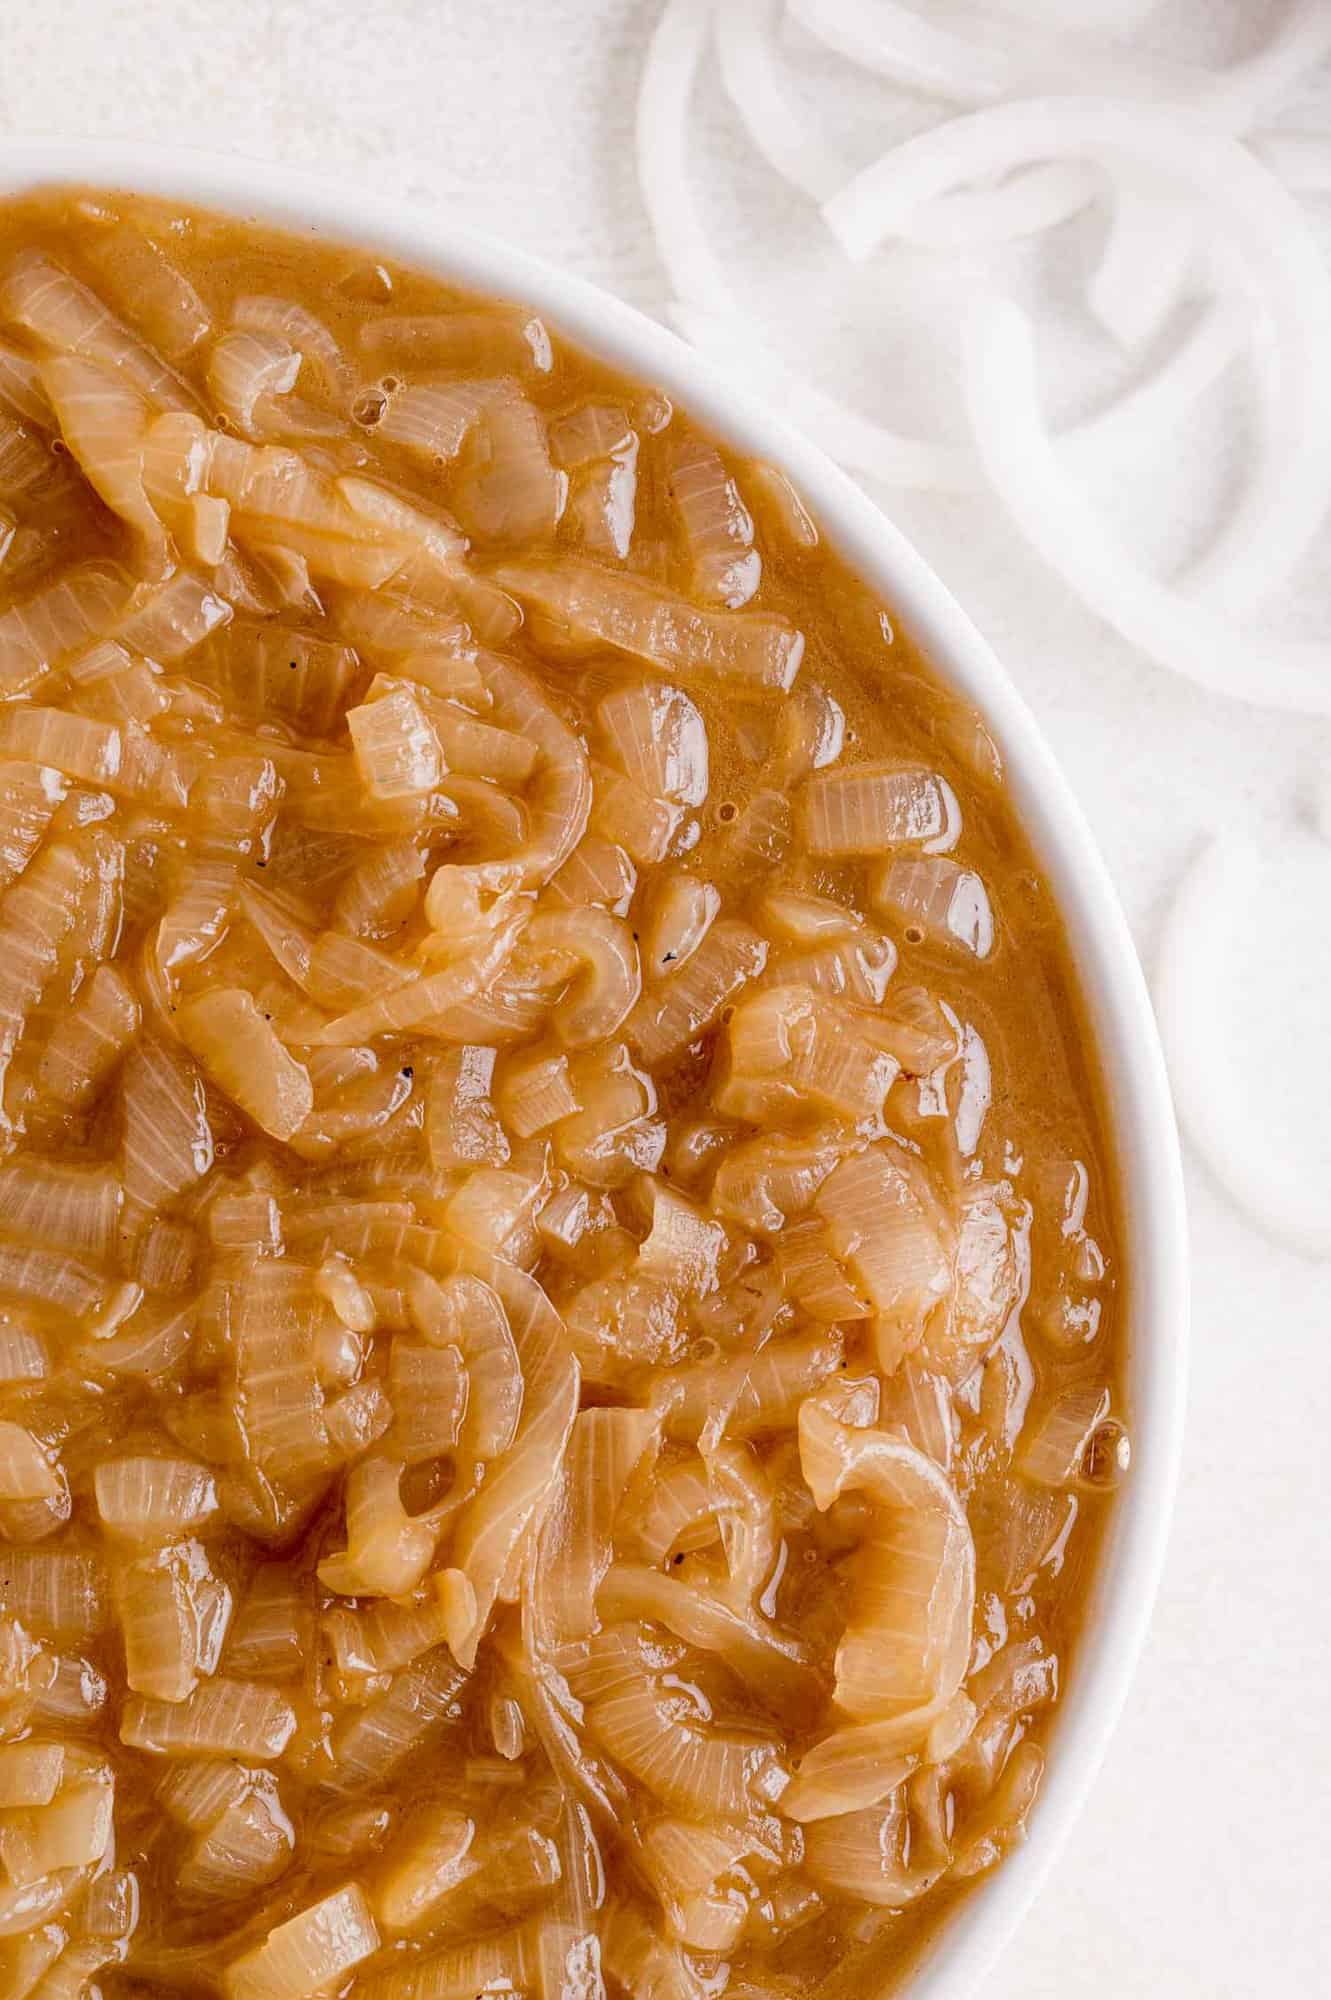
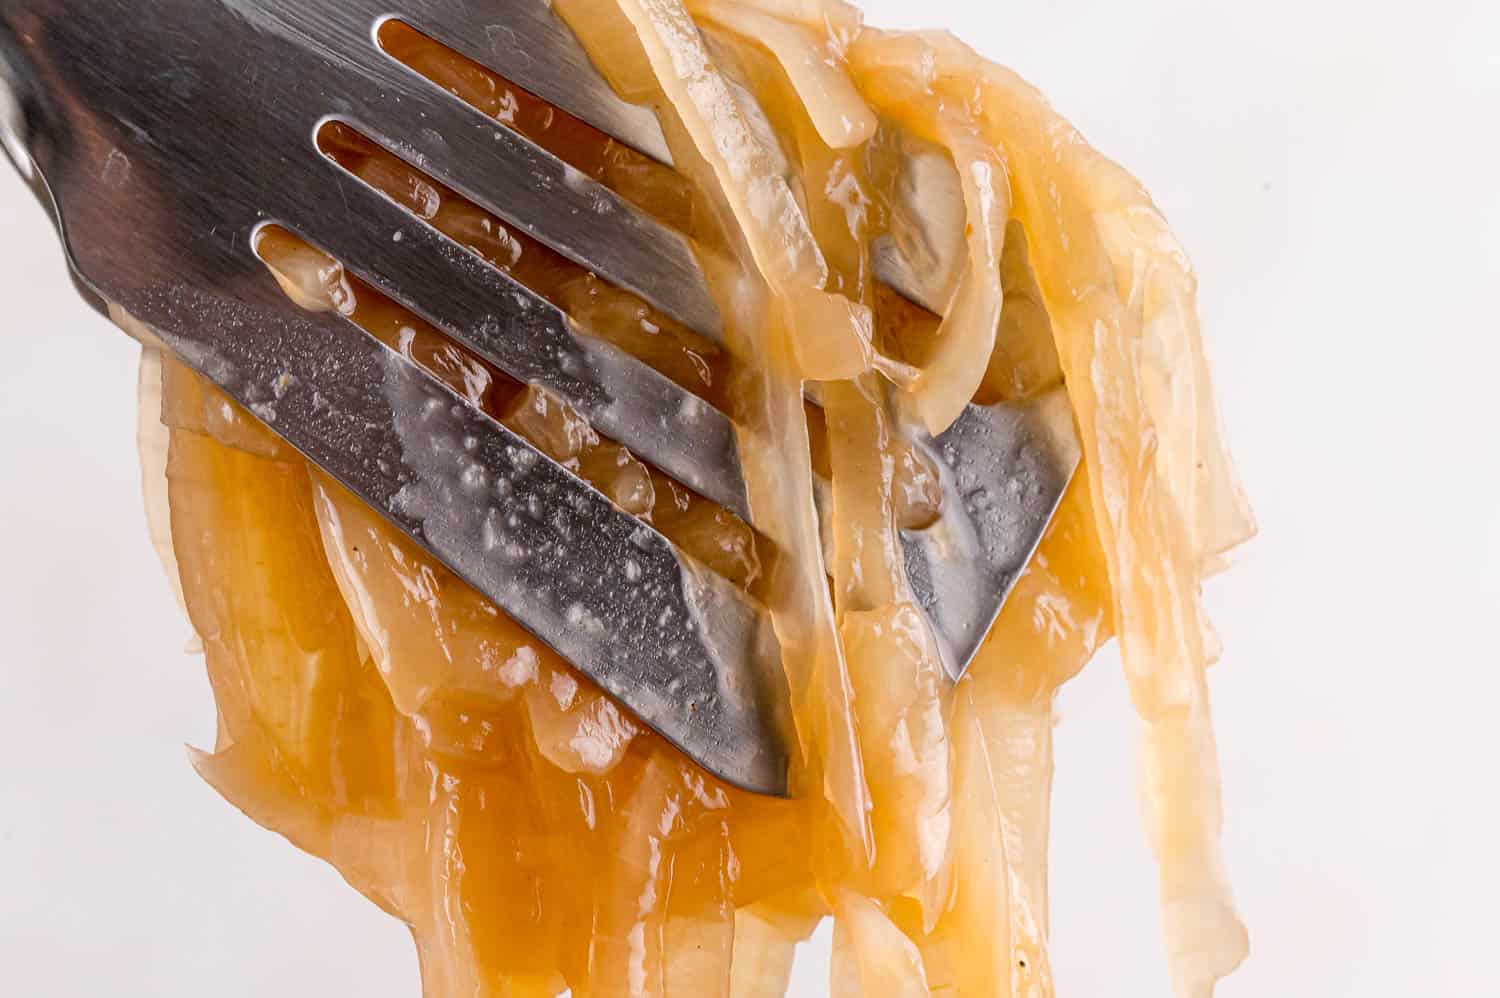
By the end of the cooking time, the onions should look soft and deep golden brown. The longer they cook, the softer and darker they’ll get. Look for a jam-like consistency.
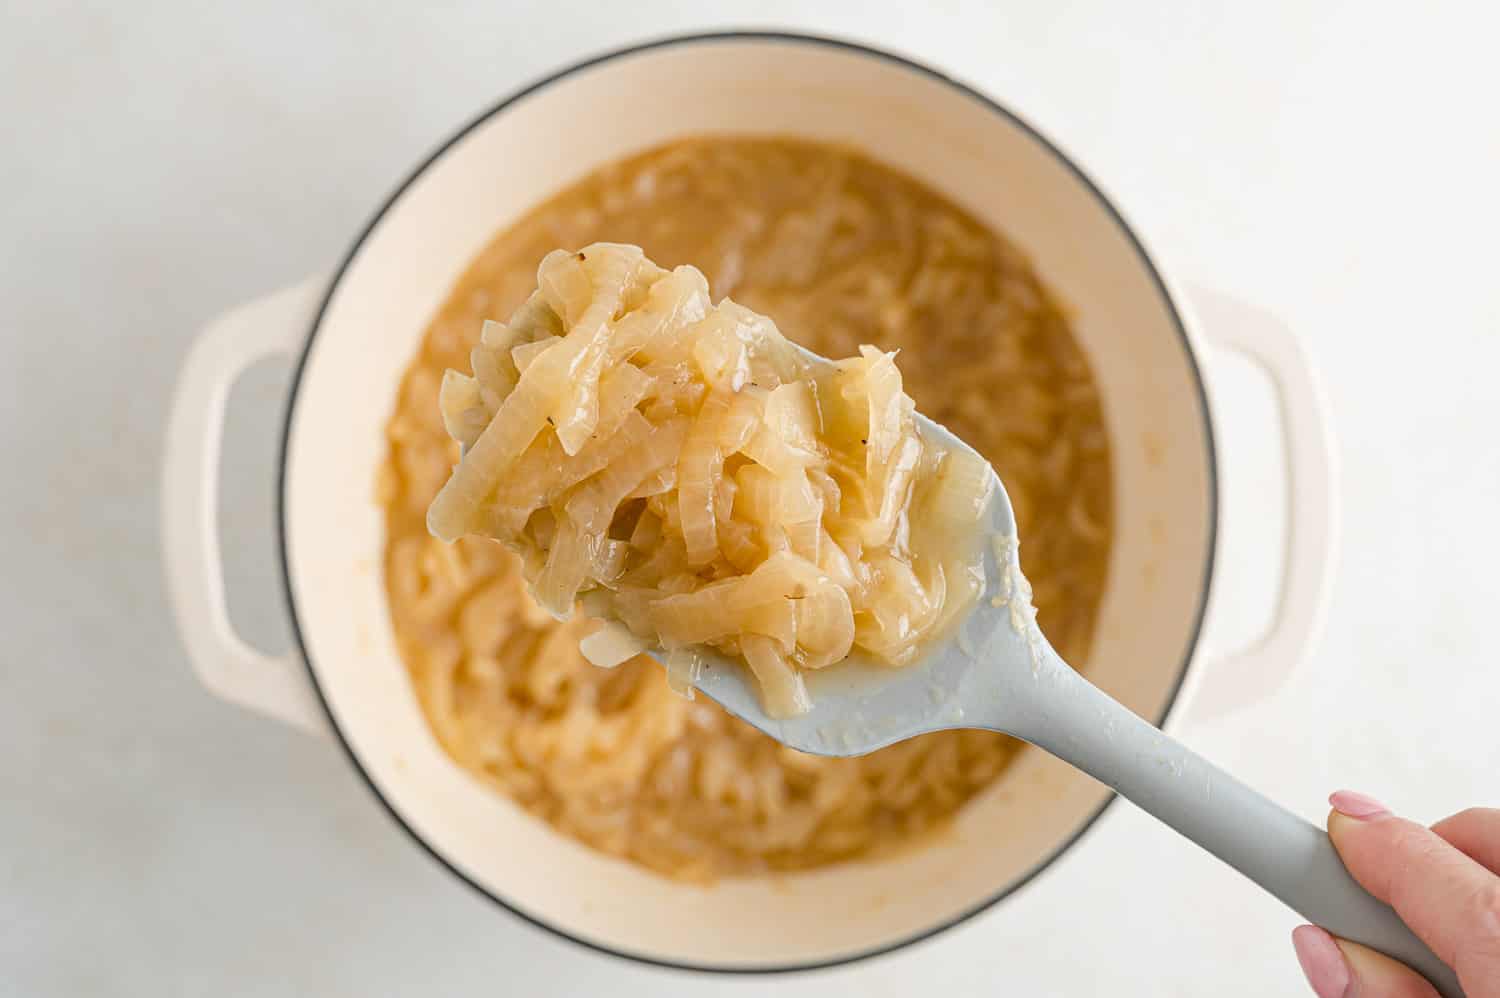
If you like, add a tablespoon of balsamic vinegar near the end of the cooking time. Enhancing the onions with balsamic vinegar adds extra flavor and color to the caramelized onions. It’s up to you.
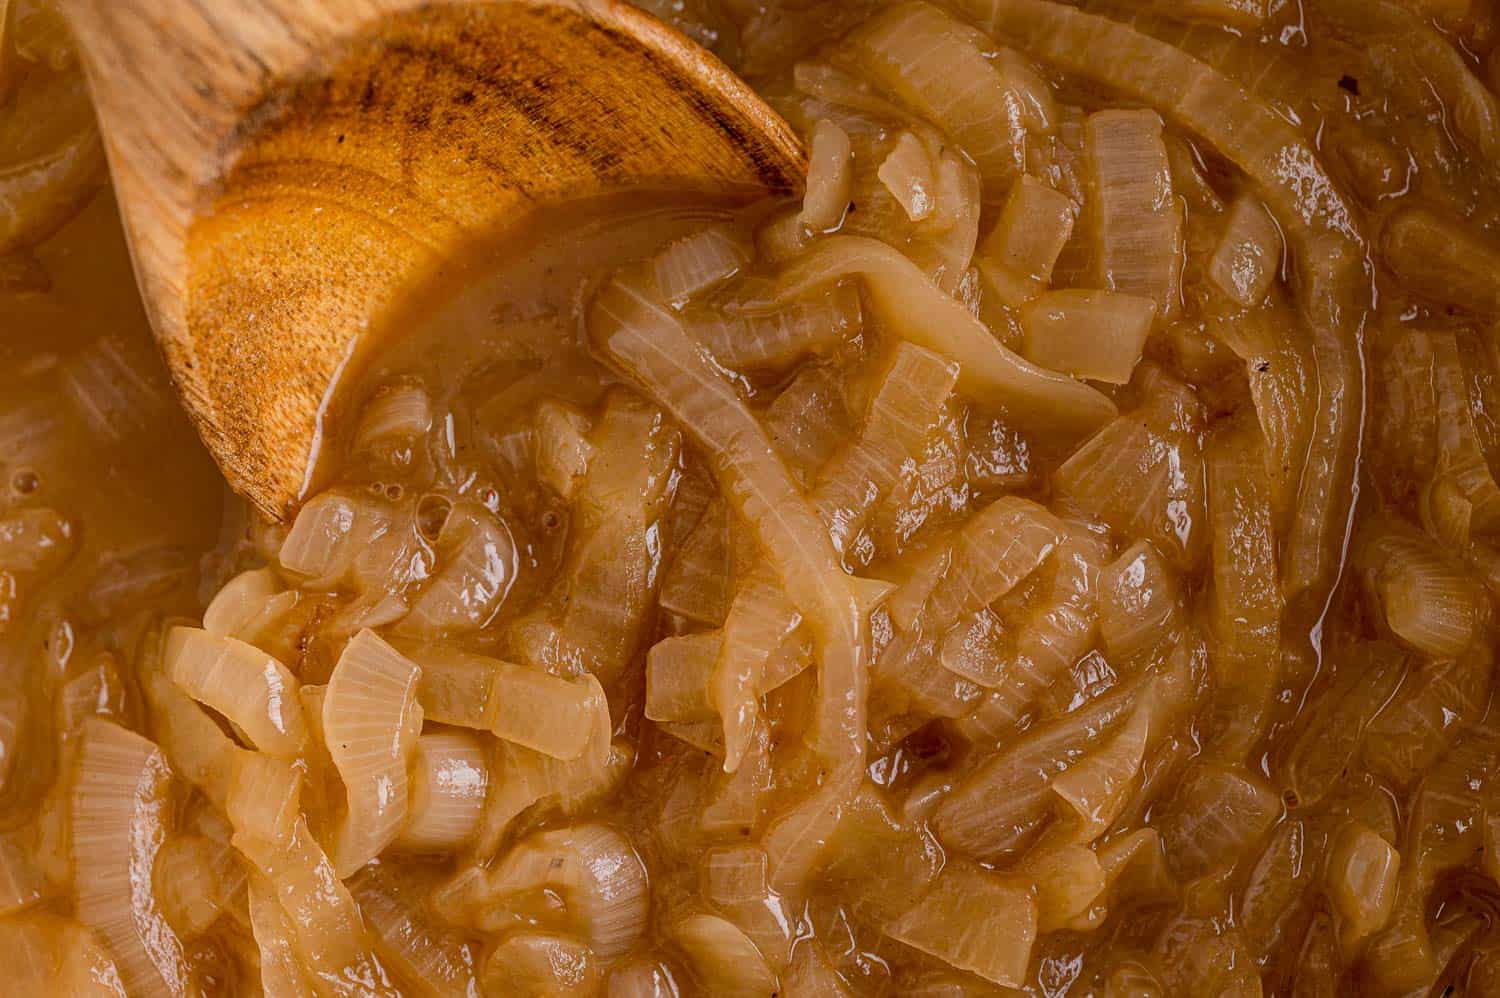
Remove the caramelized onions from the heat and transfer to a heat safe bowl to cool. When they are cool enough, be sure to sample them. You’ve waited so long!
Aren’t they wonderful? Get out a cracker or crostini, spread a little goat cheese on it, and top it with a dollop of your amazing caramelized onions. Close your eyes and savor the moment!
Caramelized onions can be made without sugar. Raw onions contain a lot of natural sugar. When they are cooked slowly and for a long time, two things happen. The sugars transform into a different type of sugar that tastes sweeter. In addition, much of the water content in onions is cooked away, leaving more concentrated sweetness. That’s why you start with a pan full of onions and end up with just two cups of caramelized onions.
Some onion varieties are naturally sweeter (Vidalia, Walla Walla, Maui). Caramelized onions made with those varieties will naturally taste sweeter.
Either oil or butter can be used to caramelize onions, or a combination. I like to use both. Oil has a higher smoke point than butter so you don’t have to worry about burning. Butter has great rich flavor.
If you prefer a non-dairy or vegan alternative, omit the butter and just use oil.
Recipe Variations
- Vegan/Non-dairy: Omit the butter and increase the olive oil to 4 tablespoons.
- Add onions and peppers: If you love to top fajitas, Italian sausages, or burgers with sautéed onion and bell pepper strips, the process is somewhat similar although the onions won’t be caramelized. Slice one large onion and a couple of bell peppers (any color). Sauté them in a large skillet over medium high heat with a tablespoon of oil for five minutes, allowing them to brown a bit. Cover the pan, and lower the heat to medium low. Cook the peppers and onions for 10 to 15 minutes, depending on how soft you like them.
Because caramelized onions keep well, they are perfect for food prepping.
Refrigerate: You’ll be glad to know that caramelized onions store well, both in the fridge and the freezer. Cool the onions to room temperature, put them in a covered container, and refrigerate. They’ll keep for four to five days.
Freeze: Caramelized onions also can be frozen for up to 4 months. There are a couple of ways you can do it. Put the onions into an ice cube tray. Freeze until hard, then pop the cubes out and put them into a freezer safe container or bag. Take a cube out when you need it for burgers or for steak. Add it to soups or stews as is, or thaw to use as a spread or topping.
You can also put the onions directly into a freezer safe bag. Remove excess air from the bag, seal and flatten the bag. When you want to use some, just break off what you need. It will thaw quickly.
How To Use Caramelized Onions
- Top beef or turkey burgers with melty cheese, caramelized onions, and a spicy chipotle mayonnaise. So good! Try air fryer burgers.
- Pile a steak or grilled chicken with the onions. Bonus points if you add sautéed mushrooms! Marinate the chicken first with balsamic marinade. Be sure to try my pork chops with balsamic caramelized onions.
- Add a dollop of onions to homemade hummus or French onion dip.
- Dress up a charcuterie board with a small dish of caramelized onions. You won’t believe how good they are with crackers and cheese.
- Make your own crostini spread with soft goat cheese, a smear of caramelized onions, and a sprig of thyme.
- Caramelized onions are the main ingredient in French onion soup. Once you’ve mastered the onions, you’re not far away from enjoying a bowlful of this favorite soup.
- Spread them on your sandwiches. They are especially good on grilled cheese sandwiches. Put a layer into these ham and cheese sliders.
- Add them to bowls, flatbreads, or pizzas.
- Like savory toppings on ice cream? Try caramelized onions and bits of salty bacon on vanilla bean ice cream.
More Onion Recipes


How To Caramelize Onions

Ingredients
- 6 large yellow or sweet onions, 12 to 14 ounces each (about 5 pounds total)
- 2 tablespoons olive oil
- 2 tablespoons unsalted butter (see note)
- ½ teaspoon kosher salt
- 1 tablespoon balsamic vinegar, optional
Instructions
- Remove papery outer skin of onions. Cut each onion in half vertically, top to bottom, then slice into ¼ -inch thick half moons. Discard root and stem end.6 large yellow or sweet onions, 12 to 14 ounces each
- In a large covered pan, heat oil and butter over medium heat until butter melts. Add onions and salt, and toss to coat with oil mixture.2 tablespoons olive oil, 2 tablespoons unsalted butter, ½ teaspoon kosher salt
- Cover and cook for 10 minutes.
- Uncover, reduce heat to medium low, and continue to cook, stirring occasionally (you’ll need to stir more often towards the end), until onions are cooked down and a deep golden brown, about 60 to 90 minutes. If needed, adjust heat to low. You want them to cook slowly without drying out! If absolutely necessary, add a splash of water to the pan.
- If desired, add balsamic vinegar in the last five minutes of cooking time to add depth to the flavor.1 tablespoon balsamic vinegar, optional
Notes
- Yield: Makes about 2 cups.
- Vegan/Non-dairy: Omit butter and use an additional 2 tablespoons olive oil.
- Storage: Caramelized onions keep well. Refrigerate in a covered container for 4 to 5 days. Freeze in a freezer-safe container or bag for up to 4 months.
- French Onion Soup: If desired, the onions can be used to make French onion soup.
Video
Nutrition
Nutrition information is automatically calculated, so should only be used as an approximation.