


Recipe Overview
Why you’ll love it: Easiest ever baked macaroni and cheese! This is a go-to recipe for many of my readers and it will become the same for your family!
How long it takes: 1 hour, 15 minutes
Equipment you’ll need: large casserole dish or 9 x 13-inch baking dish
Servings: 6

This is the easiest ever macaroni and cheese! And so delicious! Baked mac and cheese is a total crowd pleaser. This is a great recipe for busy weeknight meals but also for entertaining.
Enjoy one of our family’s favorite meals! I grew up eating this macaroni and cheese and it was always a special day when my mom prepared it. Now I love serving it to my family and I especially love how easy it is to prepare. I’m sure you will too!
easy baked macaroni and cheese
Classic mac & cheese. This baked macaroni and cheese is made like Grandma used to make it, the old-fashioned, baked-in-a-casserole-dish style. (If you’re looking for a creamy, non-baked recipe, you’ll probably love stovetop mac and cheese, crockpot mac and cheese, or Instant Pot macaroni and cheese.)
Crispy top. I just love this baked macaroni and cheese. It’s a little bit chewier, with lots of great cheddar cheese flavor, and I especially love the way the top crisps up in the oven. This type of macaroni and cheese can be cut into squares to serve.
So easy! You just boil pasta, mix with grated cheese, a couple tablespoons of flour, and seasonings, put it in a casserole dish, and pour the milk over it. That’s it! There’s no messing with white sauces or tricky steps.
Can be prepped ahead. You can get this macaroni and cheese ready to bake ahead of time, and refrigerate it overnight. It’s ready to bake when you want it. It’s perfect for potlucks!
“This is hands down my favorite mac and cheese recipe of all times…it always comes out delicious and my husband loves it.”

Ingredient Notes
This macaroni and cheese casserole has very simple ingredients and lots of room to adapt the recipe to make it your own.
- Elbow macaroni: Other shapes will work, as will whole wheat pasta. I haven’t tested this with a gluten-free pasta, but it would probably work although the texture would be slightly different.
- Shredded cheddar cheese: We like extra sharp cheddar but you can use what you like best. You’ll need 16 ounces of cheese, or about 4 cups.
- Flour: A couple tablespoons of all-purpose flour helps the mac and cheese thicken up.
- Milk: I’ve used whole milk, 2%, and nonfat milk. They’ll all work but I recommend whole milk for the best mac & cheese.
- Salt, black pepper, ground mustard: Simple pantry seasonings that are almost optional. You won’t need a lot of salt since the cheese is quite salty. Add black pepper if you like it. The ground mustard adds depth to the flavor but again, if you don’t have it, it can be skipped or you can even add a dash of Dijon mustard.
- Butter: A few dabs of butter on top of the casserole gives you that golden brown top on the macaroni and cheese!
How to make baked macaroni and cheese
This recipe is the best because it’s SO easy to make. There’s no fussing with a roux or a cheese sauce.
Here are the simple steps:
- Preheat your oven and spray a large baking dish with nonstick cooking spray (or rub with butter) for easy clean up.
- Cook pasta as directed on the package for al dente texture (don’t forget to salt your water!).
- While the macaroni cooks, combine 2 ½ cups of shredded cheese with the flour, ground mustard, and pepper.
- When the pasta is cooked and drained, mix it with the cheese mixture.
- Transfer it to your casserole dish, and pour the milk over the macaroni mixture. Top with remaining cheese and dot with butter. Cover with foil.
- Bake for 45 minutes, taking foil off after 30 minutes if desired for a crispier top.
- Most of the milk should be soaked up by the time it is done cooking, but I find it’s best to let the mac and cheese casserole sit for about 10 minutes before serving.

Recipe Tips
Choose the right kind of cheese. For this recipe, sharp cheddar is best. I actually use extra sharp cheddar because it provides this macaroni and cheese with the maximum amount of flavor.
Shred your own cheese. Pre-shredded cheese contains additives to prevent clumping in the bag but that also means the cheese shreds don’t melt as well. However, if all you have is pre-shredded cheese, don’t worry, your mac and cheese will still be tasty. It might be a little drier though.
Cover with foil. I recommend covering the casserole with foil for at least the first 30 minutes, or even the entire time. If you like a crispy, chewy top, then uncover it sooner.
Add a topping if you like. Instead of, or maybe in addition to, the layer of melted cheese on top, you can add a crispy breadcrumb topping. Mix 1 cup of panko bread crumbs or crushed crackers with 2 tablespoons of melted butter. You could also add a couple tablespoons of grated Parmesan cheese. Sprinkle the buttered bread crumbs over the top of the casserole before baking.

The mac and cheese casserole can be prepped a day ahead (up to baking). Cover it with foil and refrigerate it. Bake according to the instructions. You might need to add a few extra minutes to the baking time since the casserole is chilled.
Refrigerate/Freeze: If you have leftover mac and cheese, cover it and refrigerate it for 3 to 4 days. You can also freeze it in a freezer-safe container for up to 4 months. Thaw before reheating.
Reheat: Microwave the mac and cheese at medium heat. Watch out, it heats up quickly!
More Mac and Cheese Recipes


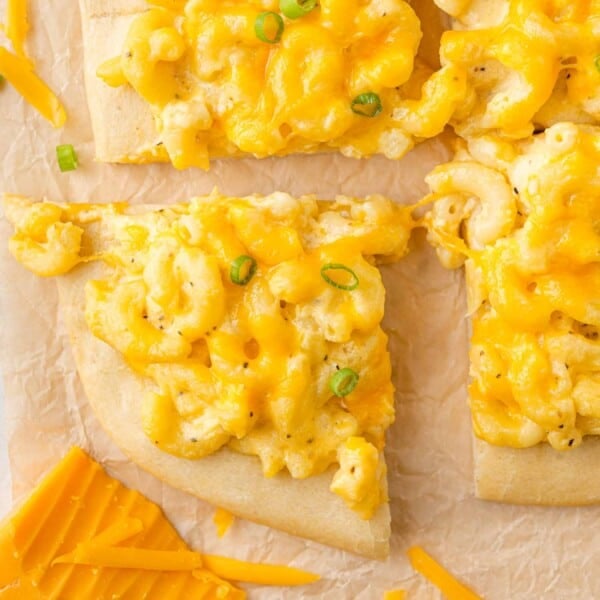


Easiest Ever Baked Macaroni and Cheese Recipe

Ingredients
- 1 box (16 ounces) elbow macaroni (4 cups)
- 16 ounces sharp or extra-sharp cheddar cheese, shredded (4 cups)
- 2 tablespoons all-purpose flour
- ¼ teaspoon salt
- ¼ teaspoon ground black pepper
- ¼ teaspoon ground mustard
- 2 cups low-fat milk (whole milk or 2% milk are fine, too)
- 1 ½ tablespoons butter, cut into small pieces
Instructions
- Preheat oven to 375°F with rack in the center. Spray or grease a large casserole dish or a 9 x 13-inch baking dish.
- Cook macaroni in salted water, as directed on the package, until tender; drain.1 box (16 ounces) elbow macaroni
- While macaroni is cooking, combine 2 ½ cups shredded cheese with flour, salt, pepper, and ground mustard.2 tablespoons all-purpose flour, ¼ teaspoon salt, ¼ teaspoon ground black pepper, ¼ teaspoon ground mustard
- In a large bowl, mix cheese mixture into the hot macaroni. Pour into the prepared baking dish. Pour milk over macaroni. Top with remaining 1 ½ cups cheese. Dot with butter. Cover tightly with foil.2 cups low-fat milk, 1 ½ tablespoons butter, cut into small pieces
- Bake for 45 minutes (taking the foil off after 30 minutes if desired) or until firm and golden brown. You want to make sure there isn’t a lot of runny milk in it; poke a knife in the center to check. Some of the milk will soak in as it cools but it should be mostly absorbed.
- Let sit for 10 minutes before serving to allow the casserole to firm up.
Notes
- Cheese: Use sharp or extra-sharp cheddar for best flavor.
- Variations: Whole wheat elbow macaroni can be substituted. If desired, add 3 tablespoons minced onion.
- Bread crumb topping: If you want to add a crispy topping, mix 1 cup panko bread crumbs or crushed crackers with 2 tablespoons melted butter. You can add a couple of tablespoons grated Parmesan cheese, too. Add on top of the casserole before baking.
Video
Nutrition
Nutrition information is automatically calculated, so should only be used as an approximation.
 Did You Make This?Share a comment and rating below! I love hearing what you think!











This is my second time making this and everyone loves it.
I’m so glad to hear it! Thanks for taking the time to leave a comment!
Hi!! Planning on making this tonight. However, I only have vitamin D whole milk… should that be ok? Should I use same amount or more/less? Thank you!
That will work perfectly, you can use the same amount that is indicated in the recipe.
I halved the recipe. Should I bake it for the same time as normal?
It will likely cook a little faster, but it depends on what size baking dish you’re using (how deep it is). I would start with a decreased cooking time and increase it as needed until it’s not milky.
I’m pretty sure you deleted my question about how long to cook the noodles.
Definitely not! I respond to all comments and do not delete any unless they are incredibly rude and unhelpful. When did you leave a comment previously? Maybe you forgot to submit the comment? Regardless, cooking time for the pasta will depend on the brand you buy, so please cook to al dente as directed on the package. I hope that helps, Judy. Have a great day!
Cooking noodles el dente? Yum yum
Oh here it is :) Just hadn’t gotten to it yet, sorry about that….we’ve been catapulted into homeschooling, so things have been a bit slower around here! Yes al dente will be perfect since they’ll cook a little more as they bake. Enjoy!
Worked very well although I did double it and that came out to more than I expected it too … I would guess that if following the standard recipe you could easily feed a family of 5 with leftovers. I thought the way it was put together (not cooking the flour into a roux first and adding the cheese sauce to noodles) was odd but it’s worked quite well. All bake times and measurements appear correct but I did double the butter because as a southern girl we follow the “mo butter, mo better” rule when it comes to Mac and cheese.
Yes, it’s a pretty big recipe! I’m so glad you liked it! And I agree, more butter is never a bad idea. ;)
Mine is in the oven now. It looks and smells amazing. Can’t wait to dig in.
I hope you loved it!
Great dish; anyway it can be frozen?
Definitely!
This was indeed an easy, no-nonsense recipe that included very little hands-on time. Didn’t make any modifications other than sprinkle some panko on top and next time I’ll go a little heavier on the spices, but it was a crowd and palate pleaser :)
I’m so glad you liked it! Panko on top sounds delicious! Thanks for taking the time to come back and leave a comment!
Looks amazing!! I’m making this for Christmas! Should I use salted or unsalted butter?
I like to use unsalted butter because cheese has a lot of salt in it, but either will work. I hope you love it! Merry Christmas!